What Makes an Air Brake Part Durable?
What actually makes a heavy-duty truck air brake part durable? Material, heat treatment, coatings, tolerances and wear patterns explained from the shop floor.
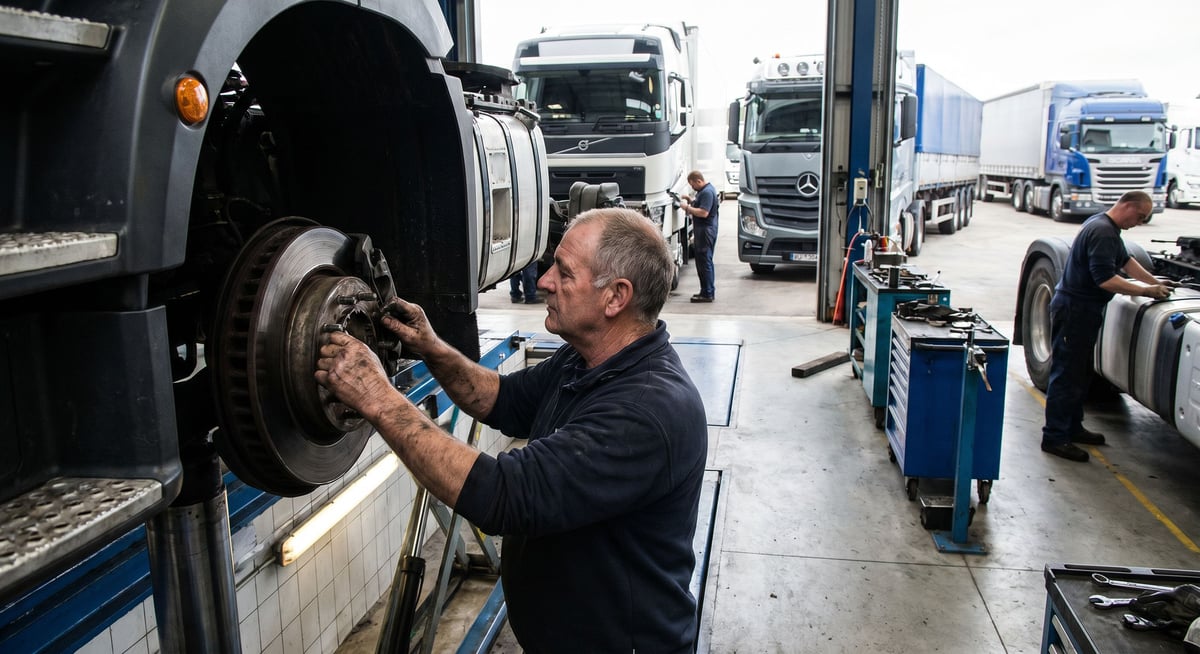
Two air brake parts can sit on the same shelf in a workshop and look identical: same fitting size, same body shape, same coat of paint. One of them runs through three winters without a single callback. The other starts weeping from the housing the first time road salt gets on it, and by the second year it is leaking outright. The difference almost never shows up in the shape you can see. It lives underneath that shape, in the casting, the heat treatment, the coating, the sealing compound and the discipline of the line that made it.
This article answers one question only: what physically makes an air brake part durable, and how do you read that on the shop floor? On a heavy-duty truck, tractor or trailer, the word "quality" by itself tells you nothing. What tells you something is which stress the part was engineered against, with which solution, and what marks it carries once it comes off the vehicle.
What do heavy-duty service conditions actually demand from a brake part?
Before durability can be discussed at all, the load the part sits under has to be described honestly. The air brake circuit on a truck, tractor or bus is not the same scale of system as the one on a passenger car. The circuit is under pressure for most of the working day, the compressor tops it back up at intervals, valves open and close on every deceleration, and chambers stroke at every stop. A city delivery truck can rack up several times the daily cycle count of a long-haul tractor; the long-haul unit, in exchange, spends far more hours under sustained thermal load and continuous vibration.
Environment stacks on top of that cycle count. Road salt applied in winter reaches every metal surface under the chassis; heat and road dust do the equivalent job in summer. A trailer coupling adds its own twist: the lines and brackets that cross the fifth wheel or drawbar move every time the chassis flexes.
Then there is the time dimension. Heavy commercial vehicles stay in service for well over a decade, and by the time they reach a second or third owner they are often working in harsher conditions than they started in. That means "runs fine when freshly installed" is not a useful bar for durability. The bar is whether the part still does its job after several hundred thousand kilometers of duty. The table below lines up the load types a heavy-duty circuit sees against where each one actually lands on a part.
| Load type | Where it stresses the part | First symptom in the field |
|---|---|---|
| Repeated pressure cycling | Diaphragm fold zone, piston seal, valve seat | Slow pressure bleed-down when parked, frequent compressor cycling |
| Thermal cycling (cold start, hot descent) | Joints between dissimilar materials, gasket faces | A leak audible cold that disappears once warm |
| Road salt, moisture and wash chemicals | Thin-plated edges, fastener threads, aluminum-to-steel contact points | White or brown corrosion ring, a fastener that will not come loose |
| Vibration and chassis flex | Bracket feet, fitting bases, abrupt section changes | Hairline crack, a loosened connection, a bright fretting mark |
| Dirty, moist or oil-carrying air | Elastomer seals, valve seats, the silencer | A sticking valve, delayed exhaust, a black oily residue |
That table is also a working definition of durability: a durable part resists all of these stresses at once, for a long time, not just one of them. A thick-walled cast housing can shrug off vibration all day, but if the coating is weak, salt will still finish it off. A beautifully plated part can still leak on the first cold morning if the seal material was the wrong family for the job.
Material and heat treatment: why two identical-looking parts don't last the same
Air brake housings are usually made from cast iron, cast aluminum alloy or machined steel, and the same material name does not mean the same material. In casting, the cleanliness of the molten metal, the speed at which it fills the mold and the cooling regime decide whether the interior ends up porous or dense. A porous casting can look flawless from the outside, but once machining opens a surface into that structure, tiny voids are exposed and pressurized air eventually finds its way through — a leak from the middle of the housing that a gasket change never fixes.
In cast iron, the shape of the graphite decides a lot. Flake graphite in gray iron acts like small internal notches: good damping, limited impact and tensile strength. Spheroidal graphite in ductile iron sits in round nodules and is noticeably tougher. Two different iron grades can share the same geometry and both be labeled "cast"; one cracks on a stone strike, the other dents and stays in one piece.
In steel parts, the conversation shifts to heat treatment. Pins, shafts, spring seats and camshafts all need something contradictory at once: a surface hard enough to resist wear, a core tough enough to absorb impact. Surface hardening, carburizing, nitriding and induction hardening are the usual routes there. Too shallow a case and the surface wears through quickly; too deep and brittle, and the part cracks on its first hard knock. Case depth is not something you can eyeball, but a bearing surface that scores out within a season, or a pin that snaps clean, usually points to a shortfall on the heat-treatment side.
Aluminum housings bring thread strength to the front of the conversation. A thread cut into aluminum has to survive being removed and reinstalled with a steel bolt, repeatedly, over the life of the vehicle. If the thread-root geometry or the local hardness is not up to that job, the thread strips on the second or third removal, and an otherwise sound housing gets scrapped over a single stripped hole.
Surface coating and corrosion: salt, moisture and road chemicals
On a heavy commercial vehicle, corrosion is not a cosmetic complaint, it is a functional failure mode. It hurts an air brake circuit three ways: rust product builds volume on moving surfaces and binds a piston or valve stem; corrosion on a gasket seating face breaks the seal and starts a leak; and corrosion on fasteners means the part cannot be removed cleanly at the next service, so a sound housing gets destroyed just getting it off.
The first line of defense is the coating itself: zinc and zinc-alloy platings topped with a passivation layer, with powder coating on some housings. What decides coating quality is not thickness alone but how evenly it is distributed. A plating bath reaches flat faces easily; sharp edges, thread roots and blind holes are where the layer thins out, which is exactly why corrosion always starts in the same handful of spots on a given design.
The second issue is the galvanic pair. When a steel fastener is torqued into an aluminum housing and salt water gets between them, the two metals form an electrochemical circuit, and the less noble metal becomes the sacrificial one. That is why a fastener's coating has to be selected together with the housing material, not as an afterthought. A white, powdery buildup around a removed fastener is the fingerprint of a galvanic reaction that has been running for a while.
The most common field habit that shortens coating life is running a pressure washer too close to the part: high-pressure water can lift the coating right off, force the lips of a protective boot open, and push water in behind it.
There is also corrosion that starts on the inside. Moisture entering the air system condenses inside pipe runs and reservoir low points, freezes in winter and keeps valves sluggish, and over a year forms rust on internal surfaces. Most of it traces back to the condition of a single component, covered in a dedicated article: Air Dryer Cartridge and Moisture Management: Selection, Service Life and Winter Conditions. With a tired dryer feeding the circuit, even the best-built valve wears out sooner than it should.
Standards and further reading
This subject is governed by the equipment rules for air-braked commercial vehicles. In the United States the federal air brake standard, FMVSS 121 (49 CFR 571.121) defines the reservoirs, protection and timing a compliant system must provide, and Europe applies the equivalent limits of UNECE Regulation No. 13. For further detail, see the illustrated reference guide at airbrakecompressor.com. Always confirm specific figures against the current regulation and the vehicle manufacturer service data.
Outside the United States the equivalent duties sit in national law. In the United Kingdom, regulation 18 of the Road Vehicles (Construction and Use) Regulations 1986 requires every part of the braking system to be maintained in good working order. In Canada, air brake systems fall under the Motor Vehicle Safety Regulations, which contain CMVSS 121.
Sealing materials: temperature range, swelling and hardening
The durability of an air brake part is often limited not by its housing but by the elastomer inside it. Gaskets, o-rings, diaphragms, seals and wipers come from rubber compound families, and each behaves differently under the same conditions.
Elastomers fail in three characteristic ways. The first is swelling: the material absorbs an oil or chemical it contacts, gains volume, and no longer fits its groove. The second is hardening: heat and time drive the elasticity out, so the material stays compressed in the shape it was squeezed into and can no longer spring back once pressure drops. The third is stiffening in the cold: below its glass transition temperature an elastomer behaves like a rigid plastic, leaks on the first movement of the day, then seals again once the vehicle warms — the pattern that confuses technicians most, and more often than not the signature of the wrong compound family, not a random fault.
| Material family | Where it performs well | Where it falls short | What it looks like in the field |
|---|---|---|---|
| Nitrile rubber (NBR) | Mineral oil and grease contact, good wear behavior, favorable cost | High heat, ozone, long-term air aging | Long-lived in oily service; cracks in a hot location |
| Ethylene propylene (EPDM) | Hot air, steam, ozone and weathering; flexible in the cold | Mineral oil and grease contact | Good in clean air; swells if compressor oil carries over |
| Fluorocarbon rubber (FKM) | High temperature and broad chemical resistance | Low-temperature flexibility, cost | Preferred in hot climates; compound choice critical in severe winters |
| Silicone rubber (VMQ) | Very wide temperature range, long-term flexibility | Mechanical strength, shape retention under pressure | Good in a static gasket; limited in a dynamic seal |
The families in that table describe general behavior only. Within the same family, compounding, filler content and hardness shift the usable temperature range and oil resistance considerably, so the family name on a label is not, by itself, a guarantee.
Diaphragms deserve a mention of their own: a brake chamber diaphragm rolls and folds on every application, so the material is loaded not just by pressure but by a continuous bending cycle, and the weave of the reinforcing fabric, how well the rubber bonds to it, and the wall thickness at the fold line all determine service life. Chamber types, sizes and failure symptoms are covered separately: Air Brake Chamber Explained: Types, Sizes, Failure Symptoms & Replacement.
Manufacturing tolerance and surface finish: why they determine service life
A part's drawing can be perfectly correct; the real question is how faithfully every unit produced from it matches that drawing. In air brake components, the dimensions that decide service life are often invisible to the naked eye: the diameter and roundness of a cylinder bore, the depth and corner radius of a seal groove, the flatness of a valve seat, the squareness of a bearing bore.
In a bore with a roundness error, a piston does not compress its seal evenly through the stroke; the elastomer is over-squeezed on one side and left with a gap on the other. The part may not leak when freshly installed, since the elastomer still has enough give to close the gap, but the over-compressed section reaches permanent set faster and the leak shows up months later — a large share of "it worked fine, then it didn't" complaints trace back to exactly this.
Surface finish cuts both ways in the same manner. A surface too rough saws through an elastomer like sandpaper; one polished to a mirror finish cannot hold an oil film, and in a dynamic seal it is the controlled micro-texture that actually carries lubrication. The target is not "the smoothest possible surface" but the finish the application needs — and you can read a shortfall from the marks on a removed elastomer: deep, one-directional scratches point to a metal surface that was too rough or carried a burr.
Burrs sit near the bottom of most checklists and near the top of most failure causes. A thin burr at the mouth of a groove slices an o-ring during assembly; the part does not fail immediately, pressure works its way out through the cut edge slowly, and the failure shows up weeks later. In a well-run production line, final flushing is treated with the same seriousness as machining itself.
Fatigue and vibration: where does a crack actually start?
Nothing on a heavy-duty vehicle sits still. Engine vibration, road shock, chassis flex and braking force keep every joint working continuously. None of those loads breaks a part on its own; failure comes from fatigue damage accumulated over millions of small cycles, and a crack starts where stress concentrates most, not necessarily where the material is weakest.
The classic addresses for stress concentration are abrupt section changes, sharp internal corners, thread roots, hole edges, the toe of a weld bead and marks left by a stamping tool. A hairline crack at the foot of a bracket usually starts at a sharp corner, and a crack advancing under paint tends to announce itself first as a line of cracked paint on the surface.
The second effect of vibration is joint loosening. A bolt that loosens sheds its preload, the working load transfers onto the bolt shank itself, and cracking accelerates from there. That is why durability is a property of the joint as much as the part: correct fastener grade, a clean seating face and the torque value the manufacturer specifies — guessing that value turns even the best part into a fatigue candidate.
The third mechanism is fretting wear: when two surfaces that should be clamped tight instead move against each other by a few microns, a reddish-brown powder forms at the contact zone, proof the joint has loosened. It shows up most often at the base of tube fittings and bracket mounting faces.
What do wear patterns actually tell you?
A part that comes off the vehicle is more honest than any fault code. Reading wear patterns is a learnable skill, and applied consistently across a fleet it stops the same failure from repeating. The table below pairs the marks technicians see most often with their likely root cause.
| Mark observed | Likely root cause | Where to check next |
|---|---|---|
| A bright band on one side, intact paint on the other | Off-axis operation, angled mounting, a distorted bracket | Bracket flatness, mounting face cleanliness, how the mating part seats |
| Deep, one-directional scratches on an elastomer | A burr or excessive roughness on the mating metal surface | Groove mouth, the lead-in chamfer on a bore |
| A gasket that has hardened and taken a permanent set | Heat and time-driven aging, a compound family unsuited to the location | Operating temperature of that location, elastomer selection |
| An elastomer that is swollen, softened and tacky | Contact with an incompatible oil or chemical | Compressor oil carryover into the circuit, the assembly grease used |
| Pitted, pockmarked surface | Corrosion pitting from trapped moisture | Moisture purge routine, dryer condition, reservoir drain habits |
| Fine reddish-brown powder | Fretting wear from micro-movement, a loosened joint | Torque condition, flatness of the seating face |
| Bright or crushed thread flanks | Over-torquing, wrong fastener grade | Fastener grade, tightening method and sequence |
Most of these marks come not from the part itself but from the conditions around it. If three units of the same product arrive with the same pattern, the source is very likely the installation, not the part.
How do you read a removed part, step by step?
The sequence below takes a few minutes in a workshop and makes most repeat failures visible. The goal is not a diagnosis on the spot, it is to avoid losing the information the removed part is carrying.
- Photograph the part before removal, while it is still installed. Orientation and line routing are not remembered accurately once the part is off the vehicle.
- While removing it, look for the wet trace of a leak, the direction dirt has built up in, and any line of cracked paint. These clues are wiped away by removal itself.
- Examine the part before washing it. The first cleaning destroys the most valuable evidence, since oily residue and corrosion color only mean something before they are washed away.
- Go over the exterior section by section: coating chips, impact marks, torn boots and gaiters, and corrosion rings around fasteners.
- Set the fasteners aside and look at the thread flanks. Crushed threads, stripped coating and reddish powder all speak to how the joint was tightened.
- Open the part and remove the elastomers one at a time, marking which cavity each came from; swelling and hardening only mean something tied back to location.
- Flex each elastomer between your fingers. One that does not spring back, or feels tacky, points to a material mismatch or aging, not a random defect.
- Wipe internal surfaces with a clean cloth and look at what comes off on it. A black oily film, a metallic sheen and grit each tell a different story.
- Log what you found in one short line: vehicle, axle position, mileage, season and pattern observed, so a repeating pattern becomes visible after a few units.
These steps are not a substitute for evaluating friction components such as brake pads, which have their own wear limits and thickness thresholds; symptoms and replacement timing on the pad side are covered separately: When Should Brake Pads Be Replaced? Symptoms and Service Life. The method here applies to the mechanical and elastomeric components of the compressed-air circuit itself.
Testing and approval: how is a part's durability actually proven?
A durability claim only means something once it is tied to measurable evidence, and on heavy commercial vehicle brake components that evidence comes in two layers. The first is the type-approval regulation for brake systems, which defines the system's safety behavior and is a condition of the vehicle being allowed on the road at all. The second is durability verification: whether the part completes a set number of cycles, in a defined environment, without damage.
A handful of verifications come up repeatedly on the durability side. A pressure-cycling test fills and empties the part enough times to represent its expected service life, then measures leakage. A thermal-cycling test moves it between cold and hot extremes to exercise the differential expansion between materials. A salt-spray test compares coating corrosion resistance in an accelerated environment, a cyclic version tracking closer to real road conditions than a continuous one. A vibration test fatigues the part together with its mounting bracket.
What these tests have in common is tying the result to a record, not a sentence: a manufacturer stating which test was run under which condition, rather than simply asserting "durable," makes the claim checkable. Batch traceability belongs to the same evidence, since a casting number and production-lot chain let a field issue be traced back to its source.
Installation mistakes that cut durability short in the field
A good part turned mediocre by a bad installation is one of the most common stories in a workshop. The list below covers the mistakes that most directly shorten service life.
- A dirty installation. A single grain of grit entering a groove breaks the elastomer's sealing line; cleaning the cavity beforehand is a one-minute task that pays off for months.
- The wrong lubricant. A grease incompatible with the elastomer eases assembly but swells the material over time; the assembly compound has to match the elastomer family in use.
- Guessing the torque value. Under-tightening leads to loosening and fretting wear; over-tightening crushes the thread. The value should come from the manufacturer's current service manual, not from feel.
- Skipping the tightening sequence. On housings held by several bolts, the order and stages of tightening let the seating face pull down evenly; a cover tightened at random leaks from one side.
- Connecting a line that was never flushed. Chips, sand or an old gasket fragment left inside a pipe travel straight to the seat of the newly installed valve.
- Fitting a hose or pipe with a twist in it. A twisted line carries a permanent stress of its own; vibration then fatigues it from the fitting base outward.
- Damaging the coating during the job. A pliers mark, a weld spatter strike or a hard knock breaks the protective layer, and corrosion starts from that point; leaving a boot or gaiter off leads to the same outcome.
Keeping a record of durability: a simple workshop discipline
Durability cannot be judged from a single part. One part failing early can be a fluke; the same pattern repeating is information, and producing it does not need an elaborate system, just a single line per removed part covering vehicle, axle position, mileage, season and pattern observed. That record does three jobs at once: it catches a repeating failure, since the same pattern on the same axle points to a systemic cause; it separates out the seasonal effect, since winter corrosion failures and summer thermal failures point in different directions; and it surfaces installation faults, since a pattern that changes by crew points to procedure, not the part.
Summary: durability is not invisible, it is readable
What makes an air brake part durable is never a single property. Casting and heat treatment set its load-carrying capacity; coating protects it from the outside environment; elastomer selection decides how the seal behaves hot and cold; tolerance and surface finish decide how these components fit together; and section geometry decides where a crack will start. A gap left open in any one of those areas eats into the service life the others earned.
You cannot measure these five factors directly in the field, but you can read their outcome in the mark left on a removed part. Durability, in that sense, is not an adjective printed in a catalog, it is a record that accumulates in a workshop over time, and whether a part was genuinely durable is a judgment made by the people who took it apart.
VADEN manufactures air brake compressors and brake system components for heavy commercial vehicles, and the material, coating, sealing and wear topics covered here are ones our production and validation processes work through daily. For system-level questions such as comparing disc and drum layouts, see Disc Brakes vs. Drum Brakes: A Heavy-Duty Vehicle Comparison.
Related technical guides: Truck Air Compressor Overhaul Kit: Head, Valve Plate, Gasket · Air Processing Unit (APU/EAC): Faults, Replacement & Care · Air Dryer Purge Valve: Faults, Replacement and Maintenance · Relay Valve & ABS Relay Valve: Faults, Replacement & Care
Frequently Asked Questions
- What physically makes an air brake part durable?
- Durability never comes from one property. Casting quality and heat treatment set how much load the part can carry, surface coating protects it from salt and moisture, the elastomer's compound family decides how the seal behaves hot and cold, manufacturing tolerance and surface finish decide how these components actually fit together, and section geometry decides where a crack will eventually start. A shortfall in any one of these five areas eats into the service life the others earned.
- How do heavy-duty air brake parts differ from ordinary ones?
- A heavy-duty air brake part has to resist several stresses at the same time: continuous pressure cycling, thermal cycling between a cold start and a hot descent, road salt and wash chemicals, vibration and chassis flex, and dirty or oil-carrying air. A design that answers only one of these falls short in the field. A thick-walled cast housing can shrug off vibration all day, but if the coating on it is weak, salt will still finish it off.
- Why don't two identical-looking parts last the same amount of time?
- Because the difference sits underneath the visible shape, not in it. The cleanliness of the metal and the cooling regime during casting can leave one housing porous; heat treatment depth can leave one pin's surface too soft or too brittle; plating can run thin at the exact same sharp edge or thread root on every unit of a given design. None of this is visible on the shelf, but it shows up in the marks a part carries once it comes off the vehicle.
- What does it mean if a leak is present in the morning but disappears by afternoon?
- This is one of the most common elastomer symptoms. Below its glass transition temperature, a seal behaves more like a rigid plastic than a rubber; it cannot spring back against its sealing face while cold, so it leaks, and once the vehicle warms up and the material regains flexibility, the seal closes again. It is usually a sign of a compound family that is not suited to the operating temperature, or of a seal that has already hardened with age.
- Why does a sealing element swell or turn tacky?
- An elastomer that is incompatible with the oil or chemical it contacts absorbs it, gains volume, no longer fits its groove, and softens into a tacky state. In an air brake circuit the two most common causes are oil carried over from the compressor and an assembly grease that does not match the elastomer's compound family. That is why the assembly compound has to be selected for the seal material in use, not just for ease of installation.
- How does manufacturing tolerance affect a part's service life?
- In a bore with a roundness or squareness error, a piston does not compress its seal evenly through the stroke: the elastomer is over-squeezed on one side and left with a gap on the other. The part may not leak when freshly installed, since the seal still has enough give to close the gap, but the over-compressed section reaches permanent set faster and the leak shows up months later. This sequence explains a large share of failures that start out fine and only turn up bad months later.
- Where does a fatigue crack in a brake part usually start?
- A fatigue crack starts where stress concentrates the most, not necessarily where the material is weakest, and those two locations are not always the same. The classic addresses are abrupt section changes, sharp internal corners, thread roots, hole edges, the toe of a weld bead and marks left by a stamping tool. A crack advancing under paint often announces itself first as a line of cracked paint on the surface, which is why cleaning a part before inspection matters.
- What does reddish-brown powder on a removed part indicate?
- That powder is the product of fretting wear: two surfaces that should be clamped tight instead move against each other by a few microns. It is proof that a joint has lost its preload and loosened, and it shows up most often at the base of tube fittings and at bracket mounting faces. Finding it means the fastening, not just the part, needs to be checked and corrected.
- Should a removed part be washed before it is inspected?
- No. The first cleaning destroys the most valuable evidence. The wet trace of a leak, the color of a corrosion deposit, the smell of an oily residue and the direction dirt has built up in only mean something before they are washed away. The right order is to photograph the part while still installed, look for clues during removal, inspect it dry, and only then clean it.
- If the same part keeps failing on the same vehicle, what should be checked?
- A single early failure can be a fluke, but the same wear pattern repeating is information, and it usually points to what surrounds the part rather than the part itself: an angled mounting, a distorted bracket, contamination left in a line, or oil and moisture reaching the circuit. Logging every removed part with its vehicle, axle position, mileage, season and observed pattern makes that repeating cause visible within a few units instead of staying invisible for months.
Related Articles
Choosing Truck Brake Components
A practical guide to choosing the right aftermarket brake components for trucks, tractor units and trailers: verification, approvals, suppliers and cost.


