Air Dryer: Faults, Replacement & Maintenance Guide
How a truck air dryer's charge and purge cycle keeps moisture and oil out of the brake system, and what a hissing purge valve or water in the tanks means.
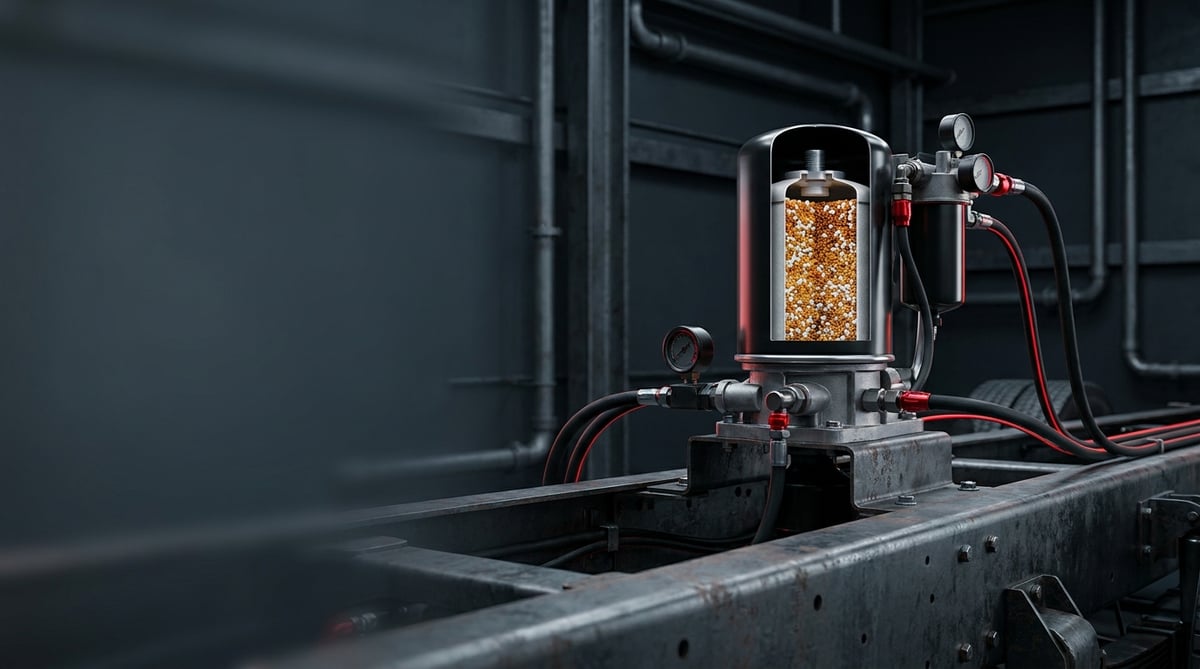
What Is an Air Dryer? Its Function and Operating Principle
The air dryer is a critical safety component in the pneumatic brake system of heavy commercial vehicles (trucks, tractors, buses) that removes moisture and oil from the hot, moist, oil-vapour-laden compressed air coming from the compressor before it enters the air reservoirs (tanks). As the compressor compresses the air, it inevitably carries ambient moisture and some engine oil into the system. This moisture condenses in the tanks and causes corrosion, freezes valves and lines in winter, while the oil degrades valve diaphragms and seal surfaces. The air dryer stops these two enemies at the system's inlet.
At its heart is a desiccant (moisture-absorbing) cartridge. The cartridge is filled with hygroscopic desiccant beads (usually molecular-sieve / silica based) with a very large surface area. In modern "oil coalescing" (oil-separating) cartridges there is also a coalescing (oil-trapping) layer ahead of the desiccant bed.
On heavy commercial vehicles the most common dryer types are the Bendix AD-9 / AD-IP / AD-HFi, the Wabco (ZF) single-cartridge dryer and EAC/LA series, the Knorr-Bremse LA-series air dryers, and Haldex dryers. On most of these brands the desiccant cartridge is supplied separately as a spin-on consumable part and can be replaced as an OE equivalent.
Charge Cycle
When the compressor produces pressure (governor in the "cut-in" position), moist air enters the dryer. First, larger water and oil droplets are captured in the oil-separator / coalescing section; then, as the air passes through the desiccant column, moisture adheres to the desiccant surface (adsorption). The dry air leaving the column pushes open the outlet check valve and fills the wet tank (the first reservoir).
Purge (Discharge/Regeneration) Cycle
When system pressure reaches the governor "cut-out" value (typically around 8.6 bar / 125 psi; set within a 7.2–9.7 bar / 105–140 psi range depending on the vehicle and governor type), the compressor is unloaded. At this moment the purge valve at the base of the dryer opens to atmosphere. As the pressurised air inside the dryer is expelled with a sudden "pfff", part of the small volume of dry air at the top of the cartridge flows back through the desiccant bed in the reverse direction. This dry reverse-flow strips the moisture the desiccant has just captured and sweeps it out through the valve to atmosphere — that is, it "reactivates" the desiccant. It normally takes 15–30 seconds for the entire purge volume to pass through the desiccant bed. Thanks to this self-regeneration, the cartridge can work for thousands of cycles.
There are three lines connected to the dryer, and recognising them is important in diagnosis: (1) the main supply line coming from the compressor, (2) the dry outlet line going to the wet tank, (3) the thin control/signal line going to the governor — this line carries the "open/close" signal to the purge valve as pressure.
To keep the purge valve and discharge port from freezing in winter, the dryer body has a built-in electric heater + thermostat (12 V or 24 V). The thermostat engages only in the cold. Some winter complaints of constant purging/freezing are caused by a faulty heater.
The extra duties cold weather places on the system, and the routines that prevent freezing, are gathered in our article on winter air brake maintenance, from tank draining to parking habits.
Fault Symptoms and Diagnosis
Air dryer faults are usually noticed as "water is coming into the tanks" or "it keeps leaking air". The table below speeds up field diagnosis; afterwards we address each main symptom separately.
| Symptom | Possible Cause | Check / Verification |
|---|---|---|
| Continuous air leak from the purge valve (the hissing does not stop even though the compressor has filled) | Purge valve diaphragm torn/stuck open, dirty seat surface; valve frozen due to heater failure | Listen to the valve after cut-out; if it does not stop, confirm the leak with soapy water |
| Water / water+oil mixture coming from the tanks | Desiccant cartridge saturated or coated with oil; cartridge replacement interval exceeded | Open the wet-tank drain valve and inspect the liquid coming out |
| Tanks drain when the engine stops (does not hold pressure) | Outlet check valve leaking | Fill to cut-out, stop the engine, measure the rate of pressure drop |
| No purge at all, compressor never unloads | Governor fault or blocked control line; purge valve stuck | Check the governor control-line pressure and the valve movement |
| Oil being expelled from the purge | Compressor passing excessive oil; cartridge clogged with oil | Inspect the base of the cartridge and the discharge port; assess compressor oil passing |
| Freezing in the lines / brake sticking in winter | Heater/thermostat fault, saturated cartridge passing moisture | Measure the heater resistance/supply (reference values below); assess the cartridge condition |
Is there continuous purging/air leakage?
A short purge burst after the compressor reaches "cut-out" and unloads is NORMAL. If this burst does not end and turns into continuous hissing, the purge valve is not closing. The most common causes are a torn diaphragm, dirt/debris caught on the seat surface, or a valve frozen in winter. On some integrated purge types, the valve can stick open after purging.
Is water getting into the tank?
If noticeable water comes from the manual drain of the wet tank, the desiccant can no longer hold moisture. If the liquid is clear water it is classic cartridge saturation; if it is dark, an emulsion (oil+water), the compressor's oil passing has finished off the cartridge early, and replacing the cartridge alone may not be enough.
Is it not holding pressure?
Tanks draining rapidly when the engine stops most often points to the dryer's outlet check valve; this valve should prevent tank air from leaking back through the dryer. To tell whether the leak is in the dryer or in the brake valves, a pressure-drop test is carried out (see "Technical Values" below).
Replacement / Installation Steps
The steps below are for spin-on desiccant cartridge replacement and/or complete dryer installation on heavy diesel vehicles. Make the vehicle safe before starting.
- Stop the engine, chock the vehicle and apply the parking (hand) brake. During cartridge replacement, watch out for the parking-brake spring releasing; if necessary, mechanically lock the park chambers with caging bolts.
- Exhaust all the air in the system. Bring the pressure of every tank (wet tank, primary, secondary, park) to zero from its drain valve. Do not disconnect any connection until you see 0 bar on the gauge.
- Disconnect the heater/thermostat electrical connector (on complete dryer replacement). Label the connecting lines (supply, outlet, governor control).
- Spin-on cartridge: Undo the cartridge anticlockwise with a suitable strap/chain wrench. Pressurised air may remain inside the cartridge; loosen it in a controlled way.
- Clean the gasket seating surface and the o-ring groove on the dryer body. Fully remove old o-ring/gasket residue; the surface must be free of scratches and rust.
- Apply a thin film of clean system oil or the manufacturer's recommended grease to the top gasket of the new cartridge (do not fit it dry).
- Turning the cartridge by hand, fit it until the gasket CONTACTS the body; then tighten it a further one full turn (360°) clockwise by hand. Do not over-tighten with a strap wrench — the gasket will be crushed and leak.
- On types held by a central shoulder bolt, tighten this bolt to the manufacturer's torque, typically ~7–9 Nm (60–80 in-lb).
- On complete dryer installation, connect the supply, outlet and governor control lines to the correct ports; plug in the heater connector.
- Charge the system: start the engine and build pressure up to the governor cut-out value. A clear purge burst should be heard at cut-out.
- Leak-check all connections and the cartridge gasket with soapy water. Then perform the pressure-drop test.
- Open the wet-tank drain and verify that the air coming out is dry.
Standards and further reading
This subject is governed by the equipment rules for air-braked commercial vehicles. In the United States the federal air brake standard, FMVSS 121 (49 CFR 571.121) defines the reservoirs, protection and timing a compliant system must provide, and Europe applies the equivalent limits of UNECE Regulation No. 13. For further detail, see the illustrated reference guide at airbrakecompressor.com. Always confirm specific figures against the current regulation and the vehicle manufacturer service data.
Readers outside the United States should work from their own national framework: in the United Kingdom the braking system must be maintained under regulation 18 of the Road Vehicles (Construction and Use) Regulations 1986, and in India the governing rules are published by the Ministry of Road Transport and Highways.
Points to Watch (Common Mistakes)
- Replacing only the cartridge and ignoring the purge valve: A significant share of continuous-purge/moisture complaints lie in the purge valve. Renewing the purge valve kit (diaphragm + seat) together with the cartridge during service prevents repeat faults.
- Over-tightening the cartridge with a strap wrench: The correct method is "gasket contact + one full turn by hand". Over-tightening crushes the gasket, makes removal impossible, and causes leaks.
- Fitting the gasket dry: An unlubricated gasket twists during installation and leaks. A thin film of lubrication is essential.
- Ignoring a compressor that passes oil: Oil coats the desiccant and finishes off even a new cartridge quickly. If an emulsion (oil+water) is seen, the root cause is the compressor/excess oil; replacing only the cartridge is a temporary fix.
- Connecting the wrong line: Connecting the governor control (thin) line to the outlet port will not operate the purge. Label before disassembly.
- Forgetting to connect the heater supply: This leads to winter freezing and recurring purge faults.
- Blowing compressed air toward the eyes / opening a port under pressure: Wear safety glasses.
Technical Values and Check Points
The values below are general-safe references for heavy diesel air brake systems. The exact value is always per the vehicle/dryer manufacturer's service card; the governor setting, heater resistance and torque values vary by model.
- Governor cut-in / cut-out: Common combinations are 7.2/8.6 bar (105/125 psi), 7.2/9.0 bar (105/130 psi) and 8.3/9.7 bar (120/140 psi). The purge is triggered at cut-out.
- Purge duration: A purge flow of ~15–30 s after cut-out is normal for desiccant regeneration.
- Pressure-drop test: Fill to cut-out, stop the engine; with the service brakes released, the acceptable drop is ~1 psi/min (≈0.07 bar/min) for a single vehicle and ~3 psi/min (≈0.2 bar/min) for a tractor-trailer combination. A faster drop points to a check-valve/system leak.
- Cartridge installation torque: By hand, "gasket contact + 1 full turn". On the central shoulder-bolt type, ~7–9 Nm (60–80 in-lb).
- Heater voltage and resistance: 12 V or 24 V depending on the vehicle system; thermostat controlled. When measuring the heater element, the typical cold resistance is around 1.5–3 Ω on 12 V units (about 4–8 A draw) and around 6–12 Ω on 24 V units (about 2–4 A draw). On an ohmmeter, infinite resistance (open circuit) = a broken/faulty element, while a very low (short-circuit) value indicates a winding fault. Rely on the service card for exact values.
- Oil-passing reference: Even a healthy compressor can pass up to a litre of oil per year; that is why an oil-coalescing cartridge and regular replacement matter.
OE Type / Cross-Reference (Dryer and Cartridge)
The dryer families commonly encountered in the field and the equivalent desiccant-cartridge logic are below. VADEN offers OE-equivalent cartridges and purge valve kits for these families; for the correct equivalent according to your vehicle chassis/OE number, rely on the application list on our product page.
The brake energy supply circuit fed by the air dryer falls under ECE R13, while the humidity, oil and particulate purity of compressed air is described by the class system of ISO 8573-1. The binding reference is the vehicle's current OE service manual.
| OE manufacturer / type family | Common use | Service part |
|---|---|---|
| Bendix AD-9 / AD-IP / AD-HFi | North American and export-type tractors/trucks | Spin-on desiccant cartridge + purge valve kit |
| Wabco (ZF) single-cartridge dryer / EAC-LA | European-built trucks and buses (common) | Spin-on desiccant cartridge; integrated valve block on some types |
| Knorr-Bremse LA series | European-built heavy commercial vehicles | Spin-on desiccant cartridge |
| Haldex air dryer | Trailer/tractor applications | Desiccant cartridge |
Note: The OE number and equivalent match vary by vehicle model; always carry out a vehicle/chassis-based application check before installation.
Maintenance and Service Life
The desiccant cartridge is a consumable part and requires regular replacement. Its life depends on the age and oil passing of the compressor, the vehicle's air consumption (number of axles, vocation), the operating environment and the moisture level.
- Standard line-haul (≤5 axles): Typically ~24 months or ~320,000 km (200,000 miles) with oil-coalescing cartridges.
- Medium-heavy use (double trailers, light off-road, ≤8 axles): ~18 months or ~240,000 km (150,000 miles).
- Heavy/vocational use or a compressor that passes oil: More frequent replacement is required; monitor the wet-tank water regularly.
- The complete dryer body (types similar to the Bendix AD-9) typically has a 3–5 year service interval in line-haul; however, the cartridge is renewed more frequently than this.
These month/km values are general-safe industry references, and the exact interval should always be determined according to the vehicle or dryer manufacturer's service bulletin/maintenance schedule (e.g. Bendix, Wabco/ZF and Knorr-Bremse service documents tie cartridge life to the usage profile). For vehicles that pass oil or operate in a very humid climate, manufacturers recommend a shortened interval.
Should the wet tank be drained manually or automatically?
Even though the air dryer holds most of the moisture, some condensation can build up over time in the wet tank; that is why there is a drain point under the wet tank. There are two methods:
- Manual drain valve: The driver/technician drains the tank by pulling the ring. Recommendation: drain the wet tank every day (end of shift) in winter and humid conditions, and at least once a week in mild conditions. The amount and colour of the liquid coming out is also an indicator of cartridge health.
- Automatic drain valve: A valve that is triggered by pressure changes and expels accumulated liquid on its own. It makes the manual-drain discipline easier; however, it too can clog/freeze, so it should be checked periodically to see whether it is working. If noticeable water begins to appear, the priority is again the condition of the desiccant cartridge.
A good maintenance routine is: renew the purge valve kit together with the cartridge at every service (cartridge replacement), drain the wet tank at the above frequency and observe the liquid quality, test the heater/thermostat before winter, and monitor whether the compressor is passing excessive oil. If the cartridge replacement interval is unknown, it is time to replace when the water coming from the wet tank starts to increase.
For related maintenance topics, you can review our content on air compressor faults and maintenance, pressure regulator (governor) adjustment and brake valves technical guide; the air dryer works as a system together with these components.
To guarantee the brake air quality of your heavy diesel vehicle, renewing your desiccant cartridge on time and correctly is the cheapest insurance. The VADEN Air Dryer product family is developed to make this maintenance routine easier, with OE-equivalent cartridge and purge valve solutions suited to Bendix AD-9, Wabco/ZF, Knorr-Bremse LA and Haldex type dryers; for the product and technical values suited to your vehicle model, you can review our product pages.
Shop this part: Air Dryer Valve
In-depth technical guide: For fault diagnosis, step-by-step replacement and service intervals: Air Processing Unit (APU/EAC): Faults, Replacement & Care
All our technical guides on this topic
- The Air Dryer: The Hidden Hero of Heavy Vehicle Air Systems (Truck Air Dryer)
- What is an Air Processing Unit? A Comprehensive Guide to Safe and Efficient Commercial Vehicle Air Systems
- Air Processing Unit (APU/EAC): Faults, Replacement & Care
- Heavy-Duty Truck Air Dryer: Bendix, WABCO & When to Replace the Cartridge
VADEN ORIGINAL products
- Air Processing Units — 279 products
- Air Processing Unit — 186 products
- Air Processing Unit Repair Kit — 87 products
Tags
Frequently Asked Questions
- How often should the air dryer purge — is constant hissing normal?
- The dryer performs a short 15–30 second purge once, each time the compressor reaches cut-out. If air keeps leaking from the purge valve even though the compressor is full, this is NOT NORMAL; usually the purge valve diaphragm or seat surface is faulty, or in winter a frozen valve may be involved.
- Water is coming into my tanks — will replacing the cartridge fix it?
- If clear water is coming out, the desiccant cartridge is usually saturated and replacement fixes it. But if the liquid is an oil+water emulsion, the real cause is the compressor passing excessive oil; in that case replacing only the cartridge will be short-lived, and the compressor/oil source must also be addressed.
- How tight should I make the cartridge — is a torque wrench essential?
- A torque wrench is not needed for spin-on cartridges: lubricate the gasket with a clean film of oil, turn it by hand, and after the gasket contacts the body, tighten it a further one full turn by hand. On types held by a central bolt, tighten the bolt to the manufacturer's torque (~7–9 Nm). Over-tightening with a strap wrench crushes the gasket and causes leaks.
- Pressure drops rapidly when I stop the engine — is the dryer to blame?
- It could be. If the dryer's outlet check valve leaks, tank air escapes back through the dryer. Perform a pressure-drop test: the acceptable drop is ~1 psi/min for a single vehicle and ~3 psi/min for a combination. Above this, there is a check valve or system leak.
- My dryer freezes in winter — what should I do?
- Check the built-in heater and thermostat; verify that it operates at the correct voltage (12 V/24 V) and that its connector is plugged in. Measure the heater element with an ohmmeter: an open circuit (infinite resistance) indicates the element is broken; the typical value is ~1.5–3 Ω at 12 V and ~6–12 Ω at 24 V. If the heater is sound, also assess the cartridge condition, since a saturated cartridge can pass moisture into the tanks and cause freezing in the lines.
- What is the difference between an oil-coalescing cartridge and a standard cartridge?
- An oil-coalescing cartridge has an oil-trapping (coalescing) layer ahead of the desiccant bed; by capturing the oil aerosol coming from the compressor it protects the desiccant, so it both delivers cleaner air and extends cartridge life. It is preferred on vehicles that pass oil or are in heavy use.
- How often should the desiccant cartridge be replaced?
- In standard line-haul work (up to five axles) an oil-coalescing cartridge typically lasts around 24 months or 320,000 km. Medium-heavy use with double trailers brings that down to roughly 18 months or 240,000 km, and heavy vocational duty or a compressor passing oil shortens it further. The complete dryer body is typically on a 3-5 year service interval. The exact interval follows the vehicle or dryer manufacturer's maintenance schedule; if it is unknown, replace when wet-tank water starts to increase.
- Should the purge valve kit be renewed together with the cartridge?
- Yes. A significant share of continuous-purge and moisture complaints lie in the purge valve rather than the cartridge, so replacing only the cartridge invites a repeat fault. Renewing the purge valve kit, meaning the diaphragm and seat, during the same service is the correct routine. While the cartridge is off, also clean the gasket seating surface and check the heater and thermostat connection.
- If an automatic drain valve is fitted, do I still need to drain the wet tank by hand?
- Keep checking it. The automatic drain valve is triggered by pressure changes and expels accumulated liquid on its own, but it can clog or freeze, so verify periodically that it is working. For manual draining the recommendation is end of shift every day in winter and humid conditions, and at least once a week in mild conditions. The amount and colour of the liquid also indicate cartridge health.
- What safety steps come before removing the cartridge?
- Stop the engine, chock the vehicle and apply the parking brake, watching for the parking-brake spring releasing; cage the park chambers mechanically if needed. Then bring the wet, primary, secondary and park tanks to zero at their drain valves. Do not undo any connection, cartridge or purge valve until the gauge reads 0 bar. On a complete dryer change, disconnect the heater connector, label the lines and wear safety glasses.
Related Articles
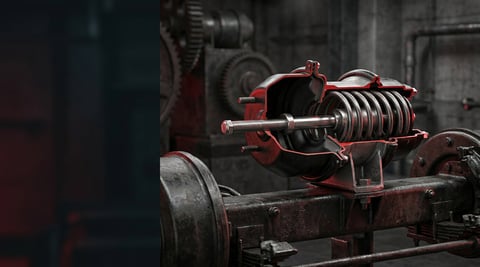
Brake Chamber: Faults, Replacement & Maintenance Guide
Service and spring brake chambers on trucks and trailers: diaphragm-leak and stroke diagnosis, why caging is mandatory before removal, and safe replacement.
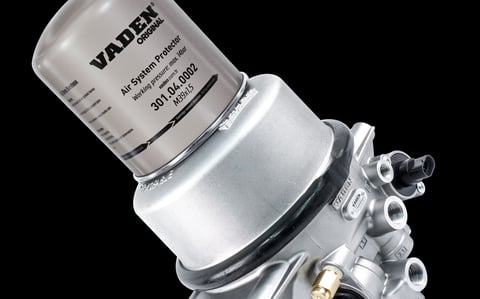
Heavy-Duty Truck Air Dryer: Bendix, WABCO & When to Replace the Cartridge
Almost every question about a truck's air dryer needs one piece of information before it can be answered: which family the dryer on that vehicle belongs to.
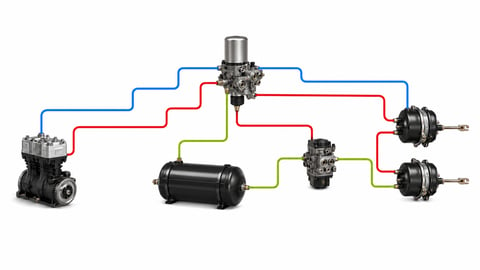
How to Read an Air Brake Diagram: Circuit Guide
How do you read an air brake system diagram? Symbol language, line colours, port codes, circuit split, trailer lines and fault-tracing, step by step.


