What Is a Brake Shoe? Heavy-Duty Drum Brake Lining
What is a brake shoe? A heavy-duty guide to drum brake linings: riveted vs. bonded types, wear patterns, relining, and replacement timing.
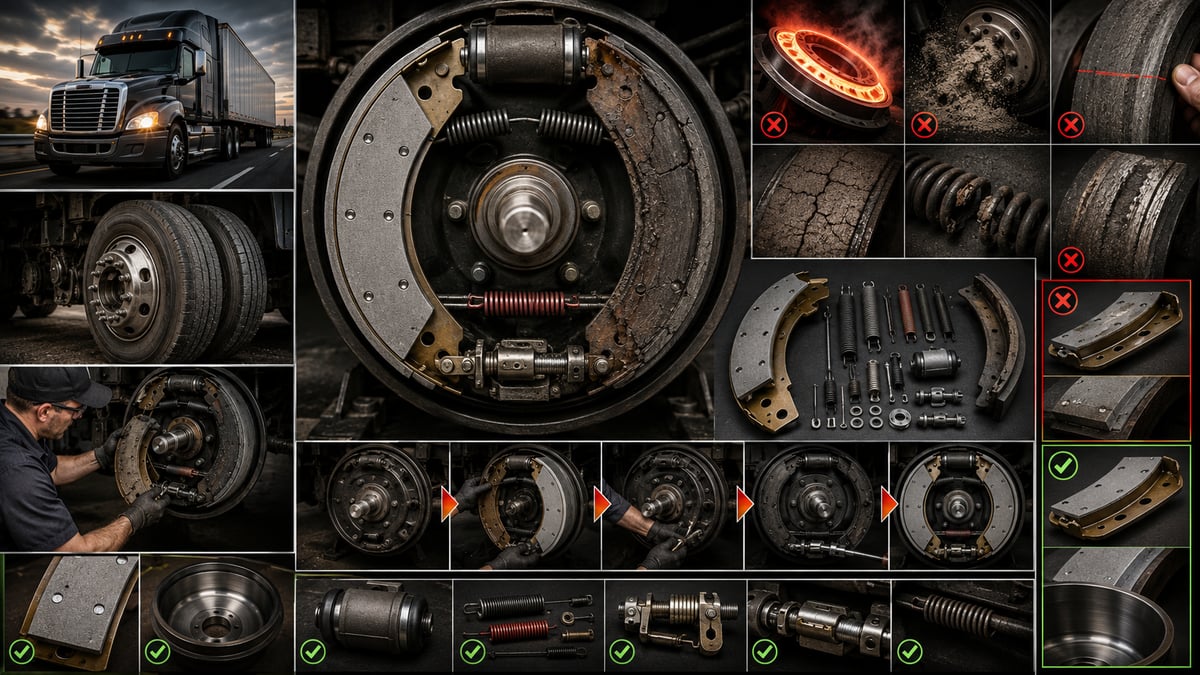
A trailer that fails its brake-tester inspection tells the story in one graph: the braking force from one wheel sits noticeably below the wheel opposite it. Pull the drum and the picture gets clearer — of the two shoes working the same axle, one is nearly new and the other has worn down to the rivet heads. The lining really has run out, but the real question is why only that one shoe wore through. On a heavy-duty drum brake, the lining is never an isolated part; it is the last surface in a chain that runs back through the metal shoe pressing it against the drum, the S-cam shaft that spreads the shoe, the slack adjuster that turns the cam, and the air chamber that drives the whole system. This guide covers the shoe within that chain for trucks, tractors, buses, and trailers: the difference between the metal shoe and the friction material, riveted versus bonded linings, how to read wear patterns, the choice between relining and full shoe replacement, and what to check after reinstallation.
How Does a Heavy-Duty Drum Brake Work, and Where Does the Shoe Fit In?
The drum brake takes its name from the bell-shaped cast component that rotates with the wheel. Braking happens when two shoes are pressed outward against the inside face of that drum, which is why the technical name for the design is an internal expanding shoe brake. The vehicle's kinetic energy turns into heat at the friction interface and is carried away through the mass of the drum. Everything in the system exists to do one job: push the shoe against the drum at the right moment, with the right force, at the right angle.
On a heavy-duty vehicle, that pressing force comes from compressed air rather than hydraulics. Press the pedal and the brake valve sends air to the chamber; the diaphragm pushes the push rod, the push rod rotates the slack adjuster, the slack adjuster turns the S-cam shaft, and the S-shaped cam at the end of that shaft spreads the two shoe rollers outward until the friction surfaces sit against the drum. Release the pedal and the air bleeds off, the return springs pull the shoes back in, and a thin clearance reappears between the drum and the lining. The size of that clearance is the single most critical setting in the whole system — it decides how quickly the brake bites and whether the shoe keeps dragging against the drum.
The parking and emergency brakes use the same shoes but draw their force from a different source: a heavy spring inside the spring brake chamber, which is released when air pressure is cut off and mechanically forces the shoes against the drum. That means the service brake, park brake, and emergency brake on a drum brake group all share the same friction surface — so lining wear affects not only stopping distance but also how well the vehicle holds on a grade.
A disc brake does the same job, and the differences come down to how force is transmitted and how heat is managed. Why one system or the other gets specified on a given axle, and where each holds the advantage, is covered in our disc brakes vs. drum brakes comparison. This guide stays on the drum side and focuses on the part that wears out fastest and gets misunderstood the most: the shoe.
| Component | Function | What a fault looks like on the shoe |
|---|---|---|
| Diaphragm brake chamber | Converts air pressure into push force | A torn diaphragm drops force, so that wheel wears less |
| Spring brake chamber (park/emergency) | Applies the brake mechanically via spring force when air is cut | A spring that never fully releases keeps the shoe dragging and burns it |
| Push rod and slack adjuster | Converts linear travel into torque at the cam shaft | Extended stroke means late, weak contact and uneven wear |
| S-cam shaft and bushings | Rotates the cam to spread the shoes evenly | Worn bushings let the cam wander sideways, wearing one edge of the lining |
| Cam rollers | Transfer the cam profile to the shoe without friction losses | Sticking or a roller off its seat delays one shoe's release |
| Shoe pin and bushing | Carries the shoe's pivot end and lets it rotate | Binding keeps the shoe from seating freely, causing localized wear at one end |
| Return springs | Pull the shoe back in when the brake is released | A fatigued spring never fully breaks contact, causing glazing and overheating |
| Drum | Provides the friction surface and heat capacity | Out-of-round wear or bell-mouthing causes tapered, wavy wear |
The table's main point is this: what you read on the shoe is, more often than not, not a fault in the shoe itself but a fault in the force reaching it or the geometry it is seated against.
What Is the Difference Between a Brake Shoe and a Brake Lining?
The brake shoe is the metal body that carries the friction material and presses it against the drum; the lining is the friction material itself, fastened to the outer face of the shoe and consumed as it wears. In the shop, the two words often get used interchangeably — "we changed the linings" usually means the whole shoe assembly went in. Technically, though, they are separate parts: the shoe is a structural carrier that, properly inspected, can outlast several sets of linings, while the lining is a wear item that is gone by the end of every service interval.
That distinction has two practical consequences. First, on the ordering side, a "lining set," a "pre-lined shoe set," and a "bare shoe" are three different products, and it has to be clear which one is being asked for. Second, on the diagnostic side, a fault in the shoe body needs to be separated from a fault in the friction material. If the surface has worn evenly, it is a consumption issue; if it has worn unevenly on one edge, cracked, or the body itself is bent, the problem sits in the carrier's geometry, and relining alone will not fix it.
What Are the Parts of a Brake Shoe?
The shoe body is a curved structure built from welded steel or cast segments. The outer face that meets the drum is called the table, and the lining sits on that surface. Underneath the table runs one or two webs that give the shoe its resistance to bending; heavy-duty shoes usually get a double-web design, because braking force tries to flex the shoe rather than pull it apart. One end carries the cam roller pocket, the other the pin bushing, and the shoe seats against the drum by flexing slightly between those two points.
What matters about the body is not any single number but its geometry as a whole: table radius, web parallelism, the alignment of the roller and pin bushings, and how flat the table itself is. If any one of those slips out of spec, the shoe will not seat fully against the drum, the contact area shrinks, unit pressure climbs, and the lining wears out far faster than it should. A shoe that has been overheated, struck, or run for a long time on bare rivet heads is a strong candidate for exactly that kind of distorted geometry.
Riveted vs. Bonded Linings: How the Two Attachment Methods Differ
Linings are fastened to the shoe by one of two methods. In a riveted joint, the lining has countersunk holes, and copper, brass, or aluminum rivets are pressed through them into the shoe's table on a dedicated riveting press. The rivet head sits below the lining surface, so part of the thickness is unusable from day one. In a bonded joint, the lining is fixed to the prepared table with a high-temperature adhesive, cured under controlled heat and pressure — no holes, no rivets.
The two behave differently in service. In a riveted joint, the lining can flex slightly between rivet points, so the surface still tries to seat itself even if the drum is not perfectly round, and dust and debris can escape through the gaps around the rivets. The trade-off is that usable thickness stops at the rivet head — once the lining wears down to that point, it is metal on metal, and the drum surface can be scrapped in short order.
In a bonded joint, the full thickness of the lining is usable, pressure spreads more evenly, and because there are no holes weakening the material, integrity holds up even at thin cross-sections. Its weak point is heat: the adhesive is engineered for a defined temperature range, and a brake that drags continuously or has been overheated repeatedly can let that bond weaken, causing the lining to blister or lift at the edge. Bonding also cannot be done in the field — it is a production process that needs an oven, a press, and careful surface preparation.
| Criterion | Riveted joint | Bonded joint |
|---|---|---|
| Attachment method | Mechanical fastening with countersunk rivets | Chemical bond with heat-resistant adhesive |
| Usable thickness | Down to the rivet head; part of the thickness is dead | Nearly the full thickness is usable |
| What sets the wear limit | Rivet-head depth plus the manufacturer's minimum thickness | Only the manufacturer's minimum thickness |
| Tolerance for drum defects | Some flex between rivets, more forgiving | Stiffer surface, geometry match matters more |
| Behavior under overheating | Rivets loosen, lining cracks and crumbles | Bond weakens, blistering, risk of lifting at the edge |
| Field relining | Possible in a shop with the right riveting press | Needs an oven and a press, cannot be done in the field |
| Typical use | Common on heavy-duty S-cam drum brakes | Light- and medium-duty applications, some OE designs |
| What to watch for | Replace before it reaches the rivet heads, use the correct rivet material | Do not apply to a shoe with a history of overheating |
There is no single answer to which method is better — the right answer is whichever one the vehicle's brake group was designed for. On heavy-duty S-cam drum brakes, riveted linings remain common because they support thicker linings and can be relined in-house. The deciding factor should be the OE specification tied to the axle and brake group code, not shop habit.
How Does the Shoe Move Inside an S-Cam Mechanism?
The S-cam gets its name from the S-shaped profile it is ground to. As the cam shaft rotates, the rollers at the ends of the shoes ride up that profile, and the two shoes spread apart toward the drum. The key feature of the profile is that it changes the ratio of motion to force as rotation progresses: fast clearance take-up at first contact, then increasing force once the shoes are against the drum.
The S-cam has one defining side effect: it spreads both shoes by an equal displacement. Both shoes move outward the same distance, but the reaction force coming back from the drum is not the same for each. That means load sharing between the two shoes in an S-cam brake never splits as sharply as it can in some hydraulic-cylinder designs — but a certain amount of difference is still normal, and it shows up in wear.
As the lining wears, the cam has to rotate further before the shoe reaches the drum. More rotation means a longer travel for the chamber push rod. That travel — the stroke — is the most practical field measurement that can be taken without pulling the drum. As stroke lengthens, response time increases and the working section of the cam profile shifts; past a certain point, the force the chamber can produce falls short of what braking requires. The automatic slack adjuster exists specifically to prevent that: it senses wear at every brake application and holds the clearance at its design value.
The slack adjuster, cam shaft bushings, chamber, and valve side all work as one chain, and an imbalance seen on the shoe usually traces back to somewhere in that chain. The diagnostic path from symptom to cause on the air side, including how to separate valve, chamber, and line faults, is covered step by step in our air brake fault diagnosis guide — that is the first place to look when shoe wear turns up abnormal.
Leading and Trailing Shoes: The Primary/Secondary Concept
The two shoes pressed inside a rotating drum do not do identical work. Depending on the direction the drum turns, friction force pulls one shoe further into the drum, while the same force tries to push the other one away from the surface. The first is called the self-energizing, leading, or primary shoe; the second is the trailing, or secondary, shoe. Self-energizing raises the brake's overall force gain, but it also wears that shoe's surface faster.
In reverse, the roles swap: the shoe that is primary going forward behaves as the secondary shoe going backward. So on a vehicle that spends most of its time moving forward, some measured wear difference between the two shoes is expected, and that alone is not a fault. What counts as a fault is when the gap becomes pronounced — if one shoe is wearing at several times the rate of the other, the cause is no longer the design, it is the mechanism itself.
Three things matter in practice. On some brake groups the two shoes are not identical — lining length, thickness, or hole pattern can differ — so direction and position must not get mixed up during installation. Shoes should never be swapped side to side just to "even out" wear; a surface that has already worn in one direction seats even worse once it is flipped to the opposite rotation. Finally, if a new set goes in before the cause of the wear difference is found, the same imbalance comes right back on the new shoes.
How Does Shoe Geometry Affect Braking Force?
Three things determine braking force: the pressing force applied to the drum, the coefficient of friction, and the radius at which that force acts. The shoe has a direct effect on two of these. Contact area and pressure distribution decide how much of a given pressing force actually converts into useful braking, and radius matching decides where that contact area forms.
When a new shoe seats fully against the drum, pressure spreads roughly evenly across the lining. A radius mismatch produces two typical patterns instead. If the shoe radius is smaller than the drum's, contact starts at the ends of the lining, the middle stays unloaded, and the entire load concentrates in two narrow bands. If the shoe radius is larger, contact starts in the middle instead and the ends stay unloaded. Either way, initial braking force is low and local temperature is high; the surface glazes over, and until the shoe finishes seating, stopping distance runs longer than it should.
Shoe body stiffness is the second factor. During braking, the shoe is not just pushed outward — the drag from the rotating drum also tries to flex it, and the web design is what limits that flex. Once a body has taken permanent deformation from overheating, it takes on a different shape under load: a shoe that looks straight when cold can bear against the drum along a single edge once it is hot. That is a defect that is hard to catch with a simple measurement but shows up unmistakably in the wear pattern.
Standards and further reading
This subject is governed by the equipment rules for air-braked commercial vehicles. In the United States the federal air brake standard, FMVSS 121 (49 CFR 571.121) defines the reservoirs, protection and timing a compliant system must provide, and Europe applies the equivalent limits of UNECE Regulation No. 13. For further detail, see the illustrated reference guide at airbrakecompressor.com. Always confirm specific figures against the current regulation and the vehicle manufacturer service data.
Outside the United States the equivalent duties sit in national law. In the United Kingdom, regulation 18 of the Road Vehicles (Construction and Use) Regulations 1986 requires every part of the braking system to be maintained in good working order. In Canada, air brake systems fall under the Motor Vehicle Safety Regulations, which contain CMVSS 121.
What Do Wear Patterns Reveal? Reading the Shoe Surface
A removed shoe carries a record of the vehicle's brake history on its surface. How that surface wore will often tell you which part is at fault before any measuring tool does. That is why shoes should not be thrown out the moment they are pulled — lay both shoes side by side and compare them against the opposite wheel on the same axle before deciding anything.
Heat is the common thread behind most patterns. As temperature climbs, the friction material's binder starts outgassing, a thin film forms on the surface, and friction drops temporarily — the condition where the driver has the pedal to the floor but deceleration falls off is what is known as brake fade. Repeated overheating hardens and polishes the surface, and at a more advanced stage produces heat cracking and crumbling. What usually generates that heat is not one hard stop but continuous brake use down a long grade; correct use of the engine brake and, where fitted, a retarder, directly extends shoe life.
| Wear pattern | What it indicates | First thing to check |
|---|---|---|
| Even wear on both shoes, close to each other | Healthy operation, balanced force distribution | Measure thickness, inspect drum surface |
| One shoe noticeably more worn than the other | One-sided binding or spring imbalance | Pin and bushing freedom, return springs, rollers |
| Tapered wear across the width of the lining | Drum has bell-mouthed or the shoe is seating crooked | Drum bore, table flatness, bearing play |
| Wear at the ends, shiny and untouched in the middle | Shoe radius smaller than the drum, seating not complete | Drum bore vs. shoe radius match, machining history |
| Wear in the middle, ends untouched | Shoe radius too large, or the body is flexing under load | Body geometry, overheating marks, web cracking |
| Shiny, hard, glazed surface | Continuous light contact or repeated overheating | Clearance setting, return springs, park chamber release |
| Heat cracking, crumbling, loose rivets | Prolonged excess temperature, continuous braking on grades | Duty cycle, retarder use, load distribution |
| Dark, oily, stained surface | Grease or another fluid leaking from the hub seal | Hub seal, axle seal, marks on the inner table |
Once an abnormal pattern turns up, replacing the shoe on its own is not the fix — if the cause is not addressed, the same pattern reappears on the new set.
Lining Thickness, Wear Limits, and Replacement Timing
There is no single mileage figure that determines when a lining needs replacing. Service life comes down to route profile, load, driving style, retarder use, and how current the brake adjustment is — two trucks running the same route can see one lining last twice as long as the other. That is why measurement, not a calendar, is what drives the decision.
Three measurements get used together in the field. The first is thickness, checked through the inspection hole in the table or measured directly once the drum is off; the limit is set by rivet-head depth plus the manufacturer's minimum thickness on a riveted lining, or by the minimum thickness alone on a bonded one. The second is chamber push rod stroke, which can be checked without removing the drum, making it the backbone of periodic inspection. The third, on designs that have one, is the position of the wear indicator.
Symptoms show up after the measurements do, but once they appear they should not be ignored: a metallic scraping sound under braking, longer pedal travel, pulling to one side, a hot wheel hub, and a vehicle that no longer holds as well on a grade are the typical warnings. What determines friction material life, what different symptoms mean, and how to plan a replacement interval is covered in detail in our when should brake pads be replaced guide; this guide is concerned with the decision once the thickness limit has already been reached.
Reline or Complete Shoe Replacement?
Once a lining is spent, there are two paths. The first is relining: keeping the existing metal shoe, stripping off the old lining, and riveting on a new one. The second is complete replacement with a factory pre-lined shoe assembly. Both are valid choices under the right conditions; what is wrong is picking one out of habit without evaluating the condition of the shoe.
The logic behind relining is that the shoe body is a structural part and, properly inspected, can carry through several lining lives. That logic only holds if the body actually gets inspected. Before relining, these questions need answers: is the table radius and flatness still true, are the web welds free of cracks, have the rivet holes gone oval, are the pin and roller bushings worn, has corrosion thinned the table's cross-section, and is there any discoloration or deformation from overheating? If even one of these comes back negative, relining is a short-lived, risky saving.
| Criterion | Relining | Complete shoe replacement |
|---|---|---|
| What the job involves | Old lining stripped, body inspected, new lining riveted on | Pre-lined shoe assembly installed directly |
| Body geometry | Depends on the relining shop's inspection | Comes measured and calibrated from the factory |
| Riveting quality | Depends on the press, rivet type, and clamping force used | Done under controlled production conditions |
| Vehicle downtime | Can run longer, as bodies go out to a shop and back | Complete once the kit is in hand |
| Where it fits | Body has passed inspection, shop is equipped, and keeps records | Body's history is uncertain, has overheat history, or speed matters |
| Main risk | Fitting new lining to a tired body and carrying the fault forward | Wrong part identification, mismatched friction grade |
The practical rule is this: if the body's history is known, it has not been overheated or struck, and the shop doing the relining measures and keeps records, relining makes sense. If the body's history is unknown, it has been run on bare rivet heads, it has scored the drum, or the surface shows heat discoloration, complete replacement is the safer call. Either way, the same thing must not be skipped: the decision is made about the shoe, but the inspection has to cover the whole brake group.
Drum Diameter, Machined Drums, and Shoe Fit
The shoe and drum work as a pair; renew one and ignore the other, and both get burned through in short order. Drums are specified by an internal diameter and width pair, and every drum has a maximum bore diameter set by the manufacturer. When the inner surface develops grooving, a step, out-of-roundness, or mild waviness, the drum can be machined up to that limit; beyond it, the drum is scrap.
Machining comes at a cost. As the bore diameter grows, drum wall thickness shrinks, and thinner wall reduces two things at once: heat capacity and resistance to deformation. A thinned-out drum heats up faster under hard braking, expands more once it is hot, and that expansion throws off contact with the shoe. Machining, then, is never purely a repair — it is always spending down part of the drum's remaining life too.
Two points matter for fit. First, because a machined drum's bore is larger, a new standard-radius shoe will not seat fully against it — contact concentrates at the ends at first, and the seating-in period runs longer. Some applications offer an oversized-thickness lining designed for exactly this gap; whether it applies has to be confirmed against the OE specification. Second, drums must always be machined or replaced in pairs on the same axle — two drums of different bore diameters on one axle produce different force on each side and pull the vehicle under braking.
How Return Springs and the Adjuster Mechanism Affect Shoe Life
The most overlooked parts of a brake are also the cheapest ones. The return spring's job is to pull the shoe off the drum when the brake is released, and that separation happens within a very small clearance. When a spring fatigues or breaks, the shoe does not come all the way back; the lining keeps making light contact with the drum. The driver will not feel that contact, but it generates heat, starts glazing, and burns through the lining at a small fraction of its expected life. The second consequence of a dragging shoe is a quiet rise in fuel consumption.
The second part that determines clearance is the adjuster mechanism. An automatic slack adjuster advances by the amount of wear at every brake application, holding clearance constant. When that mechanism sticks, it can fail in either direction: under-adjusting stretches out stroke and reduces braking force, over-adjusting eliminates clearance and leaves the shoe dragging continuously. Repeatedly cranking the automatic adjuster by hand to "fix" the clearance damages the internal gearing and masks whatever the real fault is; manual adjustment is only for the setup procedure the manufacturer specifies. The third factor is the cam shaft bushings — once a bushing wears loose, the shaft wanders sideways, cannot deliver equal motion to both shoes, and one lining starts wearing along one edge.
Parts Replaced Together With the Shoes
Once the drum is off, most of the labor is already spent; putting off the small parts inside means paying for that same labor again a few months later. That is why a shoe job should be planned as a group overhaul, not a single-part swap.
- Return and hold-down springs: Fatigue cannot be judged by eye; replace them as a set at every shoe job.
- Shoe pin, bushings, and retaining hardware: If free rotation is not restored, the shoe will not seat squarely against the drum.
- Cam rollers and washers: Replace if the surface shows flat spots or binds, and make sure they seat correctly in their pocket.
- S-cam shaft bushings and seals: Measure axial and radial play; overhaul the shaft assembly if there is any looseness.
- Drum: Check bore diameter, surface condition, and the mounting face; replace in axle pairs if the limit has been exceeded.
- Hub seal and bearing grease: A leak ruins a lining, so replace the seal if it is suspect and set bearing preload per the OE procedure.
- Slack adjuster: Verify the automatic adjuster's function; if it is sticking, replace it rather than trying to repair it.
- Brake chamber and push rod: Check the diaphragm, housing, clevis, and pin play; if stroke is out of range, trace it back to its source.
Shoe Replacement and Post-Installation Checks
The sequence below is a general framework for a heavy-duty S-cam drum brake. Torque values, clearance specs, bearing adjustment procedure, and the parking spring release method are all vehicle-specific and should be read from the OE service manual.
- Park the vehicle on level, solid ground, chock the wheels, secure the air system the way the manufacturer specifies, and mechanically release the spring chamber.
- Remove the wheel and inspect the brake group and the inner table surface visually before washing anything down — oil traces, how wear dust is distributed, and drag marks tell you more before cleanup than after.
- Wear appropriate personal protective equipment and do not blow off brake dust with compressed air — use a dust-collecting or wet method instead.
- Remove the drum and inspect the inner surface for grooving, stepping, heat spotting, and cracks; measure the bore and compare it against the manufacturer's machining limit.
- Remove the springs and retaining hardware with the correct tool, take the shoes off, and lay the pair side by side to record the wear pattern.
- Check the cam shaft's free movement, its axial play, and the roller pockets; inspect the pin and bushings and replace them if needed. If there is a leak at the hub seal, trace and fix the source before fitting new linings.
- Handle the new shoes with clean hands and keep grease, oil, or cleaner off the friction surface; apply only a light film of the approved grease type, and only at the points the manufacturer allows.
- Fit the shoes in the correct orientation and position, install the new springs and retaining hardware, and confirm the pin and roller ends are fully seated.
- Refit the drum, torque the wheel group to the manufacturer's values and sequence, and follow the OE bearing-adjustment procedure where the design calls for one.
- Set brake clearance using the manufacturer's procedure; on an automatic slack adjuster, do not force manual adjustment outside the setup procedure.
- Pressurize the system, check for leaks, return the parking spring to its normal position, and measure and compare chamber stroke across the axle.
- Test the vehicle at low speed: confirm the brake holds evenly, there is no pulling, no dragging noise, and the wheel spins freely once the brake is released.
- Run a controlled break-in drive; avoid repeated hard stops and let light-to-moderate braking bed the surface in gradually.
- Where possible, take an axle-by-axle force reading on a brake tester, and log the job in the vehicle file: the part fitted, drum condition, measured stroke, and mileage.
Maintenance Discipline and Where the Shoe Fits in the Brake Chain
The shoe is the part that shows the result of everything happening in the drum brake system. Force generated on the air side, motion transmitted through the mechanical side, and geometry preserved at the wheel end all converge, in the end, in how the lining presses against the drum. That is why every symptom read off the shoe actually reports on the whole chain, and a sound maintenance program is built around that chain, not around a single part.
The discipline that actually works in the field is simple. Stroke gets measured axle by axle at every scheduled service and logged. Lining thickness is checked through the inspection hole or at teardown, and the two sides of the same axle are compared. Drum surface gets inspected at every shoe change. Hub seals, cam shaft bushings, and springs get gone over every time the drum comes off. Retarder use on downgrades becomes part of driver training. Most important of all, an abnormal wear pattern is never solved by just swapping the part — it is investigated until the cause is found.
One last limit applies to every figure in this guide: two vehicles from the same manufacturer at the same tonnage can call for entirely different clearance, thickness, and torque values simply because they run different axle and brake group combinations. The basis for any decision is always the current OE service documentation matched to the vehicle's chassis and axle code; this text does not replace that documentation — it gives the framework needed to read it correctly.
One factor that accelerates early wear is the condition of the plate that separates the shoe assembly from road dirt; for that part see our brake dust shield guide.
Shop this part: Brake System
Main guide: Disc Brakes vs. Drum Brakes: A Heavy-Duty Vehicle Comparison
Tags
Frequently Asked Questions
- What is a brake shoe, and how is it different from a brake lining?
- A brake shoe is the curved metal body that carries the friction material and presses it against the drum; the lining is the friction material itself, fastened to the outside of that body and consumed as it wears. The shoe is a structural carrier and, as long as its geometry holds up, can be reused through several lining lives, while the lining is a wear item. In the shop the two words often get used interchangeably, so when ordering it helps to say clearly whether a bare shoe, a lining set, or a complete pre-lined shoe assembly is needed.
- How does the shoe move inside a heavy-duty drum brake?
- Pressing the pedal sends air from the brake valve to the chamber, the diaphragm pushes the push rod, the push rod rotates the slack adjuster, the slack adjuster turns the S-cam shaft, and the S-shaped cam at the end of that shaft spreads the rollers at the ends of the shoes outward. The two shoes move apart and seat against the inner face of the drum. Releasing the pedal bleeds off the air, and the return springs pull the shoes back in. The S-cam spreads both shoes by an equal displacement, but the reaction force coming back from the drum is not identical on each side, so a measured wear difference between them is normal.
- Is a riveted lining or a bonded lining better?
- Both have their place — what matters is which one the brake group was designed for. In a riveted joint, the lining can flex slightly between rivet points, so it is more tolerant of drum imperfections and can be relined in a shop, but usable thickness stops at the rivet head. In a bonded joint, the full thickness is usable and pressure spreads more evenly, but the adhesive can weaken under sustained overheating, and bonding cannot be done in the field. Riveted linings remain common on heavy-duty S-cam drum brakes.
- When should a drum brake lining be replaced?
- The decision is made by measurement, not by a calendar. Three checks get used together in the field: thickness measured through the inspection hole or with the drum off, chamber push rod stroke, and the position of the wear indicator where one is fitted. The limit is set by rivet-head depth plus the manufacturer's minimum thickness on a riveted lining, or by minimum thickness alone on a bonded one. A metallic scraping sound, longer pedal travel, pulling to one side, and weaker holding on a grade are warnings that should not be put off.
- Why don't the two brake shoes wear evenly?
- A small difference is built into the design: depending on which way the drum turns, one shoe gets pulled harder into the surface by friction force while the other gets pushed away from it. That measured difference is not a fault. It becomes one when the gap widens noticeably — the usual causes are a binding shoe pin or bushing, a fatigued or broken return spring, a cam roller off its seat, a worn cam shaft bushing, a sticking slack adjuster, or a torn chamber diaphragm. A difference between the two sides of the same axle usually points to a force imbalance on the chamber, valve, or adjustment side instead.
- What does a wear pattern tell you about a fault?
- Tapered wear across the width of the lining means the drum has bell-mouthed or the shoe is seating crooked; wear at the ends with no contact in the middle means the shoe radius is smaller than the drum's; wear in the middle with the ends untouched means the radius is too large, or the body is flexing under load. A shiny, glazed surface points to constant light contact or repeated overheating, heat cracking points to prolonged high temperature, and a dark, oily surface points to a leak from the hub seal.
- Should you reline the shoes or replace them completely?
- If the body's history is known, it has not been overheated or struck, and the shop doing the relining measures and keeps records, relining is a sound choice. Before relining, check the table radius and flatness, the web welds for cracks, the rivet holes for ovaling, the pin and roller bushings, corrosion at the table, and any discoloration from overheating. If the body's history is unknown, it has been run down to the rivet heads, it has scored the drum, or it shows heat discoloration, a complete pre-lined shoe assembly is the safer choice.
- Can a drum be machined, and will a new shoe fit a machined drum properly?
- A drum can be machined up to the maximum bore diameter the manufacturer sets; beyond that, it is scrap. Machining is not free — as wall thickness drops, so does heat capacity and resistance to deformation. Because a machined drum's bore is larger, a standard-radius new shoe will not seat fully at first; contact concentrates at the ends and the seating-in period runs longer. Some applications offer an oversized-thickness lining for this case, and whether it is usable has to be confirmed against the OE specification. Drums are always machined or replaced in pairs on the same axle.
- What other parts should be replaced along with the shoes?
- Once the drum is off, most of the labor is already spent, so putting off the small parts inside just means paying that labor again later. Replace the return and hold-down springs as a set, and inspect the shoe pin, bushings, and retaining hardware, the cam rollers, the S-cam shaft bushings and seals, the drum's bore and mounting face, the hub seal and bearing grease, the slack adjuster's function, and the chamber diaphragm and push rod play.
- Do new brake shoes need a break-in period?
- Yes. Until a new lining has fully seated against the drum, its contact area is smaller than the design value, so pressure and local temperature stay high in that area. A string of hard stops right after installation glazes the surface and cuts its life short from the start. The right approach is a controlled break-in drive with light-to-moderate braking, followed by measuring and comparing chamber stroke axle by axle and, where possible, a brake-tester reading axle by axle. The vehicle's OE service manual is the reference for the exact break-in procedure.
Related Articles
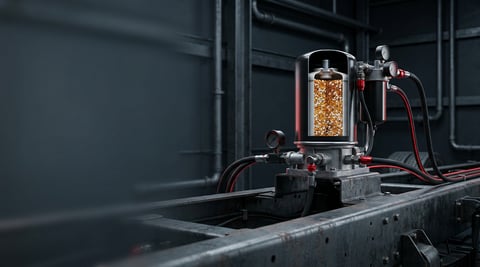
Air Dryer: Faults, Replacement & Maintenance Guide
How a truck air dryer's charge and purge cycle keeps moisture and oil out of the brake system, and what a hissing purge valve or water in the tanks means.
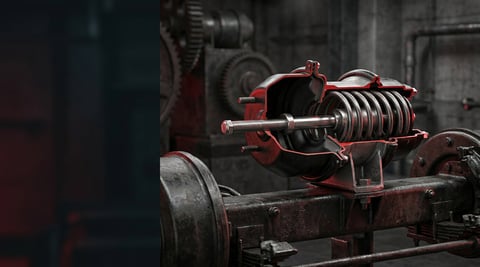
Brake Chamber: Faults, Replacement & Maintenance Guide
Service and spring brake chambers on trucks and trailers: diaphragm-leak and stroke diagnosis, why caging is mandatory before removal, and safe replacement.
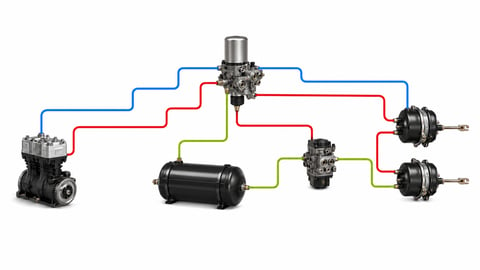
How to Read an Air Brake Diagram: Circuit Guide
How do you read an air brake system diagram? Symbol language, line colours, port codes, circuit split, trailer lines and fault-tracing, step by step.


