When Should Brake Pads Be Replaced? Symptoms and Service Life
Why brake pad life can't be measured in kilometers: warning signs, how to measure wear on disc and drum brakes, and a fleet tracking method.
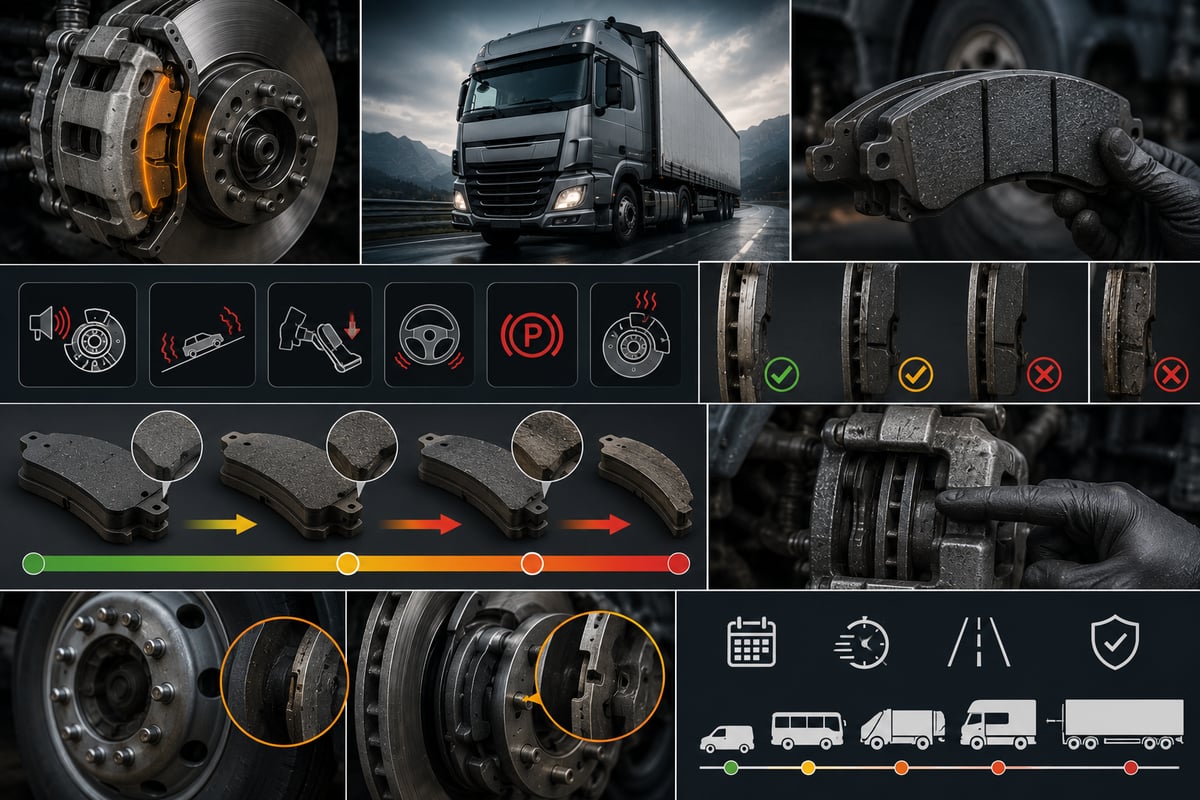
A loaded tractor unit is halfway down a long descent. Every time the driver touches the brake, the pedal sinks a little deeper than the touch before, and a faint smell of hot friction material seeps into the cab. Pulling into a rest area and holding a hand near the rims, one axle is noticeably hotter than the others. The driver already has the sentence ready: "the pads are gone." Once the wheel comes off, though, one side tells a different story than the other: on the very same axle, one wheel's friction material is worn almost down to the backing plate while the opposite side still has plenty of thickness left. The pad being finished is true, but that's only the outcome. The real question is why that pad lasted half as long as its neighbor. This guide covers, at heavy commercial vehicle scale, when a brake pad needs replacing, how wear is measured, how urgent each symptom is, and what actually determines pad life.
Why Do Brake Pads Wear? The Friction Work Behind Every Stop
A brake doesn't generate a force that stops the vehicle on its own; it converts the kinetic energy the vehicle is carrying into heat and releases that heat into the atmosphere. A loaded tractor unit on a long descent, or one making repeated stops back to back, produces a very high heat output, and all of it has to leave through a friction surface measuring only a few hundred square centimeters. The brake pad is the part deliberately sacrificed in this process. It is the consumable that takes on the wear so the disc or drum doesn't have to, absorbs the heat, and tries to keep the friction coefficient stable across a wide temperature range.
In a disc brake, the pad is friction material bonded to a steel backing plate, and the caliper presses this pad against the disc from both sides. In a drum system the same job is done by lining fixed to a shoe body, except the material is pressed against the drum's inner surface from the inside. In both layouts, what gets consumed is the same thing: the thickness of the friction material. Wear itself isn't a fault - it's the outcome the design expects; what counts as a fault is wear progressing faster than expected, unevenly, or without being noticed.
There are two wear mechanisms at work. Mechanical abrasion is the friction surfaces tearing microscopic particles off one another, and it increases with brake pressure. Thermal degradation is the material losing its binder at the surface and turning to dust, and it increases with temperature. On a heavy commercial vehicle, it's usually the second mechanism that actually shortens life the most: one pad from the same set can wear down gradually in stop-and-go city traffic while another loses its surface entirely on a single long descent.
This article focuses on when the friction material runs out, regardless of system type. The relative strengths of disc and drum architectures, and the criteria for choosing between them, are a separate subject; for a comparison, see Disc Brakes vs. Drum Brakes: A Heavy-Duty Vehicle Comparison. What's discussed here isn't which system is better, but when the pad in the system you already have needs replacing.
Why Brake Pad Life Can't Be Measured in Kilometers
The question asked most often in the field is the hardest one to answer: how many kilometers a brake pad lasts. There isn't a single figure to give, not because measuring it is difficult, but because the question itself is framed wrong. A pad doesn't wear out with distance; it wears out with the work the brake is made to do over that distance. Take two identical tractor units with the same brand, the same axle and the same set of pads: if one runs long-haul across flat plains and the other works city distribution or a mountain route, their pad consumption differs by a multiple. In other words, brake pad life is measured in energy spent, not in kilometers.
The variables that determine that energy are well known: the vehicle's instantaneous mass, the speed each brake application starts from, the number of applications per unit distance, the grade and length of descents, and how much the retarder or engine brake is doing the work instead. That's why a loaded run and an empty return on the very same route don't produce the same wear. Adding load increases both the energy that has to be stopped and the pressure on the friction surface, and both effects accelerate wear.
This is also why vehicle manufacturers give a check interval for pads in their service manuals instead of a fixed replacement mileage. The manufacturer can't know exactly when the material will run out, but it can say how often it needs checking. The right approach isn't watching a mileage target; it's taking regular measurements and reading the wear rate out of the vehicle's own data.
For a sense of scale: on a heavy commercial vehicle, pad life sits in roughly the same order of magnitude as tire life on the same vehicle. A tractor unit that runs mostly long-haul can get through several service intervals on one set of pads, while a truck working city distribution or construction-site traffic sees that period shrink considerably. A fixed figure isn't the right reference point - the vehicle's own measurement history is.
The Factors That Shape Brake Pad Wear
Taken one at a time, the factors behind the difference in pad life look minor, but combined with a multiplying effect they push two otherwise identical vehicles onto very different maintenance schedules.
Load and axle distribution. As the mass that has to be stopped grows, so does the energy spent doing it. Just as important as total weight is how the load is distributed across the axles. A load stacked toward the front, or shifted on the semi-trailer, puts a disproportionate share onto that axle's brake, and the pad there wears out early. A semi-trailer running different loading patterns is the most common reason behind unexplained jumps in wear records.
Route profile. A flat, long-haul route is where the brake works the least. Urban distribution generates low-speed but very frequent braking; total energy stays moderate, and mechanical abrasion dominates. A mountain route is the toughest of all: on long descents the friction surface never gets a chance to cool, heat builds up, and thermal degradation takes over. Construction-site and quarry traffic adds abrasive dust on top of all of that.
Driving technique. The difference between two drivers on the same route is often bigger than the difference between two routes. A driving style that keeps a short following distance, doesn't read traffic ahead, and brakes instead of lifting off the accelerator burns through pads quickly. The most damaging habit of all is holding the pedal lightly depressed all the way down a descent - a low but continuous heat input.
Retarder and engine brake use. Auxiliary retarding systems take over a large part of the service brake's job. When the retarder or exhaust brake is used correctly on a long descent, most of the speed control happens without the friction brake ever engaging. A vehicle that isn't using its retarder, or is running with a faulty one, sees a clear jump in pad consumption - and that jump is often misread as "the pads must be low quality."
Pad material and grade. Friction materials balance friction coefficient, thermal stability, wear resistance and how aggressive they are toward the mating surface. A hard, heat-resistant compound gives a longer life but works the disc harder; a softer compound runs quietly but wears out fast. Life alone isn't the criterion to choose by - the grade has to be approved for the vehicle's axle and brake type and suited to how the vehicle is actually used.
Mating surface and environment. A disc full of heat cracks or already close to its thickness limit will chew through a fresh pad quickly; the same is true of a drum that has gone oval. Dust, mud and winter road salt all carry abrasive material onto the friction surface.
| Usage profile | Dominant wear mechanism | Result seen in operation |
|---|---|---|
| Long-haul, flat route | Low-intensity mechanical abrasion | Longest life, steady and predictable wear |
| Urban distribution, many stops | High-frequency mechanical abrasion | Life shortens noticeably, front axle wears first |
| Mountain and long-descent routes | Thermal degradation and surface loss | Sudden drop in life, heat cracking and fade risk |
| Construction site, quarry, unpaved ground | Abrasive particles and scouring | Short life, grooving on the mating surface |
| Retarder disabled or unused | Energy piled onto the service brake | Accelerated consumption across every axle |
Warning Signs That Show It's Time to Replace Brake Pads
The right way to decide on a pad replacement is measurement, but a driver is often forced to decide from the signs the vehicle gives, without a way to measure. Knowing the signs matters, but knowing how much time each one buys you matters just as much.
A metallic scraping or grinding sound is the symptom noticed latest and the most expensive one; the friction material is likely already gone, and the backing plate or rivet head has started touching the mating surface. At this point the question is no longer the pad, but whether the disc or drum can still be saved. A high-pitched squeal is different: it can also come from surface glazing, moisture or contamination, so on its own it isn't conclusive, but it does call for an inspection.
A change in pedal behavior is the second group of symptoms. On an air brake system, a lengthening brake chamber pushrod stroke is a reliable indirect indicator of wear. The automatic slack adjuster compensates for that lengthening; once it reaches the limit of that compensation, or if the slack adjuster isn't doing its job, brake response is delayed.
The vehicle pulling to one side under braking usually doesn't mean the pad is finished - it means there's an imbalance between the two sides. A single wheel overheating belongs to the same family and is one of the earliest signs of a mechanism that's sticking. A wear warning on the instrument cluster is an unambiguous signal, but it's a final call, not a planning tool.
| Symptom | Urgency | What to do |
|---|---|---|
| Metallic scraping or grinding sound from the brakes | Very urgent, do not continue driving | Stop the vehicle at a safe point; pad, disc and drum are assessed together |
| Pad-wear warning on the instrument cluster | Urgent, a short distance can be planned | Measure at the first opportunity; both sides of the same axle are replaced together |
| Pronounced pull to one side under braking | Urgent | Measure both sides separately; check caliper, slack adjuster and chamber travel |
| One wheel overheating, smell of burning | Urgent | Strip that wheel's mechanism and inspect it for sticking |
| Lengthening brake chamber pushrod stroke | High | Confirm the slack adjuster is doing its job, then measure pad thickness |
| Vibration under braking and steering wheel oscillation | Medium | Measure disc thickness variation and runout, inspect the pad surface |
| Friction material that looks thin by eye | Medium | Remove the wheel, measure at the thinnest point, calculate remaining life |
| High-pitched squeal or chirping noise | Medium | Rule out surface glazing, contamination and moisture; inspect the pad if it persists |
| Visible thickness difference between the two sides of the same axle | Monitor | Log the difference, clean and lubricate the mechanism, recheck at the next inspection |
How Is Brake Pad Thickness Measured on Disc Brakes?
The first rule of measurement is knowing exactly what's being measured. The most common mistake in the field is measuring the steel backing plate together with the friction material and assuming there's more remaining life than there actually is. The figure that matters is the thickness of the friction material alone; the backing plate is never included in that measurement, and the manufacturer's minimum value applies only to the friction material.
Most calipers have an inspection window that lets you check without removing the wheel. That window is enough for a quick first look, but a final decision needs the wheel off, because a pad rarely wears down evenly - it more often wears wedge-shaped, and the area visible through the window may not be the thinnest area. The decision is always made from the measurement taken at the thinnest point.
Each wheel on a disc brake carries two pads: the inner pad on the piston side and the outer pad on the opposite side. Both must be measured separately. A pronounced difference between them shows that the caliper isn't sliding freely on its carrier - in other words, the guide pins are seized - and that's a mechanical fault that has to be resolved before the pads are even considered.
Many pads carry a wear indicator groove or guide notch on the side face or along the edge of the backing plate; once the material wears down to that line, the minimum limit is close. The groove is a useful quick indicator, but it isn't the absolute limit - the manufacturer's minimum thickness value is still the final criterion.
The condition of the surface should be logged during measurement as well: if there's glazing, discoloration from heat, cracking or chipping at the edge, the pad may not be doing its job fully even where thickness is still adequate. It's also worth confirming by hand that the pad moves freely in the caliper's carrier - a pad seized in place by corrosion won't retract properly after a brake application.
How Is Brake Shoe and Lining Wear Assessed on Drum Brakes?
Measurement on a drum system is more indirect, because the friction surface is enclosed. For that reason, three methods are used together: observation through the inspection hole on the backing plate, measuring the brake chamber pushrod stroke, and a direct thickness measurement once the drum is removed.
On designs where the lining is riveted to the shoe, the limit is the friction material wearing down to rivet-head level; a rivet head touching the drum both damages the surface and reduces braking force. Bonded lining has no such reference, so the manufacturer's minimum thickness value is used instead. In both cases the ends of the shoe and its center wear differently, so the measurement is taken from the thinnest point.
Pushrod stroke is the most practical wear indicator on a drum-braked vehicle. As the lining thins, the shoe needs more travel to reach the drum, and the automatic slack adjuster compensates for that. If the stroke value falls outside the manufacturer's range, either the lining has reached its limit or the slack adjuster isn't doing its job - and telling the two apart matters, because fitting new lining on a vehicle where the slack adjuster isn't working brings the problem straight back.
Once the drum is off, the shoe body, return springs, rollers, S-cam bushings and pin bearings are inspected along with the lining. For rivet-versus-bonded differences and what to watch for when replacing a shoe, see the What Is a Brake Shoe? Drum Brake Lining Wear and Replacement guide.
What the Wear Sensor and Dashboard Warning Do and Don't Tell You
Wear sensors come in two main architectures. A contact-type sensor completes or breaks a circuit through a conductor that's exposed once the pad reaches a certain thickness; it gives binary information - it says "the limit has been reached," nothing more. A continuous-measurement sensor reports remaining thickness proportionally through a change in resistance, and the vehicle electronics can turn that into a graduated warning.
It's just as important to know what a sensor doesn't tell you. Sensors are usually fitted at selected points, not on every wheel; a reading from one wheel doesn't represent the condition of another, and on a vehicle wearing unevenly, the side without a sensor can cross the limit while the warning light never comes on. On top of that, the sensor cable runs through an area exposed to stone chips, chafing and road-salt corrosion; a broken cable can trigger a warning while the pad is still fine, and a pinched cable may fail to warn even at the limit.
The right way to use a sensor is as a safety net, with planning based on actual measurement instead. By the time the warning light comes on, the window for planning has already closed.
Standards and further reading
This subject is governed by the equipment rules for air-braked commercial vehicles. In the United States the federal air brake standard, FMVSS 121 (49 CFR 571.121) defines the reservoirs, protection and timing a compliant system must provide, and Europe applies the equivalent limits of UNECE Regulation No. 13. For further detail, see the illustrated reference guide at airbrakecompressor.com. Always confirm specific figures against the current regulation and the vehicle manufacturer service data.
Outside the United States the equivalent duties sit in national law. In the United Kingdom, regulation 18 of the Road Vehicles (Construction and Use) Regulations 1986 requires every part of the braking system to be maintained in good working order. In Canada, air brake systems fall under the Motor Vehicle Safety Regulations, which contain CMVSS 121.
Brake Pads Are Never Judged Alone: Deciding Together With the Disc or Drum
There's no rule that says a new pad will do its job no matter what condition the mating surface is in. The friction pair is a single system; if one component is at its limit, it wears the other out early too. That's why a pad replacement decision is always made together with a disc or drum measurement.
On a disc, three quantities are checked. Thickness: a disc below minimum thickness can't be used, because its heat-absorption capacity has dropped and the risk of cracking has gone up; this value is usually stamped on the disc hub. Thickness variation: a difference in thickness measured around the circumference produces vibration at the pedal. Runout: axial wobble in the disc causes the pad to be pushed back with every rotation and produces uneven wear. On top of these, there are heat cracks on the surface; fine, web-like cracking is acceptable up to a point, while deep radial cracks running from the outer edge toward the center scrap the disc.
On a drum, inner diameter is measured; it grows as the drum wears, and a drum beyond the maximum value is replaced. Ovality, stepping on the inner surface, deep grooving and cracks are all equally valid grounds for scrapping. Measurements need to be taken along axes perpendicular to each other - a single-point measurement hides ovality.
| Part | What is measured | Decision criterion |
|---|---|---|
| Disc brake pad | Friction material thickness, at the thinnest point | Manufacturer's minimum thickness; the backing plate is not included in the measurement |
| Brake disc | Thickness, circumferential thickness variation, axial runout | A disc below minimum thickness or beyond the runout limit is replaced |
| Brake disc surface | Heat-crack pattern, grooving, discoloration | Deepening radial cracks and deep grooves are grounds for scrapping |
| Drum brake lining, riveted | Distance remaining between the material and the rivet head | Replaced before the material reaches rivet-head level |
| Brake drum | Inner diameter, ovality, stepping | A drum beyond maximum inner diameter, that has gone oval, or that has cracked is replaced |
| Brake chamber pushrod | Difference between released and applied stroke | If outside the manufacturer's range, adjustment and wear are investigated |
| Caliper guide pins | Free sliding movement and boot integrity | Seizing or a torn boot is repaired before the pads |
Causes of Premature Wear: Mechanical and Operational
A pad that wears out much earlier than expected should be questioned mechanically before it's blamed on driving style. Most premature wear traces back to the brake failing to release when it should.
A seized caliper mechanism is the most common cause. Guide pins seizing from corrosion or degraded lubrication, boots tearing and letting in water and dust, or the piston failing to retract, all leave the pad riding against the surface continuously. The result is the vehicle braking the whole time without meaning to, that wheel overheating, and rapid consumption on that side. For checks, service and lubrication procedure, and repair limits on the caliper, see the Air Disc Brake Caliper: Faults, Replacement & Maintenance Guide.
An automatic slack adjuster that isn't doing its job is the drum-brake equivalent. When the slack adjuster isn't working correctly, the shoe either stays in constant contact or engages too late; in the first case the pad wears out early, in the second that wheel doesn't take its share of the braking and the load shifts onto the other axles. Either way, premature wear shows up somewhere.
Brake imbalance is especially decisive in a tractor-and-trailer combination. A semi-trailer that brakes earlier or harder than the tractor piles a disproportionate share of the work onto the trailer; coupling vehicles of different ages or different settings can cause the trailer's pads to wear out several times faster than the tractor's. This is a brake-force distribution problem, not a pad quality problem.
Constant light braking is one of the leading operational causes; the surface never gets a chance to cool, and the material degrades thermally. The same effect occurs when a vehicle moves off before the parking brake has fully released. The wrong pad grade and overloading round out the picture; a vehicle loaded beyond the legal limit puts the brake system to work with energy the design never accounted for, and the pad is the first thing to pay for it.
| Wear pattern | Likely cause | How to verify |
|---|---|---|
| Inner pad much thinner than the outer pad on the same wheel | Guide pins seized, caliper can't slide | Move the caliper by hand; check boots and pin lubrication |
| One side of an axle worn out, the other side sound | Mechanism on the worn side not releasing, or misadjustment | Compare wheel temperatures; strip and inspect the mechanism |
| Pad worn wedge-shaped, one end thinner than the other | Sticking in the pad bed, deformation in the caliper bridge | Clean the bed and check the pad's free movement |
| Fast, simultaneous consumption across every axle | Retarder disabled, route or driving style changed | Test retarder function; compare trip and route logs |
| Trailer pads wearing many times faster than the tractor's | Brake force imbalance in the combination | Inspect brake force distribution and settings on the system side |
| Deep grooving appearing early on new pads | Mating surface out of limits, or abrasive contamination | Measure the disc or drum; check surrounding seals |
What Does One-Sided Wear on a Single Axle Tell You?
Reading the wear pattern is the fastest way to know where to look for the fault. The general rule is this: symmetric wear points to operation, asymmetric wear points to a mechanism. Consumption that accelerates together across every wheel points to route, load and driving style, while consumption concentrated on one side points to that wheel's own mechanism.
A pronounced difference between the left and right side of the same axle shows that the caliper on that side isn't sliding, that the piston isn't retracting, or that the slack adjuster is misbehaving. The vehicle pulling to that side under braking confirms it. If the difference is small and only the inner pad is affected, the cause is usually the guide pins, and it can be resolved at the wheel.
A large difference between the front and rear axles points more toward brake force distribution than toward a mechanism; load distribution, axle pressure settings and the share taken by the electronic brake control are decisive here. A large difference between the tractor and the trailer points to a combination that's out of balance. A cross pattern - the right side wearing faster on one axle and the left side on another - usually points to an asymmetry rooted in the chassis or in loading; in that case, the vehicle's laden axle weights should be measured.
Parts Replaced or Checked Alongside the Brake Pads
A pad replacement isn't a job done in isolation. Handling the friction pair and the mechanism carrying it at the same time is what makes sure the new pad actually delivers its expected life.
- Both sides of the same axle together: Pads are never replaced on a single wheel; a one-sided change creates a friction mismatch and the vehicle pulls under braking.
- Disc or drum measurement: New pads are never fitted without measuring the mating surface; a pad fitted onto a surface beyond limits wears out quickly.
- Caliper guide pins and boots: Free sliding movement of the pins is confirmed, any torn boot is replaced, and the mechanism is lubricated with the grease type the manufacturer specifies.
- Wear sensor and its cable: A sensor that has reached its limit or already made contact is renewed; the cable's routing is checked for chafing.
- Springs, rollers and bushings on the drum side: A fatigued return spring won't pull the shoe back. S-cam bushings and pin bearings are assessed at the same time.
- Automatic slack adjuster: A slack adjuster that isn't doing its job will bring the same problem straight back with the new pads; its function has to be confirmed.
- Fasteners and torque: Pad retaining springs, pins, clips and caliper bolts are tightened to the manufacturer's value and sequence; single-use fasteners are renewed.
- Cleaning: Pad beds are cleared of soot, rust and old material residue. A new pad seized in its own bed is the fastest-wearing pad there is.
How to Replace Truck Brake Pads on an Air Disc Brake: Step-by-Step Workshop Sequence
Everything up to this point has been about deciding when a pad needs to change. What comes after that decision is workshop work, and it depends on sequence: get the order wrong and the new pad either binds in its bed or starts rubbing the disc within the first few kilometers. The sequence below is a general framework for an air disc brake. The exact strip-down order, where the adjuster shaft sits, and which direction it turns all vary by caliper family; torque and running-clearance figures aren't given here either, because those come from the caliper manufacturer's current service instructions. The work is always done on both sides of the same axle together.
- Park the vehicle on level ground and chock the wheels of the axle that will stay on the ground, in both directions. The adjuster mechanism can't be wound back while the caliper is still under spring-brake force, so the wheel being worked on has to be free of brake force first; on an axle with a spring brake chamber, release the park brake the way the manufacturer specifies - with air, or with the chamber's mechanical release (caging) bolt. Once the park brake is released, the chocks are what's actually holding the vehicle in place.
- Lift the axle at the manufacturer's specified jacking point, support it on a stand of adequate capacity, then remove the wheel. If the disc and caliper have just come off heavy use, let them cool first - a hot part is a burn risk, and any measurement taken while it's hot will be misleading.
- Disconnect the wear sensor and pull it out of its bore. Note the cable's routing and where it's clipped; a cable that isn't put back on the same path can rub against the disc or the inside of the wheel.
- Remove the safety pin or clip that secures the pad retainer bridge, then lift off the bridge and the pad retaining spring. The bridge sits under spring tension, so press it down and release it under control - don't let it fly loose.
- Wind back the adjuster mechanism. On most calipers this means removing a protective cap over the adjuster shaft and turning the shaft by hand, in the direction the manufacturer specifies, with the correct star bit or socket, until the pistons sit at their innermost position. Don't do this with an impact gun - a sudden impact damages the adjuster's gear and clutch. If the shaft won't turn with normal hand effort, don't force it; pull the caliper and inspect it instead.
- Take the pads out of their bed. Getting the outer pad out may require sliding the caliper body outward on its guide pins; if the caliper doesn't slide by hand at this point, that's the first sign the pins have seized. On designs that use a pad plate, note which face was against the pad.
- With the pads out, the disc and caliper are both exposed. Measure the disc at its thinnest point and check for thickness variation and heat cracks; confirm by hand that the caliper slides freely on its pins, and check the guide-pin boots and the piston dust boots for tears or hardening. The criteria for both are covered in the disc and premature-wear sections above. If a boot is torn or a pin has seized, that repair is done with a caliper rubber and repair kit before the new pads go in; a disc beyond its limit doesn't get new pads fitted to it either.
- Clean the pad bed and the retainer's contact surfaces of rust and brake dust. Don't blow brake dust out with compressed air; vacuum it or use a wet method. A new pad should seat into its bed by hand, without forcing; if it won't, either the bed is still dirty or the part is wrong.
- Fit the new pads, with their plates if the design uses them, in the correct orientation. Apply grease only to the contact points the manufacturer permits; no oil or grease should reach the pad's friction surface or the disc. Replace a wear sensor that's at its limit or has already made contact, and secure its cable along the original route.
- Refit the pad retaining spring and the bridge, tighten the fastener to the manufacturer's torque, and fit the safety pin or clip. Use the new pin and clip supplied with the pad kit; a part the manufacturer treats as single-use isn't reused.
- Set the running clearance. Turn the adjuster shaft the other way by hand until the pads touch the disc, then back it off by the amount the manufacturer specifies; apply the brake a few times afterward and let the automatic adjuster settle the clearance in. Once clearance is confirmed by the manufacturer's method, refit the adjuster shaft's protective cap - a missing cap lets water and dirt into the shaft.
- Fit the wheel and tighten the lug nuts to the manufacturer's torque, in a cross pattern; if the manufacturer calls for it, re-torque after a short drive. If the spring brake chamber was mechanically caged, don't move the vehicle until that mechanism has been returned to its working position. Run the brake test and the bedding-in procedure in the sequence covered in the bedding-in section below.
Two steps in this sequence show their mistakes immediately in the new pad: winding back the adjuster mechanism and setting the running clearance. A caliper handed back without clearance set either drags constantly on the disc or engages late. In the first case that wheel overheats and burns through its pad set early; in the second it doesn't take its share of braking and the load shifts to the other wheels. Removing and servicing the caliper is covered in the air disc brake caliper guide, replacing the bridge and pad plate in the caliper pad retainer and pad plate guide, and measuring and replacing the sensor in the brake pad wear sensor guide.
Bedding-In After Replacement: Why New Pads Don't Deliver Full Power Right Away
A new pad doesn't make full contact with the mating surface right from the start. The pad surface is flat, but the disc or drum surface carries its own working pattern; the actual contact area at the outset is only a small portion of the area the design intended. Bedding-in, known on the ground as breaking the pads in, is the process where the two surfaces settle into each other and a stable friction layer forms on the pad surface; until it's complete, the vehicle's braking performance sits below what's expected.
The second purpose of bedding-in is the controlled maturing of the binder in the friction material. If the first few kilometers see very hard, repeated braking, the surface overheats and the film that forms on it reduces friction. Proper bedding-in means building up heat gradually and allowing cooling time in between.
- Once the replacement is complete, apply the brake pedal several times with the vehicle stationary so the mechanism seats and system pressure returns to normal.
- Check that the wheel turns freely; if there's any dragging, find the cause before taking the vehicle onto the road.
- Make the first move at low speed in an open area; confirm brake response with light applications and watch for pulling to one side.
- Use only light-to-moderate braking for the first kilometers, and avoid hard or prolonged stops except in an emergency.
- Leave enough distance between brake applications for the surface to cool; braking repeatedly in quick succession is bedding-in's biggest enemy.
- Postpone long, steep descents until bedding-in is complete wherever possible; if a descent can't be avoided, prioritize the retarder or engine brake.
- Once the manufacturer's bedding-in distance is complete, remove the wheel and visually confirm the pad has seated fully against the mating surface; the contact mark should cover the full area.
- If the contact mark is only partial, re-examine caliper movement, the pad bed, and the flatness of the mating surface.
- At the first post-bedding-in check, take a thickness measurement and record it as the baseline for that vehicle's wear tracking.
A Wear-Tracking Method for Fleets: Turning Measurement Into a System
A visual check may be enough for a single vehicle; at fleet scale, though, knowing in advance when a pad will run out turns an unplanned stop into planned maintenance. This doesn't take complicated software - all it takes is measuring and recording the same way on every vehicle.
- Standardize the measurement points for every vehicle. Put in writing which wheel, which pad and which spot gets measured; if different technicians measure different spots, the records can't be compared.
- Take a baseline measurement when a vehicle enters the fleet, or right after a pad replacement, and log it together with the odometer reading; this value becomes that vehicle's reference point.
- Measure every wheel at each scheduled service; record values in millimeters, together with wheel position and that day's mileage. A visual note like "fine" or "getting low" doesn't count as a record.
- Divide the thickness lost between two measurements by the distance covered over that interval to get the wear rate, usually expressed in millimeters per ten thousand kilometers.
- Subtract the manufacturer's minimum thickness from the remaining thickness and divide by the wear rate to forecast remaining life in distance. As long as the route hasn't changed, this forecast holds up well in practice.
- Group vehicles by route profile; evaluate long-haul, urban distribution and mountain routes separately. Comparing wear rates across different profiles is misleading.
- Flag vehicles that deviate noticeably from their group average. The deviation can come from driving style just as easily as from a mechanical fault; to tell them apart, look at that vehicle's wheel-by-wheel values.
- Track the difference between wheels on the same vehicle as well; one wheel consuming pad faster than the others is grounds for a mechanical inspection regardless of what the remaining-life calculation says.
- Slot the forecast replacement into the planned maintenance calendar, and combine it with a tire or oil service whenever possible so it doesn't create a second, separate vehicle downtime.
- When a replacement is carried out, log the grade, date and mileage of the pad fitted in the vehicle's file, take a new baseline measurement, and restart the cycle.
Driving and Maintenance Habits That Extend Brake Pad Life
Brake pad life is mostly a result of day-to-day operating habits, not the purchasing decision. The items below cost nothing extra - they just take discipline.
- Use the retarder first: On a long descent, speed control is handled primarily by the retarder or engine brake; the service brake is kept in reserve for the final adjustment and the stop itself.
- The right gear on a descent: Select the appropriate gear before starting down a grade. Descending in too high a gear and riding the brake continuously is the fastest way to burn through a set of pads.
- Avoid constant light braking: Instead of holding the pedal lightly down, make short, deliberate brake applications and allow cooling time between them.
- Following distance and anticipatory driving: Reading traffic ahead of time directly reduces the number of brake applications; this is where the biggest driver-dependent difference comes from.
- Loading discipline: Distributing the load evenly across the axles and staying within legal limits keeps the braking share carried the way it was designed to be.
- Mechanism maintenance: Guide-pin lubrication, boot integrity and slack-adjuster function are verified periodically; most premature wear traces back to these three items.
- Measurement records: Keep a record in millimeters at every inspection; a life forecast only means something once it rests on that record.
A brake pad is one of a vehicle's most predictable consumables, and yet it's one of the parts most often managed by guesswork. In reality, a pad tells you exactly when it will run out: its thickness is measured, its wear rate is calculated, and the remaining distance is forecast. Once those three steps are followed, a pad replacement stops being a surprise and becomes just another ordinary line on the maintenance plan. And every pad that wears out earlier than expected is, in effect, a fault report - it's telling you about a seized caliper, a slack adjuster that isn't doing its job, or a brake balance that's out of order. In every case, the current OE service documentation for that vehicle's chassis and axle code remains binding.
Friction material faces different working conditions in disc and drum layouts; how the two systems differ in maintenance and operation is covered in our disc brakes versus drum brakes comparison.
Wear is now on the agenda not only as component life but also as the particles it releases; we look at that in our article on EURO7 and brake dust emissions.
Shop this part: Brake Lining
Tags
Frequently Asked Questions
- How Long Is Brake Pad Life in Kilometers?
- Giving a single mileage figure wouldn't be accurate, because brake pad life isn't set by distance - it's set by the work the brake is made to do over that distance. Two identical vehicles, same brand, same axle, same set of pads, can end up with completely different service lives: a tractor unit running flat, long-haul routes versus the same vehicle working a route full of climbs and descents will differ by a multiple. Load, route grade, how often the vehicle stops, retarder use and mechanical condition all combine to determine life. The right approach isn't counting kilometers - it's measuring thickness regularly and working out the wear rate for your own fleet.
- What Signs Show That Brake Pads Need Replacing?
- Knowing the signs matters, but knowing how much time each one buys you matters just as much. A metallic scraping or grinding sound is the symptom noticed latest and the one that gives you the least time; by the time it appears, the friction material has most likely already run out and the backing plate has started touching the mating surface. Earlier warnings include a change in pedal or air-pressure behavior, longer stopping distances, the vehicle pulling to one side under braking, and a wear warning on the instrument cluster. None of these signs replace an actual measurement - the decision is always made from thickness.
- How Is Brake Pad Thickness Measured on Disc Brakes?
- The first rule of measurement is knowing exactly what's being measured. The most common mistake in the field is measuring the steel backing plate together with the friction material and assuming there's more remaining life than there actually is. The figure that matters is the thickness of the friction material alone; the backing plate is never included in that measurement. The measurement is taken at the pad's most worn point, because the decisive value is the lowest thickness, not the average. The limit value varies by vehicle and brake manufacturer, so the current service manual is what governs it.
- How Is Brake Pad Wear Assessed on Drum Brakes?
- Because the friction surface is enclosed in a drum system, measurement is more indirect, and three methods are used together: observation through the inspection hole on the backing plate, measuring the brake chamber pushrod stroke, and a direct thickness measurement once the drum is removed. On designs where the lining is riveted to the shoe, how deep the rivet head sits below the surface is also checked; a rivet head getting close to the surface means it's about to score the drum. The stroke measurement also shows whether the automatic slack adjuster is doing its job.
- Does a Wear Sensor Warning Mean the Pads Are Finished?
- What the sensor tells you depends on its type. A contact-type sensor gives binary information: it completes or breaks a circuit once the pad reaches a certain thickness, so all it tells you is that the limit has been reached - it says nothing about remaining life. A continuous-measurement sensor reports remaining thickness proportionally through a change in resistance, giving room to plan ahead. Either way, the sensor only measures the single point it's mounted at - it doesn't see uneven wear, one-sided wear, or the disc's condition. That's why no warning doesn't mean the pad is fine.
- Should the Disc or Drum Be Replaced Along With the Pads?
- The decision is always made with both measured together. The friction pair is a single system; if one component is at its limit, it wears the other out early too. There's no rule that says a new pad will do its job regardless of the mating surface's condition. On a disc, thickness, surface condition and runout are all assessed together; on a drum, inner diameter and surface integrity are checked. A new pad fitted onto a surface that's already at its limit, or scored deeply, won't deliver the expected life and will reduce braking performance as well.
- Why Do Brake Pads Wear Out Earlier Than Expected?
- Premature wear should be questioned mechanically before it's blamed on driving style. Most of it comes from the brake failing to release fully when it should. The most common cause is a seized caliper mechanism: corrosion on the guide pins or a degraded boot stops the piston from retracting, and the pad stays in constant light contact with the surface. A slack adjuster that isn't working correctly, a wheel that won't turn freely, a restricted air line, and an uneven brake force split between axles all produce the same result. Replacing the pad without finding these causes just brings the problem straight back.
- What Does Fast Wear on One Side Indicate?
- The general rule is this: symmetric wear points to operation, asymmetric wear points to a mechanism. Consumption that accelerates together across every wheel points to route, load and driving style. Consumption concentrated on one side, though, tells you there's a problem in that wheel's own mechanism: a seized caliper, a guide pin that won't slide, a faulty slack adjuster, or an air-pressure imbalance reaching that side. Reading the wear pattern is the fastest way to know exactly where to look for the fault.
- Why Don't New Brake Pads Deliver Full Stopping Power Right Away?
- A new pad doesn't make full contact with the mating surface right from the start. The pad surface is flat, while the disc or drum carries its own working pattern; the actual contact area at the outset is only a small portion of the intended area. Bedding-in, known on the ground as breaking the pads in, is the process where the two surfaces settle into each other and a stable friction layer forms on the pad. Until that process is complete, stopping distance can run somewhat longer. Avoiding hard, prolonged braking during the bedding-in period lets the surfaces seat properly and lets the pad deliver its expected life.
- How Do Fleets Track Brake Pad Wear?
- At fleet scale, the goal is knowing in advance when a pad will run out so an unplanned stop turns into planned maintenance, and none of that takes complicated software. All it takes is measuring and recording the same way on every vehicle: measurement points are fixed for each vehicle, measurement is repeated at the same interval, and thickness values are logged per vehicle. Looking at the difference between two measurements against the distance covered gives each vehicle's own wear rate. That rate produces a realistic replacement date for that specific vehicle, and it's far more accurate than a general mileage assumption.
Related Articles
Air Dryer: Faults, Replacement & Maintenance Guide
How a truck air dryer's charge and purge cycle keeps moisture and oil out of the brake system, and what a hissing purge valve or water in the tanks means.
Brake Chamber: Faults, Replacement & Maintenance Guide
Service and spring brake chambers on trucks and trailers: diaphragm-leak and stroke diagnosis, why caging is mandatory before removal, and safe replacement.
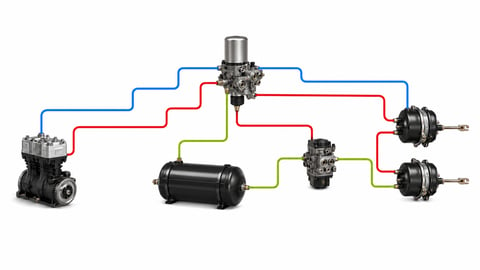
How to Read an Air Brake Diagram: Circuit Guide
How do you read an air brake system diagram? Symbol language, line colours, port codes, circuit split, trailer lines and fault-tracing, step by step.


