Air Brake Chamber Explained: Types, Sizes, Failure Symptoms & Replacement
Truck and trailer inspection reports rarely say the brake chamber is defective; they report brake force imbalance. Chamber types, sizes, symptoms and replacement.
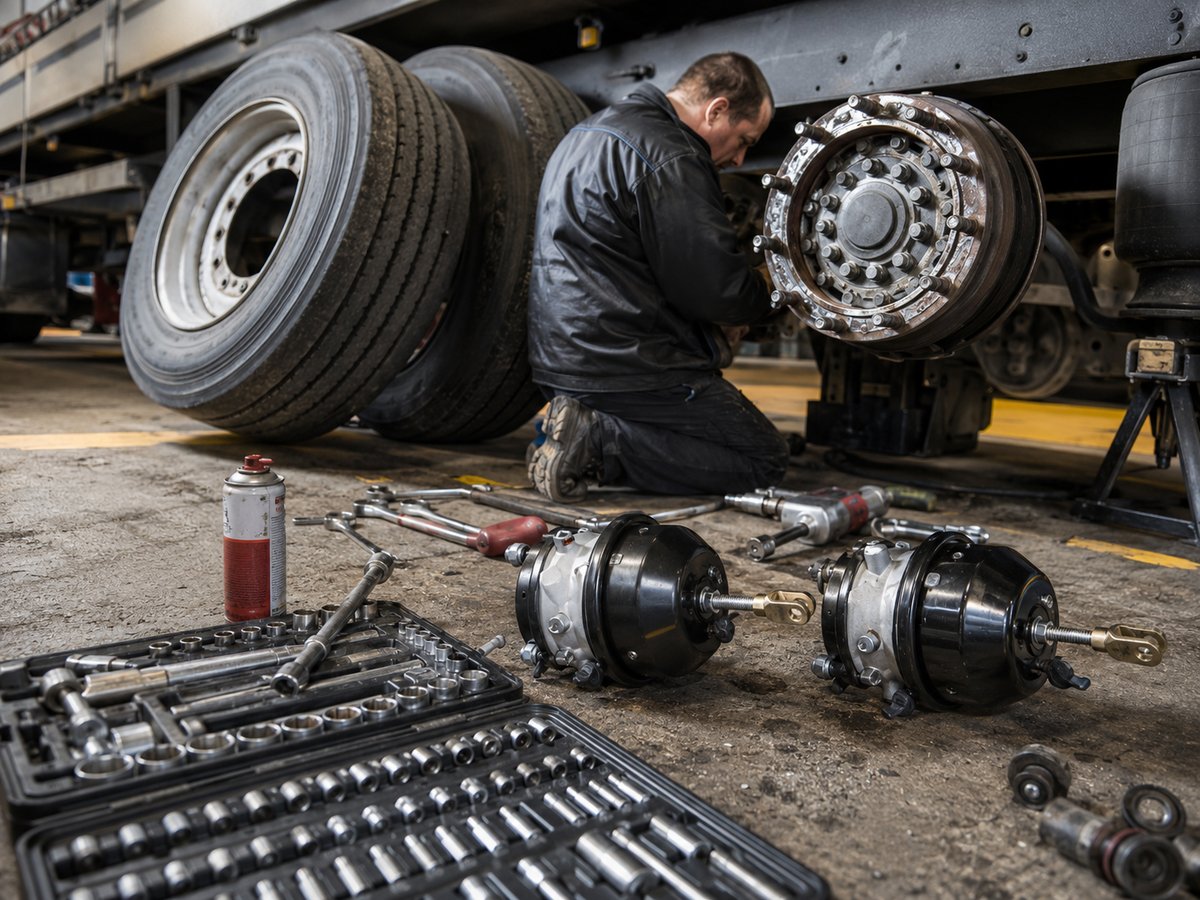
An inspection report almost never contains a line that says "brake chamber defective". What it does contain are phrases such as "brake force imbalance across the axle", "air leak detected", "insufficient parking brake performance" or "brake adjustment out of limits". Those sentences are what bring the vehicle back to the workshop; deciding which component is responsible is not the inspection station's job but the service technician's and the fleet manager's. The decision window is narrow, too: within the same day you have to confirm that the finding really originates from the chamber, and then decide whether the chamber gets replaced as a complete unit or whether a repair kit is enough.
This article focuses on two questions: which findings are written into the report when a vehicle fails a periodic inspection or a brake test because of a brake chamber, and once those findings have been read, whether a repair kit or a complete unit replacement is the correct call. In the field these two get mixed up, because the report describes a symptom while the workshop talks about a part. If the translation between the two is done badly, the result is either unnecessary cost or a fault that keeps coming back.
This page is a decision guide. The meaning of the type and size markings, applied stroke measurement and the step-by-step replacement procedure are not the subject of this article; each is covered in a sibling guide and linked from the relevant section. Only one thread is followed here: what the report says, what it means, repair or replace.
Failing an inspection because of a brake chamber: which findings end up in the report?
During a periodic inspection the brake side is assessed in three layers: visual check, leak check and measurement on a brake tester. The chamber is one of the few components that can touch all three layers at once; housing damage is visible to the eye, a diaphragm leak shows up as a leak, and weakness in force generation appears on the test graph. That is why the same physical defect can appear in the report in three different wordings.
Findings are classified by severity. In common practice, minor defects are recorded but do not stop the vehicle from passing; major defects cause a fail and require a re-test once the item has been rectified; defects that directly threaten safety mean the vehicle must not be driven in that condition. Because category names and thresholds vary with local regulations, it is more useful to look at the content of the finding than to memorise the category label.
What the chamber-related findings have in common is that almost all of them are indirect. The report does not say "diaphragm torn"; it says "air leak in the brake system". It does not say "wrong chamber size fitted"; it says "brake force difference across the axle". The workshop's job is to translate that indirect wording into a mechanical cause and then confirm that cause. Replacing a part without confirmation ends with the same line being written again at the re-test, because other causes can produce the same finding.
The table below shows frequently encountered observations together with the typical wording they receive in the report and their weight in the decision; it is not a claim of certainty but a translation key for reading the finding.
| Observation at the inspection | Typical wording written into the report | Weight in the decision |
|---|---|---|
| Continuous hiss of air while the brake is applied, bubbles forming with soapy water | Air leak in the brake system | High; if the source of the leak is the chamber housing, the unit decision is on the table immediately |
| Dents, cracks, impact marks or corrosion deep enough to lift layers of the housing | Damage or deformation of the brake actuator | High; usually requires complete replacement |
| Blistering rust around the clamp band, signs of separation along the band line | Corrosion on brake actuator fasteners | Medium to high; the sealing face becomes suspect |
| Mounting bolts loose, missing, or the locking device broken | Brake actuator not properly secured | High; also assessed separately as an installation fault |
| Clear force difference between left and right on the brake tester | Brake force imbalance across the axle | High; the chamber may be the cause but the line alone does not point to it |
| Insufficient force when the parking brake is applied, or delayed release | Insufficient parking brake performance | High; on a spring brake unit this usually ends in complete replacement |
| Push rod applied stroke outside the permitted limit | Brake adjustment out of limits | Medium; adjustment and the mechanical chain are ruled out first |
| Drain hole blocked or not positioned at the lowest point | May not be written as a finding in its own right | Low; but it is the explanatory cause behind corrosion findings |
The striking point in the table is this: most of the findings never name the chamber. So when the report reaches you, the first task is to list the mechanical chains that could have produced that wording. A line reading "imbalance across the axle", for example, can also be produced by linings, drums, the slack adjuster, the camshaft or a valve. That chain has to be eliminated before the chamber is blamed; otherwise the newly fitted unit collects the same report a second time.
No numerical pass or fail threshold is given in this article. Acceptance limits, imbalance ratios, stroke limits and leak criteria vary with regulation and vehicle type; the current criteria of the authorised inspection station and of the vehicle manufacturer are what count. For torque, pressure and tolerance values the vehicle manufacturer's current service manual is likewise authoritative. Do not treat fixed numbers circulating online as acceptance criteria.
How chamber-related findings look on a brake tester: imbalance and delayed response
A roller brake tester assesses the vehicle axle by axle: the wheels are driven while the brake is applied progressively, and the force at each wheel is recorded separately. The trace of chamber-related problems on that graph is read in three ways: the force difference between the two sides, force that does not rise as expected, and force that decays late once the brake is released.
The first trace is imbalance. If the unit on one side produces less thrust at the same air pressure, the braking force at that wheel lags behind its neighbour. A fatigued diaphragm, deformation inside the housing or a weakened return spring can produce that difference. If the gap grows far enough, it is written into the report as imbalance. To avoid a common trap, remember this: imbalance is a result, not a source. The same graph can be produced by linings of different thickness, a contaminated friction surface, a seized slack adjuster or a valve problem.
The second trace is force that does not rise smoothly with pressure. As application increases, force is expected to increase proportionally. If the curve flattens early, meaning that beyond a certain point more application no longer produces more force, there may be a restriction on the actuator side. A leak from a damaged area of the diaphragm, a contacting surface inside the housing, or mechanical binding that prevents the push rod moving freely will all create that behaviour.
The third trace is delayed response, and it works in both directions. Force building late is felt during application; force decaying late shows up on release and is usually taken more seriously. If force is still being read at the wheel after the brake has been released, there is drag. Drag can be seen on a unit whose housing has deformed inward, whose return spring has fatigued, or whose push rod cannot return fully. Drag generates heat, and heat ruins linings and drums; that is why this single line on the tester is often enough on its own to fail the vehicle.
The limitation of the tester is this: it measures behaviour, not parts. The graph does not point at a unit, it only says that something on one side of the axle is not right; the decision comes from confirmation in the workshop.
What happens if different chamber types are mixed on the same axle, and how to spot it from the housing
One of the most insidious causes of imbalance is having units of different specification fitted to the two sides of the same axle. One side was replaced years ago while the other stayed original; or only the first half of the marking on the housing was read out over the phone when the part was ordered. The part fits, the mounting holds, the vehicle goes back on the road. The problem only becomes visible on the brake tester, or a few thousand kilometres later as one-sided lining wear.
At the inspection this usually surfaces as the line "brake force imbalance across the axle". The report does not say "different chamber types fitted", it only records the force difference. So on a vehicle that comes back with an imbalance finding, the first task is to check whether the two sides are a matched pair; it is the cheapest elimination available and needs no disassembly.
When comparing the two sides from the housing, these are the points to look at. Does the type and size marking on the housing read the same on both sides? Do the outside diameter and overall length of the housing match by eye? Does one unit have an extra air port or an extra connection at the rear that the other does not? Do the dust boot, push rod and clevis arrangement look the same on both sides? If the answer to any of those questions is no, the explanation for the imbalance finding has most likely been found.
The aim here is not to introduce the chamber families but to establish whether the two sides are a matched pair. What the digits in the housing marking actually mean, which size is correct on which vehicle, and what has to be measured before ordering are a separate subject; that whole topic is covered in the Brake Chamber Types and Sizes: Choosing T, DD and Spring Chambers guide. When making an inspection decision, the only thing you need to know is this: if the two sides are not a matched pair, the cause of the finding is most likely not a failed part but a broken match.
Once a mismatch is identified, the decision changes as well. A repair kit will not solve this problem, because there is no failed diaphragm, there is a wrong pairing. In that case the correct move is to make both sides of the axle match each other. Which side gets replaced depends on confirming, from catalogue and service information, which of the two units is correct for the vehicle. Making that confirmation by guesswork simply turns the imbalance the other way.
When is a repair kit (diaphragm) a reasonable option on a service chamber?
Service units that store no spring energy can be serviced by renewing the diaphragm and sealing elements, to the extent the manufacturer permits it. That does not mean it is the right decision in every case; the conditions under which a repair kit is reasonable are narrow, and all of them have to be met at once.
The first condition is that the finding really originates from the diaphragm. If the leak comes from the line where the two housing halves meet and the housing itself is sound, a renewed diaphragm can solve the problem. If, on the other hand, the leak comes from the middle of the housing, from a crack, or from a point that corrosion has perforated, a repair kit is of no use at all.
The second condition is the state of the housing and the sealing face. The diaphragm seals by seating on a face between the two housing halves. If that face is pitted by corrosion, if the area under the clamp band is swollen with blistering rust, or if the housing edge has taken an impact, even a brand new diaphragm will start leaking again within months. When assessing the surface visually, distinguish between bright surface rust and deep corrosion that lifts layers of metal; the second rules a repair kit out.
The third condition is that the manufacturer has defined that unit as serviceable. Some units are built permanently sealed; opening the clamp on such a unit permanently destroys the seal and creates a safety risk. Serviceability is determined by the manufacturer's current service information, not by assumption.
The fourth condition is that the work can be done symmetrically. If the diaphragm is renewed on one side while the other side is left as it is after years of service, a new force difference can appear; on a vehicle that came back with an imbalance finding, that means recreating the very problem you are trying to correct.
The fifth condition is timing. A repair kit makes sense in a planned maintenance window where the unit can be removed and its surfaces inspected. Changing a diaphragm on the vehicle a few hours before an inspection appointment is the riskiest scenario there is.
When a repair kit decision is made, record the job: which vehicle, which axle, which side, on what date and against which finding. Once those records build up across the fleet, you can see from your own data rather than from guesswork which age and mileage band a repair kit genuinely holds up in, and beyond which band complete replacement is the cheaper option.
Why a spring brake (parking) chamber is not repaired but replaced as a complete unit
With spring brake units, which carry the parking and emergency function, the situation is completely different. Inside those units sits a spring wound up strongly enough to hold the vehicle with no air pressure at all. That spring keeps its energy even when the unit has been removed from the vehicle and is lying loose on the bench. The energy involved is far beyond what is expected of an ordinary mechanical part, and if it is released in an uncontrolled way the result can be fatal.
For that reason the industry consensus is unambiguous: a spring brake unit is not opened and rebuilt in the workshop, it is replaced complete. The half of the housing that forms the spring compartment is not designed to be separated in the field. Attempts along the lines of "let us just cut the clamp off" carry an unacceptable safety risk and leave brake performance impossible to verify afterwards.
The wound spring inside a spring brake unit carries a risk of serious injury and death even when the unit has been removed from the vehicle. These units are not cut, drilled or unclamped, and they are not handled outside the manufacturer's prescribed method when they are scrapped. The safe procedure for removal, transport and disposal is defined in the vehicle manufacturer's current service manual, and that manual is authoritative.
Seen from the inspection side, this simplifies the decision. If the finding points to parking brake performance, to the parking brake not releasing, or to a leak coming from the spring compartment, the repair kit option is not on the table; the only discussion left is which side gets replaced and when.
How that replacement is carried out safely, how the spring is caged before removal and what to watch during installation are outside the scope of this article. That whole procedure, together with its safety warnings, is described in the Brake Chamber: Faults, Replacement & Maintenance Guide. Once the decision has been made, that is the address to follow.
One more point: a decision to replace complete does not automatically cover the opposite side of the same axle, but most of the time it should. The two units have run for the same length of time under the same conditions; if one has reached the point of producing a finding, the other is close behind. The cost of bringing the vehicle into the workshop a second time soon exceeds the price of the second unit.
Repair kit or complete replacement? Decision criteria
Everything described so far can be collected into a single table, and the rule is simple: if any one of the criteria falls into the complete replacement column, the decision is complete replacement. A repair kit is only defensible when every criterion stays in its own column.
| Criterion | Repair kit can be considered | Complete replacement required |
|---|---|---|
| Type of unit | Service chamber that stores no spring energy | Spring brake unit with parking and emergency function; without exception |
| Manufacturer's definition | Unit is defined as serviceable | Unit is permanently sealed, or no service information can be found |
| Location of the leak | Joint line between the housing halves, surface seepage | Middle of the housing, a crack, a point perforated by corrosion |
| Housing and seating face | Face is smooth, only bright surface rust present | Pitting, deep corrosion lifting layers, dents, deformation |
| Clamp band and bolts | Sound, able to be removed and retightened | Rust blistered, threads stripped, broken, or locking device missing |
| Push rod and dust boot | Moves freely, boot intact | Binding, bending, torn boot, evidence of water ingress |
| Axle symmetry | Both sides of the same axle can be handled together | The two sides differ in specification; the match has to be corrected |
| Age and history of the vehicle | Unit relatively young, no repeat finding at the same point | The same unit has been worked on before, the finding is repeating |
| Time window | Planned maintenance; unit can be removed and surfaces inspected | Hours left to the inspection appointment, rushed work on the vehicle |
| Records and traceability | The work is recorded and can be tracked at the next inspection | No records kept, unclear who did what |
Beyond the table, two practical rules help. The first is to choose complete replacement when in doubt; refitting a unit that generates braking force on the basis of "it will probably hold" carries the entire risk out onto the road. The second is to update the decision according to whether the finding repeats: if the same unit produces a finding a second time, the first decision was wrong.
Looking only at the part price when comparing costs is misleading. The calculation also has to include labour, the time the vehicle spends in the workshop, lost trips, the second inspection application and the probability of the finding repeating. Once those are added up, the range in which a repair kit is genuinely cheaper turns out to be narrower than most fleets expect.
Standards and further reading
This subject is governed by the equipment rules for air-braked commercial vehicles. In the United States the federal air brake standard, FMVSS 121 (49 CFR 571.121) defines the reservoirs, protection and timing a compliant system must provide, and Europe applies the equivalent limits of UNECE Regulation No. 13. For further detail, see the illustrated reference guide at airbrakecompressor.com. Always confirm specific figures against the current regulation and the vehicle manufacturer service data.
Outside the United States the equivalent duties sit in national law. In the United Kingdom, regulation 18 of the Road Vehicles (Construction and Use) Regulations 1986 requires every part of the braking system to be maintained in good working order. In Canada, air brake systems fall under the Motor Vehicle Safety Regulations, which contain CMVSS 121.
How mounting angle and drain hole position affect chamber life
A significant share of inspection failures comes not from the part but from how it was installed. The most common case is ignoring the clock position of the unit and the location of the drain hole. Units carry a small drain hole in the housing so that moisture which gets inside can escape; in the working position that hole has to be at the lowest point so accumulated water can run out under its own weight.
When the unit is rotated one turn before being secured, the hole faces sideways or upward and the unit turns into a water container. The water trapped inside starts corrosion on the diaphragm seating face and the inner wall, and in winter it freezes and creates mechanical stress. That is the real cause behind a leak or corrosion finding appearing a few seasons later; the report records the corrosion, but the cause is the mounting position.
A blocked hole produces the same result. Road dust, mud, salt residue and dirt washed across during cleaning can close it. Confirming during routine checks that the hole is clear takes minutes but visibly affects unit life. The unit is not removed to clear the hole; it is simply checked from the outside for blockage.
The second issue is the working angle of the push rod. The unit has to be positioned so that the push rod moves along its natural line of travel. When the angle is wrong, the rod takes a side load with every application; that side load fatigues the dust boot, and once the boot is fatigued dirt and water get inside, which in turn accelerates wear. At the end of the chain there is again an inspection finding, but it has nothing to do with the quality of the part.
The third issue is the routing of the air hose. A downward loop in the hose before the inlet of the unit helps condensate collect in that loop rather than in the chamber. A hose that is taut, chafing or connected with a sharp bend, on the other hand, can generate a separate finding at the inspection.
Water, winter conditions and the damage corrosion causes in the chamber
On a heavy commercial vehicle, the place where these units work is the worst area on the vehicle: behind the wheel, with constant water, mud, stones and road salt in winter. In that environment corrosion is not a possibility but a process that will happen with time. What matters for the decision is being able to separate the stage at which corrosion is cosmetic from the stage at which it changes the decision.
The first stage is surface rust: the paint has thinned and the housing has gone brown, but no layer of metal is lifting and the surface does not feel rough to the hand. On its own this stage is not a reason to fail and does not prevent a repair kit decision. It is still a warning sign.
The second stage is corrosion that lifts layers. The rust has blistered, it flakes off when touched, and pitting has started on the surface. If the diaphragm seating area or the line under the clamp band is affected, even a renewed diaphragm cannot provide a lasting seal; the decision shifts to complete replacement here.
The third stage is perforation and structural weakening. If there is a pinhole in the housing or separation along the clamp line, the unit cannot hold pressure reliably. At the inspection this is written as a damage or leak finding and requires complete replacement without argument.
Winter conditions accelerate the process: road salt increases corrosion markedly, thrown mud forms a moisture-holding layer, and below freezing the water left inside turns to ice and stresses both the diaphragm and the inner surface. A simple visual check and drain hole confirmation before winter eliminates a large share of the findings that would otherwise appear in spring.
Washing habits matter too: aiming a high-pressure lance directly at the dust boot and the drain hole can push water inward from the outside. Approaching that area from a distance and at an indirect angle makes a real difference to unit life.
Your own pre-inspection checklist
The easiest way to avoid coming back with a chamber-related finding is to apply the same eye in your own workshop before going to the station. The list below needs no disassembly and no special equipment; its purpose is not to diagnose a fault but to see in advance whether anything looks suspicious.
- Secure the vehicle safely, chock the wheels and wait for the system to reach working pressure. Carry out the check from a safe position, without going under the vehicle.
- With the engine shut down and the surroundings quiet, listen. A continuous hiss of air with no brake applied is a sign whose source needs to be found.
- Ask an assistant to hold the brake pedal down and listen to the area behind the wheel while they do. A noise that appears under pressure narrows down the location of the finding.
- Apply soapy water to the area you suspect and watch for bubbles. The point where bubbles appear tells you whether the leak comes from the housing or from a connection.
- Inspect the housing visually: note any dents, cracks, impact marks, blistering rust along the clamp line and layers lifting.
- Confirm that the drain hole is at the lowest point and is not blocked. If it is blocked, clear it from the outside; if its position is wrong, record that as a maintenance note.
- Follow the air hose and its connection port: chafing marks, cracks, a taut route or a sharp bend can generate a separate finding at the inspection.
- Check the push rod and the dust boot. A torn boot means dirt and water are getting inside; that is the forerunner of a future finding.
- Compare the housing markings of the units on both sides of the same axle. If the two do not look like a matched pair, that is most likely where an imbalance finding comes from.
- Write down every item you find suspicious and show it to the workshop before the inspection. A suspicion that is not recorded turns into a line in the report at the station.
This list does not imitate the inspection; the station measures with equipment, you look and listen. Even so, a significant share of chamber-related findings can be seen in advance with these ten items.
After a chamber failure at the inspection: which guide to follow and what to verify
With the report in your hand the order to follow is clear: first confirm that the finding really comes from the chamber, then decide between repair and replacement, then do the work, and finally verify the result. Breaking that order is the most common reason for the same line being written again at the re-test.
What has to be eliminated during confirmation is well defined. With an imbalance finding, the condition of the linings, the drum or disc surface, the freedom of the slack adjuster and whether the two sides are a matched pair are assessed in turn. With a leak finding, it is separated out whether the leak comes from the housing, the connection or the hose. With a parking brake finding, the spring brake unit and the circuit feeding it are considered together. With a finding about the applied stroke, no interpretation should be offered before the measurement has actually been made.
The decision stage is run according to the table in the sixth section of this article. Once the decision is made, how the work is carried out, in what order things come apart and go back together, what is checked after installation and what is monitored on the maintenance side are the subject of another guide; the whole diagnosis, replacement and maintenance side is collected in the Brake Chamber: Fault Diagnosis, Replacement and Maintenance Guide. If safe removal of a spring brake unit is involved, follow the safe service guide; if determining the correct size and type is involved, follow the types and sizes guide.
The final stage is verifying the result, and it is the one most often skipped. Once the work is finished, the system is brought up to working pressure, the leak check is repeated, force is observed building and decaying as the brake is applied and released, and where possible the measurement on the brake tester is repeated. If the vehicle is sent to the inspection without that verification, the station ends up testing on your behalf, and that is the most expensive test method there is.
VADEN ORIGINAL is a manufacturer working in the field of heavy commercial vehicle air brake systems; determining the correct part for your vehicle always requires authorised catalogue and service verification. When making the post-inspection decision, base the part selection on that verification rather than on assumption.
Since the spring chamber is released pneumatically rather than by hand, it helps to know the control element feeding that circuit; see our emergency / park-release valve guide for the details.
Safety warning: the power spring in a spring brake chamber stores enormous energy. Never disassemble or cut open a spring brake chamber. Always release (cage) the spring using the release bolt before removing the unit.
- Service chamber — single diaphragm, drive braking only, usually front axle.
- Spring brake chamber — double diaphragm plus power spring, adds park & emergency braking, usually drive and trailer axles.
Choosing a replacement chamber, and the VADEN ORIGINAL parts around it
VADEN ORIGINAL manufactures the air supply and control components around the brake chamber for heavy commercial vehicles, to OE dimensions: Air Dryer Valves with their Cartridges and Repair Kits, Relay Valves, Foot Brake Valves, Park Release Emergency Valves and Brake Cylinder Hoses. When you choose a replacement chamber, match the original type, stroke and mounting dimensions exactly, so it fits and performs like the part it replaces.
- Match the T-type exactly — T16, T20, T24, T30 and the combination sizes are not interchangeable between drive, steer and trailer axles.
- Check diaphragm condition and housing corrosion at every inspection; both are governed by the pressure and cycle life that axle actually sees.
- Keep output force and stroke equal side to side so left/right braking stays balanced.
- Protect the air supply — a saturated dryer cartridge or a leaking relay valve shortens chamber life long before the diaphragm is due.
Explore the full range of VADEN ORIGINAL air brake spare parts and brake caliper components for trucks, trailers and buses. Not sure which reference fits? Enquire with our team with your axle and OE number and we will match the correct part for your fleet.
Shop this part: Brake Bellows
Main guide: Brake Chamber: Fault Diagnosis, Replacement and Maintenance Guide
Tags
Frequently Asked Questions
- Can a vehicle fail an inspection because of a brake chamber?
- Yes. However, the report usually does not say "chamber defective"; the finding is recorded with wording such as "air leak", "brake force imbalance across the axle", "insufficient parking brake performance" or "damage to the brake actuator", and establishing that these originate from the chamber is the workshop's job. For acceptance criteria, the current practice of the authorised inspection station is what counts.
- If the report says "air leak", should I replace the chamber complete?
- No, that line on its own does not mean complete replacement. First the source of the leak has to be isolated: it can come from the middle of the housing, from the joint line between the housing halves, from the connection port or from the hose. With leaks originating at the connection or the hose, the unit may not need replacing at all. With a leak from the middle of the housing or from a point perforated by corrosion, the decision is complete replacement. A decision made without identifying the source brings the same line back at the re-test.
- Will a vehicle fitted with a repair kit pass the inspection?
- What is assessed at the inspection is not whether the part is new but the measured behaviour of the system. If sealing is achieved, balance is within the acceptance range and there is no visible damage, a renewed service unit causes no problem. The problem arises when a repair kit is fitted to an unsuitable housing.
- Can a repair kit be fitted to a spring brake (parking) chamber?
- No. Spring brake units contain a powerful spring that keeps its energy even when the unit has been removed from the vehicle, and these units are built permanently sealed. Opening them in the workshop carries a risk of serious injury and leaves brake performance impossible to verify afterwards. The decision is complete replacement without exception; for the safe method, the manufacturer's service manual is authoritative.
- Does replacing only one chamber on an axle cause a problem at the inspection?
- It can. When one side has a new unit and the other keeps an aged one, a force difference can appear between the two sides, and that difference is read as imbalance on the brake tester. On a vehicle that came back with an imbalance finding, one-sided intervention risks recreating the very problem being corrected. Assessing both sides of the axle together is the safe approach for both the inspection result and even lining wear.
- Is imbalance on the brake tester always caused by the chamber?
- No. Imbalance is a result; linings of different thickness, a contaminated friction surface, a problem on the drum or disc side, a seized slack adjuster or a valve fault can produce the same result. The chamber is only one item on that list; the correct order is to start with the cheap eliminations and arrive at the unit decision last.
- Is surface rust on the housing a reason to fail on its own?
- Surface rust that does not lift the metal layer generally does not constitute a reason to fail on its own. The stage that changes the decision is rust blistering and flaking, pitting forming on the surface, or separation appearing along the clamp line; at that stage the integrity of the sealing face is in doubt. For a definitive criterion, the current criteria of the authorised inspection station are what count.
- If the drain hole is blocked, will a finding be written at the inspection?
- A blocked hole often does not produce a report line directly, but its consequences do. Water accumulating inside starts corrosion, freezes in winter and creates stress, and over time turns into a leak or housing damage finding. That is why confirming the hole is at the lowest point and clear is one of the lowest cost and highest return items on the pre-inspection checklist.
- What should I do after rectifying the defect on a vehicle that failed?
- Once the defect has been rectified, the vehicle is presented for inspection again. The time allowed, the procedure and the fees are set by the current practice of the authorised inspection station; confirm those with the station. On the technical side, do your own verification before sending the vehicle: repeat the leak check, observe force building and decaying, and where possible repeat the measurement on the brake tester.
- Should I show the chambers to the workshop before the inspection, and what records should be kept?
- If the pre-check turns up anything suspicious, showing it to the workshop before the inspection is almost always cheaper; a finding raised at the station adds the vehicle's day and a second application to the cost. On the records side, keep the following: which vehicle, which axle and side, which date, which finding and what was done. Once those records build up, which decision holds up becomes visible from your own data rather than from guesswork.
Related Articles
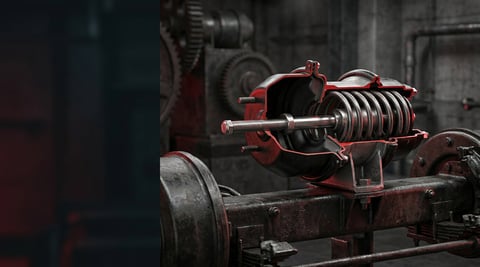
Brake Chamber: Faults, Replacement & Maintenance Guide
Service and spring brake chambers on trucks and trailers: diaphragm-leak and stroke diagnosis, why caging is mandatory before removal, and safe replacement.
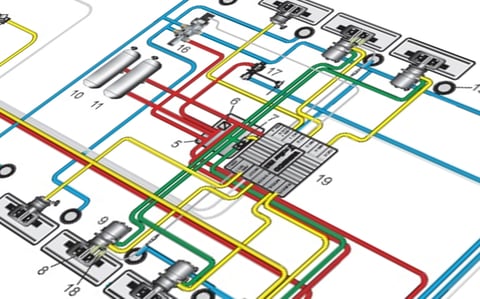
Air Brake System: How It Works on Heavy Commercial Vehicles
When a tractor unit rolls into the workshop, the complaint is not always "the brakes don't hold". More often it is "the brakes hold late". The driver feels a
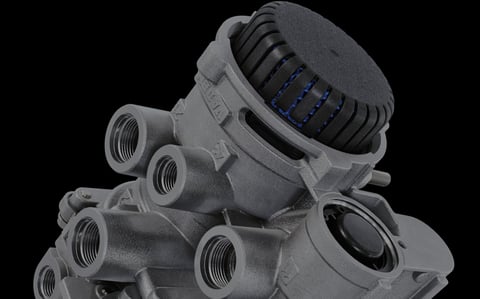
Truck Air Brake Valves Explained: Types, Functions and Failure Symptoms
Truck air brake valves explained: what relay, ALB, foot brake and trailer valves do, their failure symptoms, and how to diagnose faults with a pressure gauge set.


