Oil Cooler: Failure Symptoms, Replacement & Maintenance Guide
Engine and transmission oil cooler guide for heavy trucks: failure symptoms, internal leak diagnosis, pressure test, replacement steps and torque values.
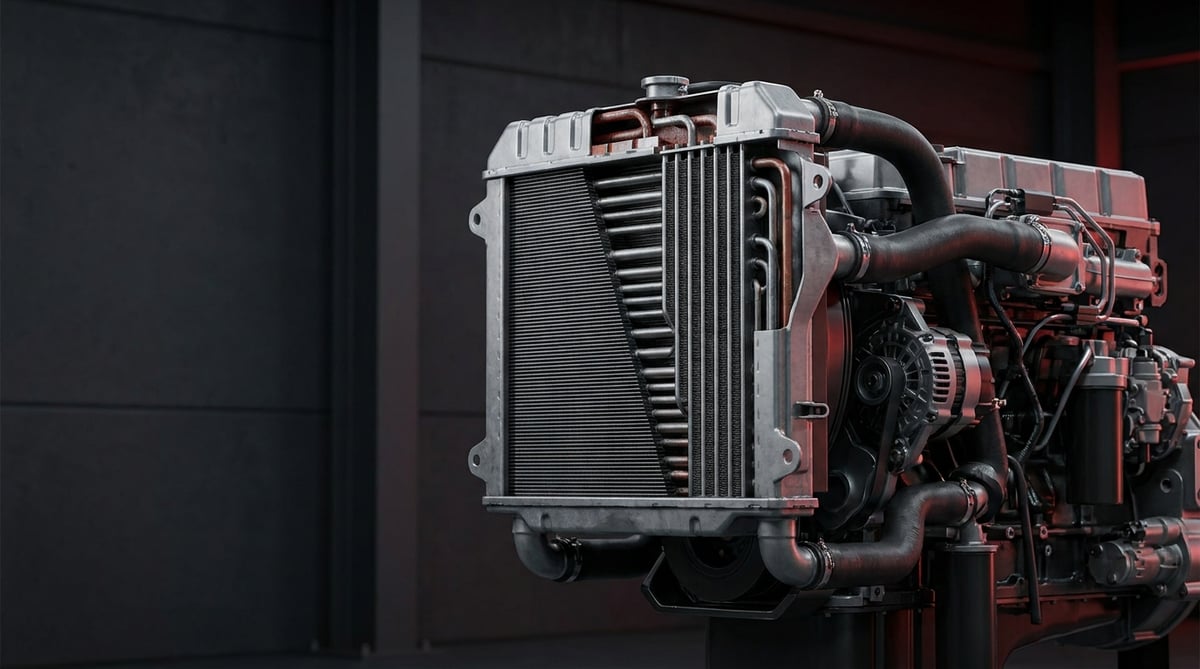
The oil cooler is one of the most overlooked components on a heavy commercial vehicle — and one of the most expensive when it fails. On most fleets, a complaint of "the engine is overheating" leads straight to the radiator, then a thermostat replacement, then questions about the fan clutch; meanwhile, heat transfer on the oil side has already collapsed. Worse still, when an internal leak develops in a heat-exchanger type cooler, the oil and the coolant mix and both circuits are poisoned at once. In the field, the first sign of this is usually brown foam in the expansion tank, or oil turning milky as coolant works its way into the sump. This guide covers the engine oil cooler and the transmission/retarder oil cooler together: how they work, what each symptom actually tells you, how the replacement is carried out, and which checkpoints must never be skipped.
E-E-A-T note: This document was prepared by the VADEN ORIGINAL technical team, drawing on heavy commercial vehicle field service experience and OE manufacturer documentation. The figures given here are typical ranges; for exact values such as torque, pressure and temperature, always refer to the vehicle's own current OE service manual. Last updated: September 2026.
Component sizing is based on the relevant international standard family (ISO/EN/DIN/SAE) and the manufacturer OE specification.What Is an Oil Cooler (Engine + Transmission / Heat Exchanger)? Function and Operating Principle
An oil cooler is a heat exchanger that transfers the heat carried by engine or transmission oil to the coolant or to the air stream, keeping the oil within its operating temperature range and thereby preserving the viscosity of the oil film and, with it, its lubricating capability.
The operating principle is simple, but the detail is where it matters. After leaving the pump, the oil is routed to the cooler body either before it reaches the filter or immediately after it. Inside the cooler there are two separate circuits: hot oil on one side, coolant on the other (liquid-to-liquid heat exchanger) or ambient air (oil-to-air type radiator). The two fluids never mix; heat is conducted through the thin metal plate or tube wall between them. On heavy commercial engines, plate-type (stacked/cassette) liquid-to-liquid exchangers are common because they offer far more heat transfer surface within the same volume.
Here is the critical point: an oil cooler does not only "cool" — it also heats. On a cold start, the coolant warms up faster than the oil, so during the first few minutes the heat flow runs in the opposite direction and brings the oil rapidly up to operating temperature. This is a mechanism that reduces the wear an engine suffers at start-up, and it is lost the moment the cooler is bypassed or deleted.
- Cooler body / cassette stack: The heat transfer core formed by brazing aluminium or stainless steel plates together.
- Gasket set (O-ring / paper / metal-rubber): The critical element that separates the oil circuit from the coolant circuit and provides the seal; always renewed at replacement.
- Bypass / pressure relief valve: Allows the oil to bypass the cooler and continue on when the oil is cold or the cooler is blocked; prevents the engine from being starved of oil.
- Oil thermostat (on some applications): Keeps the cooler out of circuit until the oil reaches a set temperature.
- Connection fittings and hoses: Oil and coolant inlet/outlet lines; on transmission coolers these are usually pressurised steel pipes.
- Mounting flange / housing cover: The part that secures the cooler to the block, the filter head or the transmission housing.
The Difference Between an Engine Oil Cooler and a Transmission Oil Cooler
Both rely on the same physics, but their loads differ. The engine oil cooler works under a continuous and relatively steady heat load; the transmission cooler sees sudden peak loads. On automated transmissions in particular (ZF type, Voith retarder applications), when the retarder engages on a long descent the oil temperature can climb 20-30 °C within minutes. That is why transmission/retarder coolers are generally designed for higher flow rates and faster response. Another difference: when an internal leak occurs in an engine oil cooler, the pressure differential usually pushes oil into the coolant; on a transmission cooler, coolant can migrate into the oil side while the vehicle is parked — and you meet the transmission the next morning with a coffee-coloured fluid.
Liquid-to-Liquid (Heat Exchanger) vs. Oil-to-Air Type Comparison
The liquid-to-liquid heat exchanger is compact, less affected by ambient temperature because it is integrated into the engine coolant circuit, and it can warm the oil on a cold start. The oil-to-air type sits at the front panel as a separate radiator; there is no risk of mixing with the coolant circuit, but it is exposed to blockage, stone impact and insect/mud build-up. On heavy commercial tractor units, the engine side is mostly liquid-to-liquid, while on the transmission/retarder side both types are found depending on the application.
The engine oil filter shares the same oil line as the cooler; its fault symptoms, diagnostic methods and replacement steps are examined as a whole in our engine oil filter faults, diagnosis and replacement guide.
Position in the Circuit and Bypass Logic
When the cooler is designed together with the oil filter head, it is referred to as a "filter-cooler module". The bypass valve here opens when the cooler core is blocked or the oil is highly viscous, sending the oil straight to the gallery. This protects the engine — but keep this in mind: if the bypass stays permanently open, the oil is never being cooled at all, and no warning may appear on the instrument cluster. This is very often the silent cause behind chronic high oil temperature complaints.
| Application / System | Typical Cooler Type | Dominant Load Character | Critical Risk |
|---|---|---|---|
| Heavy commercial diesel engine (12-13 L, EURO 5/6) | Plate-type liquid-to-liquid exchanger, in-block or in the filter module | Continuous, high flow | Internal leak - oil-coolant mixing |
| Automated transmission (ZF type / equivalent) | Liquid-to-liquid exchanger, flanged to the transmission housing | Variable, peak-loaded | Coolant - oil migration, clutch/synchroniser damage |
| Hydrodynamic retarder (Voith type / equivalent) | High-flow exchanger, connected to the engine coolant circuit | Sudden and very high heat rejection | Insufficient transfer - loss of retarder power |
| Tractor unit / truck automatic transmission (light-medium) | Oil-to-air type front radiator | Moderate, dependent on ambient temperature | Core blockage, external impact |
| Construction machine / crane vehicle hydraulic line | Oil-to-air type fan-assisted cooler | Extended idling + high load | Fan/thermostat failure, overheating |
Part number verification is essential. Even within the same engine family, the emission level (EURO 5 / EURO 6), transmission code, retarder option and production date can change the number of cooler cassettes and the flange hole pattern. Two coolers can look almost identical externally while the plate count — and therefore the transfer capacity — differs. Before ordering, match the part using the chassis number (VIN) and the OE part number; do not decide on "same engine" information alone.
Failure Symptoms and Diagnosis
Oil cooler failures fall into two groups: loss of performance (blockage, scaling, declining heat transfer) and loss of sealing (external leakage or internal leakage between circuits). The second demands immediate action; the first eats the engine slowly.
| Symptom | Possible Cause | Check / Verification |
|---|---|---|
| Brown foam or an oil film in the expansion tank/radiator | Internal exchanger leak: oil is passing into the coolant circuit under the pressure differential | Inspect the tank visually with the engine cold; drain some coolant into a container and look for an oil film. To confirm, remove the cooler, apply compressed air to the oil side (typically 2-4 bar, per the manual) and watch for bubbles from the coolant side. |
| Milky coffee colour or emulsion on the dipstick; coolant entering the sump | Coolant is passing into the oil side (especially while the vehicle is parked, or on a transmission cooler) | Take an oil sample; if water is present it will crackle when heated. To distinguish this from a cylinder head gasket failure, run the pressure test separately — if the circuit holds pressure with the cooler removed, the head gasket is the culprit. |
| Oil temperature constantly high while coolant temperature is normal | Cooler core blocked; bypass valve stuck open; oil thermostat not opening | Read oil and coolant temperatures simultaneously with a diagnostic tool. Coolant normal + oil high means the problem is on the cooler side. Check the temperature difference between the cooler inlet and outlet: if the difference is minimal, no transfer is taking place. |
| External oil leak around the cooler body, a wet area collecting dirt | Fatigued flange gasket/O-ring, cracked body, loss of mounting torque | Clean the area and monitor it with UV dye or talcum powder. Check the bolt torques against the manual; if they have loosened, renew the gasket rather than simply retightening. |
| Retarder power drops on a descent, "retarder overheated" warning | Scaling/deposits in the retarder exchanger; air in the coolant circuit; reduced flow | Log retarder oil and coolant temperatures during a simulated long descent. If the temperature climbs very quickly and does not come back down, transfer is insufficient. Bleed the coolant circuit and retest. |
| In cold weather, oil pressure stays higher than normal for an extended period | Bypass valve stuck/closed, cooler internally blocked | Monitor the oil pressure curve on a cold start; if it does not return to normal as the engine warms, remove the bypass valve and check its movement by hand. |
| Traces of glycol/antifreeze in the oil analysis | Micro-leak in the exchanger (not yet visible to the eye) | If a periodic oil analysis report is positive for glycol, run a pressure test even if you see nothing visually. It is the earliest warning available. |
| Engine overheats although the radiator, thermostat and fan are sound | Coolant side of the cooler blocked - flow in the coolant circuit has dropped | Pressure/flow check of the coolant circuit. If there is an abnormal temperature difference between the cooler's coolant inlet and outlet hoses and you can feel pressure resistance by hand, the core is blocked. |
| Transmission shifts harshly, clutch slips (automatic/automated) | Transmission oil has taken on water or overheated - viscosity and friction coefficient degraded | Transmission oil sample + temperature log. If water is detected, evaluate the cooler and the transmission internals together. |
Telling Oil-Coolant Mixing Apart from a Cylinder Head Gasket Failure
This is the most common misdiagnosis in the field. The moment an emulsion appears, the head comes off and the bill multiplies — yet the culprit is usually the exchanger. The cleanest way to tell them apart: take the cooler out of circuit, blank off the oil and coolant lines, then pressurise the coolant circuit and watch whether the pressure drops. If the pressure holds once the cooler has been removed, the cooler was the problem. An additional clue: a head gasket leak is usually accompanied by white exhaust smoke and pressurisation (the tank swelling); with an exchanger leak there is no smoke, because no coolant is reaching the combustion chamber.
Quick Transfer Test Using Temperature Difference (Delta-T)
Using a non-contact thermometer, measure the difference between the cooler's oil inlet and oil outlet. At operating temperature and under load, a healthy exchanger shows a clear drop; if the difference is near zero, the oil is not being cooled. Take the same measurement on the coolant side: if there is no difference at all between coolant inlet and outlet, there is no flow on the coolant side. These two measurements point you in the right direction within the first 5 minutes, without removing a single part.
Confirming an Internal Leak by Pressure Test
For a definitive result, the cooler is removed, one side is blanked off, air is applied to the other side at the pressure stated in the manual (generally in the 2-4 bar range, varying by application) and the part is submerged in a container of water. Escaping bubbles prove an internal leak. Never exceed the upper limit stated in the manual — the plate core will deform and you can turn a sound part into scrap.
Further reading
For a plain-language technical overview of this subject, see the reference article on Wikipedia. Always confirm specific figures and procedures against the vehicle manufacturer service data.
Replacement / Installation Steps
Personal protective equipment and safety: Never work on a hot engine; when a pressurised coolant circuit is opened, fluid above 90 °C can spray out and cause severe burns. Wait until the engine and coolant have dropped to a temperature that is safe to touch by hand. Oil- and antifreeze-resistant gloves, safety goggles and work clothing are mandatory. The vehicle must be on level ground, with the parking brake applied and wheels chocked; if lifting is required use mechanical stands, and never work on a jack alone. Antifreeze is toxic and must be collected in accordance with waste regulations — do not pour it on the ground or into a drain. Disconnect the battery negative terminal.
- Confirm and document the fault: Before starting the replacement, prove that the cooler really is the culprit with a pressure test or a delta-T measurement. Record the fault codes, temperature logs and oil analysis result; these records will serve you in a part return or warranty process.
- Match the correct part by VIN: Have the new cooler, the gasket set and, if required, the bolts on hand before you start dismantling. Physically compare the cassette count, the flange hole pattern and the fitting dimensions against the old part. If single-use bolts are specified, always fit new ones.
- Drain the circuits: Collect the coolant in a clean container (filter it if it is to be reused, discard it if contaminated). Drain the engine oil or transmission oil completely — in a system that has suffered an internal leak, the old oil is never reused. Remove the oil filter as well.
- Create access: Depending on the cooler's location, remove obstructions such as the air filter housing, the intercooler pipe, the starter motor, the oil filter head or the guard plate. Label every hose and connector you remove; on heavy commercial vehicles, lines that look alike but are not are frequently mixed up.
- Disconnect the lines and fittings: Collect any residual fluid as you remove the oil and coolant hoses/pipes. When undoing fittings, hold the counter nut with a second spanner — twisting and cracking a pipe is the most expensive surprise of the whole job. Cap every open port with a clean plug or cloth.
- Remove and inspect the old cooler: Loosen the bolts in a crosswise sequence and in stages. Before you scrap the removed part, inspect it: deposits, scale, wear marks or metal particles inside the core mean the root cause lies elsewhere (e.g. degraded antifreeze, internal engine wear) and replacing only the cooler will bring the problem straight back.
- Clean the mating surfaces: Clean the gasket face on the block/transmission side with a plastic or soft scraper. Do not use a metal scraper or a grinding disc; any scratch you leave on the surface will make the new gasket leak on the very first heat cycle. Clean old fluid and dirt out of the bolt holes (an oil-filled hole distorts the torque reading and can crack the block).
- Fit new gaskets and O-rings: Never reuse gaskets. If the manual permits, seat the O-rings after moistening them with a thin film of clean oil; do not use grease or sealant unless specified. Make sure at the moment of assembly that the gasket has not slipped out of its groove.
- Seat and torque the cooler: Position the part without forcing it; if it resists, it is the wrong part or the wrong angle. Start the bolts by hand, then tighten them with a torque wrench in a crosswise sequence and in stages (for example 50% - 75% - full torque of the target). If torque-plus-angle is specified, use an angle gauge; tightening "by feel" crushes a plate core.
- Connect the lines, fill with oil and coolant: Tighten the fittings to the specified torque. Fit a new oil filter. Fill with engine/transmission oil of the type and quantity given in the OE specification. Fill the coolant at the antifreeze concentration prescribed by the manufacturer and carry out the bleeding procedure — an air lock will leave your new cooler with no heat transfer from day one.
- Test and verify: Start the engine and check for leaks at idle. Bring it to operating temperature, monitor the oil and coolant temperatures with a diagnostic tool and repeat the delta-T measurement. Once it has cooled, recheck and top up the coolant and oil levels. After a short road test, confirm once more that there is no oil trace in the expansion tank and no emulsion on the dipstick.
Points to Watch (Common Mistakes)
Do not reuse contaminated oil and coolant. In a system that has suffered an internal leak, the glycol mixed into the oil breaks down the oil additives and leaves deposits on bearing surfaces. Oil mixed into the coolant swells hoses and thermostat seals. Putting the old fluid back after fitting a new cooler brings the same failure back a few thousand kilometres later — this time together with engine damage. With heavy contamination, the circuit must be flushed with a suitable cleaner and hoses/thermostat renewed if necessary.
Assembly without a torque wrench = throwing the new part away. A plate exchanger core has thin walls. Overtightening warps the flange, ruins the gasket face and usually leaks not immediately after assembly but after the first few heat-cool cycles — meaning it leaves the workshop leak-free and strands the vehicle on the road. Undertightening fails to seat the gasket. In both cases it is not the part that is at fault, but the workmanship.
- Skipping the root cause: If the cooler was blocked, do not fit a new part before answering the question "why did it block?". If there is degraded/mixed antifreeze, a neglected oil change or internal engine wear, the new cooler will live exactly the same lifespan.
- Wrong antifreeze or wrong concentration: On heavy commercial vehicles, straying outside the additive package specified by the manufacturer (OAT/HOAT etc.) starts corrosion and scaling in the aluminium core. Mixing different types can form a gel that blocks the core from the inside.
- Skipping the bleed: Air left in the coolant circuit leaves the upper channels of the exchanger dry. The oil temperature comes out higher than expected and the "new part" is assumed to be faulty.
- Cleaning the gasket face with a metal scraper: Every scratch left behind is a direct leak path through the seal.
- Applying excessive pressure during the pressure test: Exceeding the manual's limit permanently deforms a sound core.
- Reusing a single-use bolt: Bolts tightened by torque-plus-angle stretch and deform; they cannot deliver the same preload a second time.
- Skipping core cleaning on an oil-to-air type cooler: Leaving a core clogged with mud, insects and oil film in place and expecting a new part to fix it brings the same overheating straight back. When washing, take care not to flatten the fins with high-pressure water.
- Deleting / bypassing the cooler: Blanking off the cooler as a "temporary fix" leaves oil temperature uncontrolled and also destroys the oil warm-up function on a cold start. It runs in the short term and eats the engine in the long term.
Technical Values and Checkpoints
The values below are typical/general reference ranges encountered in heavy commercial applications, intended to guide the "is this normal or not?" question during diagnosis. The engine family, emission level, transmission code and retarder option can shift these values significantly. For exact values, the vehicle's current OE service manual is authoritative.
| Parameter | Typical Reference Range | Note / Comment |
|---|---|---|
| Engine oil normal operating temperature | approx. 90-110 °C | Typically somewhat higher than the coolant temperature. Constantly above 120 °C points to a cooler or oil thermostat problem. |
| Engine coolant normal temperature | approx. 82-95 °C | Depends on the thermostat opening temperature. Coolant normal + oil high points suspicion directly at the oil cooler. |
| Transmission oil normal temperature | approx. 80-110 °C | May rise temporarily higher with retarder use; a permanently high value is a transfer problem. |
| Peak oil temperature with retarder engaged | approx. 120-150 °C (short duration) | Varies by application; consult the manual for the warning threshold and time limit. |
| Engine oil pressure (idle, hot) | approx. 1.0-2.5 bar (≈15-36 psi) | Below the lower limit suggests oil pump/bearing wear or a bypass problem. |
| Engine oil pressure (operating speed, hot) | approx. 3-6 bar (≈44-87 psi) | A blocked cooler does not generally lower the pressure directly, but it keeps the bypass permanently open. |
| Coolant circuit test pressure | approx. 1.0-2.0 bar (≈15-29 psi) | Do not exceed the value marked on the tank cap; use the value stated in the manual for leak testing. |
| Exchanger internal leak air test pressure | approx. 2-4 bar (≈29-58 psi) | Never exceed the upper limit stated in the manual; a plate core deforms permanently. |
| Delta-T between oil inlet and outlet (healthy, under load) | approx. 5-15 °C drop | If the difference is near zero there is no transfer: blockage, or the bypass stuck open. |
| Antifreeze concentration | typically 40-60% (per manufacturer) | High concentration reduces heat transfer. More is not better. |
| Glycol in oil analysis | should not be detected (0) | Any positive trace is the earliest evidence of an internal leak. |
Torque values are as critical as the part itself in a cooler installation. The table below shows typical orders of magnitude; the value to be applied must always be taken from the vehicle-specific manual.
| Connection | Typical Torque Order | Application Note |
|---|---|---|
| Cooler cassette/flange bolts (M8) | approx. 20-30 Nm | Tighten crosswise, in stages. Most applications recommend 2-3 stages. |
| Cooler housing bolts (M10) | approx. 40-60 Nm | If torque-plus-angle is specified, use an angle gauge. |
| Oil/coolant fitting connections | approx. 25-45 Nm | Hold the counter nut with a second spanner; do not twist the pipe. |
| Oil filter head bolts | approx. 20-35 Nm | On coolers integrated with the filter module, these are torqued together. |
| Sump plug / drain plug | approx. 30-60 Nm | Use a new washer; overtightening strips the sump thread. |
Field tip: After a new cooler is fitted, check the oil and coolant levels twice within the first 500-1000 km. The plate core and gaskets bed in during the first heat-cool cycles; a small drop in level can be normal, but a continuous drop is the harbinger of an assembly error. In the same period, take one more look at the expansion tank: no oil trace means the job is clean.
- Is there an oil film or foam in the expansion tank? (Look with the engine cold, under good light.)
- Is there emulsion, a coffee colour or a rise in level on the dipstick?
- Is there a wet/dirty area or a dried, crusted oil trace around the cooler?
- Under load, are the oil and coolant temperatures consistent with each other? (Coolant normal + oil high = suspect the cooler.)
- Is the core of the oil-to-air type cooler clean, are the fins flattened?
- Do the antifreeze concentration and type meet the manufacturer's specification? (Measure with a refractometer.)
- Is there any trace of glycol or water in the latest oil analysis report?
- Was the coolant circuit bleeding procedure carried out in full?
Maintenance and Service Life
An oil cooler has no periodic "replacement life" of its own; what determines its lifespan is the quality of the two fluids passing through it. A healthy exchanger, with the correct antifreeze and timely oil changes, can last the economic life of the vehicle. A neglected coolant circuit, by contrast, corrodes the aluminium core from the inside and finishes the part off within a few hundred thousand kilometres. In other words, maintenance is not carried out on the cooler itself, but on everything around it.
- Do not delay the antifreeze change: Once the additive package is exhausted, protection ends and corrosion begins. Follow the mileage/year limit given by the manufacturer; "the colour still looks fine" is not a criterion.
- Do not mix antifreeze types: Different technologies (OAT/HOAT etc.) can gel together and block the core. If topping up is required, use the same type.
- Stay faithful to the oil change interval and the OE specification: Oxidised oil leaves varnish/deposits inside the cooler and insulates the transfer surface.
- Have periodic oil analysis carried out: On fleet vehicles it is the cheapest early warning system there is. A glycol trace signals months before visible damage.
- Clean the oil-to-air core regularly: Carry out seasonal cleaning especially on routes heavy with dust, straw or insects; use low-pressure water and mind the fin direction.
- Monitor the coolant circuit as a whole: If the thermostat, water pump, radiator cap and hoses are not sound, the cooler cannot work correctly either. In a system that has lost cap pressure, the coolant boils early and a steam pocket forms in the exchanger.
- Follow the temperature logs: On fleets with telemetry or diagnostic recording, a slow upward trend in oil temperature is an early indicator of blockage.
- Do not skip the first post-replacement check: A level and leak check after the first 500-1000 km catches assembly-related problems while they are still cheap.
In short: oil cooler maintenance is really disciplined fluid management. A fleet that uses the correct antifreeze at the correct concentration, never delays an oil change and has an oil analysis done once a year will mostly never see an oil cooler failure. And if it does, it closes the matter with an exchanger and a gasket set, before it turns into engine damage. The difference between the two is the difference between a modest maintenance bill and an engine overhaul.
The VADEN ORIGINAL Oil Cooler (Engine + Transmission / Heat Exchanger) product family is offered from stock for heavy commercial vehicle engine and transmission applications, with a cassette structure to OE dimensions, the correct plate count and a complete gasket set. To verify the right cooler for your vehicle via the chassis number and OE part number, to see the scope of our product family, or to obtain technical confirmation before installation, you can review the Oil Cooler group in the VADEN ORIGINAL catalogue or get in touch with our technical team.
Related categories: Oil Cooler · Cover · Gasket · Oil Cooler · Oil Cooler · Hose
Related technical guides: Exhaust Manifold: Cracks, Leaks, Replacement & Torque Guide · Engine Cylinder Head Group: Faults, Replacement & Maintenance · Exhaust / Engine Brake: Faults, Replacement & Maintenance Guide · Truck Oil Pan Group: Faults, Replacement & Maintenance Guide · Engine Valve Train & Adjustment Shim: Faults, Replacement, Care
Application and compatibility: Vehicle compatibility catalogue · Engine compatibility catalogue
Main guide: Low Engine Oil Pressure: Symptoms, Causes, and the Role of the Oil Pump
Tags
Frequently Asked Questions
- How do you recognise an oil cooler failure?
- The three clearest signs: an oil film or brown foam in the expansion tank/radiator, a milky coffee-coloured emulsion on the dipstick, and oil temperature staying constantly high while the coolant temperature is normal. The fourth is more insidious: glycol showing up in an oil analysis when nothing at all is visible to the eye. If any of these symptoms is present, verify with a pressure test before replacing any part.
- Water has mixed into the oil — is it definitely the cylinder head gasket?
- No — and this is the assumption that costs the most in the field. An internal leak in the oil cooler creates exactly the same emulsion. To tell them apart, take the cooler out of circuit and pressurise the coolant circuit: if the pressure holds, the cooler is the culprit. An additional clue is that a head gasket leak usually also shows exhaust smoke and pressurisation of the tank; with an exchanger leak, neither occurs.
- Can the oil cooler be deleted?
- Technically the vehicle will run, but it is not recommended. Blanking off the cooler leaves oil temperature uncontrolled; viscosity drops, the oil film thins and bearing/turbo wear accelerates. The oil warm-up function on a cold start is lost as well. It can be a temporary measure at the roadside to get the vehicle to the nearest workshop, but it is not a permanent solution.
- How long does an oil cooler replacement take?
- It depends heavily on location. A cooler integrated into the filter module and accessible from the outside can be changed in a few hours; on an application buried inside the block or flanged to the transmission housing, the parts that must be removed for access can push the job close to a full day. Do not forget to add the oil, filter and antifreeze change plus the bleeding procedure to the time.
- Should the oil and antifreeze also be changed when the oil cooler is replaced?
- If there has been an internal leak, absolutely yes — both are contaminated, and putting them back puts the new part and the engine at risk. With heavy contamination, the circuit must also be flushed with a suitable cleaner. If the replacement is being carried out only because of an external leak or blockage, and the fluids are clean and not due, they can be filtered and reused; the oil filter, however, is renewed in every case.
- Are a transmission oil cooler and an engine oil cooler the same thing?
- The principle is the same, the application differs. Both transfer the oil's heat to the coolant (or to air), but the transmission/retarder cooler is sized for sudden peak loads and generally has a higher flow rate. As parts they are not interchangeable; the flange, cassette count and connection dimensions differ.
- I fitted a new cooler and the oil temperature is still high — why?
- The first suspect is air left in the coolant circuit: an air lock leaves the upper channels of the exchanger dry. The second is that the root cause was never addressed — thermostat, water pump, radiator blockage or the wrong antifreeze concentration. The third is a bypass valve or oil thermostat stuck in place. Understanding why the removed part failed, before fitting a new one, prevents this situation from the start.
- How do I select the correct oil cooler?
- Match it via the chassis number (VIN) and the OE part number. Even within the same engine family, the emission level, transmission code, retarder option and production date can change the cassette count and the flange pattern; two parts can look almost identical from the outside while their heat transfer capacities differ. Confirming the part number with the technical team before ordering is far cheaper than taking the vehicle out of service a second time because of a wrong part.
- Glycol showed up in the oil analysis but there are no symptoms — is it urgent?
- Do not relax just because there are no symptoms; a glycol trace is the earliest evidence of a micro-leak and usually appears months before a visible emulsion. Intervening at this stage is what saves the engine from an overhaul. Verify with a pressure test and, if confirmed, replace it at a planned service — do not wait to be stranded on the road.
- If the oil cooler blocks, is the engine left without oil?
- No. The bypass/pressure relief valve in the filter-cooler module opens when the core is blocked or the oil is highly viscous and sends the oil straight to the gallery, so lubrication continues. The real danger is the silent one: if the bypass stays permanently open, the oil is never cooled at all and no warning may appear on the instrument cluster. That is very often what sits behind chronic high oil temperature.
Related Articles

Oil Filter Cap and Housing: Leaks, Cracks and Seal Replacement
Truck engine oil filter cap and housing: why plastic caps crack, O-ring leak causes, bypass valve faults, and correct torque and seal replacement steps.
Piston Rings: Oil Consumption, Compression Loss and Replacement
Ring-related oil consumption and compression loss in truck diesel engines: how rings seal, blow-by and leak-down tests, ring gap and replacement.
Intake Manifold and Intake Pipe: Faults, Diagnosis, Repair
How the intake manifold and charge air pipe work on truck diesel engines, how to spot boost leaks, run a pressure test and fit them leak free.


