Brake Caliper Overhaul Kit: Guide Pins, Boots & Adjuster
Truck brake caliper overhaul: guide pin seizure, torn boots and locked adjusters — symptoms, diagnosis, fitting steps, torque values and kit selection.
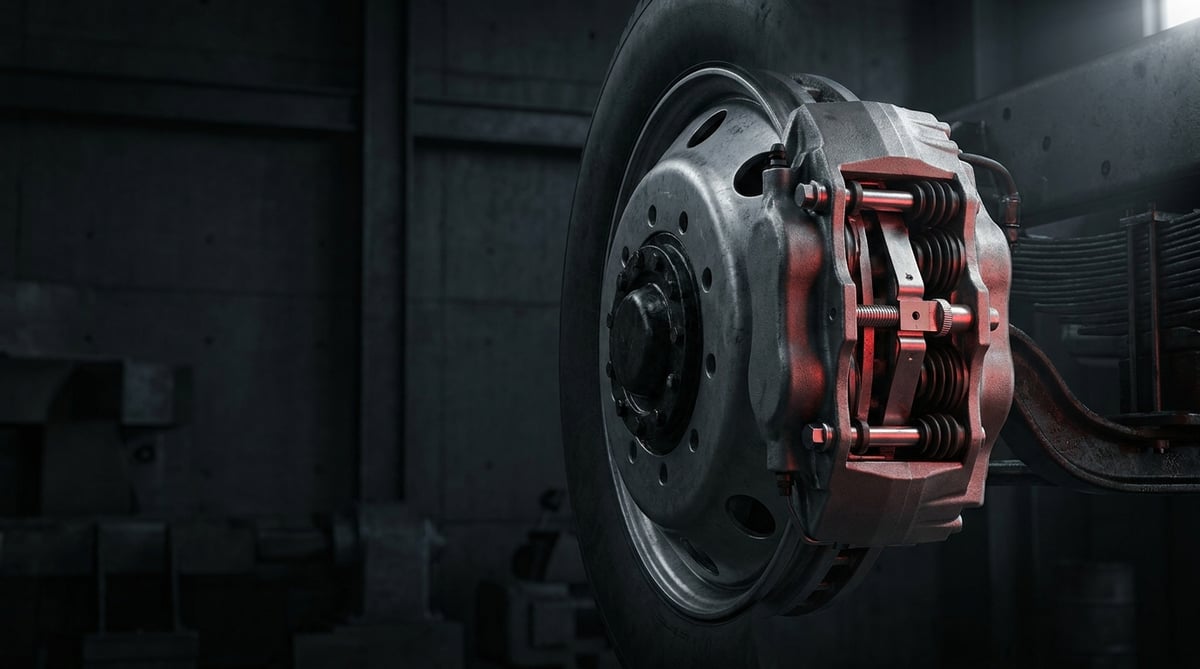
One of the most debated questions in heavy commercial vehicle workshops is this: the caliper has seized — do we replace the whole unit or overhaul it? The reality in the field is that the vast majority of disc brake calipers are scrapped not because of a cracked housing or a deformed bridge, but because water, salt and mud have worked their way into the guide pin bores, the boots have torn and the adjuster mechanism has locked up. In other words, the truly faulty part is not the caliper itself, but a few hundred grams of sealing and mechanism components inside it. Diagnosed correctly and fitted with an overhaul kit in good time, the same caliper housing will comfortably see out a second — and often a third — pad life. This guide explains, in workshop language, what caliper overhaul kits (guide pin sets, mechanism sets, boot and seal kits) actually do, which symptom points to which component, and where mistakes are most often made during removal and refitting.
E-E-A-T note: This document was prepared by the VADEN ORIGINAL technical team, drawing on field experience with heavy commercial vehicle brake systems and OE manufacturer documentation. The values given here are typical/general reference figures; for exact torque, dimension and tolerance values, the vehicle and caliper manufacturer's current service manual always takes precedence. Last updated: September 2026.
Heavy commercial vehicle air brake systems are designed within the framework of ECE R13 (UN/EU braking regulation) and ISO 611.What Is a Caliper Overhaul (Guide Pin / Mechanism / Repair Kit)? Function and Operating Principle
A caliper overhaul kit is a set of service parts supplied together to restore the worn or degraded sliding, sealing and automatic pad adjustment elements (guide pins, bushes, boots, seals, tappet caps and the adjuster mechanism) of a floating (sliding) type heavy commercial vehicle disc brake caliper to their original function.
To understand the operating principle, you first need to look at how the caliper actually brakes. On the pneumatic disc brakes used in heavy commercial vehicles (Knorr-Bremse type SN/SB/SK series, Wabco type PAN/Maxx series, Meritor ELSA-equivalent designs), the thrust force from the brake chamber acts on an eccentric shaft inside the caliper. This eccentric converts a small angular movement into a large axial force; that force is transmitted through the bridge (traverse) and two tappets (spindles) to press the inner pad against the disc. Because the caliper housing can slide freely on the carrier thanks to the guide pins, the moment the inner pad contacts the disc, the housing slides in the opposite direction and pulls the outer pad onto the disc as well. A single-sided mechanism thus clamps both faces of the disc.
Two points are critical in this picture. First, the caliper must be able to slide on the carrier without any resistance. Second, as the pads wear, the tappets must extend themselves through a geared mechanism to keep the running clearance constant. The overhaul kit is exactly what keeps these two functions alive: the guide pins and their bushes provide the sliding, while the boots and seals stop dirt and water from getting in and ruining both.
- Guide pin (short/long): Allows the caliper housing to slide axially on the carrier. There are usually two pins of different diameters — one running in a fixed bearing, the other with clearance (floating).
- Guide pin bush / sliding bush: The steel or composite bush that forms the sliding surface; once worn, the caliper "rocks" and the pad wears at an angle.
- Guide pin boot and cap plug: Prevents water, salt and mud from entering the pin bore. A torn boot is by far the most common reason an overhaul becomes necessary.
- Tappet (spindle) cap and boot: The adjustable cap that contacts the pad backing plate, plus the boot that isolates the hot, dusty area on the disc side from the mechanism.
- Automatic adjuster mechanism: The one-way gear/clutch assembly that progressively extends the tappets as the pads wear, together with the adjuster shaft and its plug.
- Sealing and O-ring set: Eccentric bearing, adjuster shaft and cover seals.
- Mechanism set (operating shaft kit): Eccentric shaft, bearing rollers/needles and bridge linkage components — with heavy damage, the complete mechanism is renewed.
The difference between a guide pin kit and a mechanism kit
In workshop language, "overhaul kit" usually means the guide pin set, but these are different levels of intervention. A guide pin kit restores the caliper's ability to slide on the carrier; it is relatively easy to fit and the caliper is not opened up. A mechanism kit, on the other hand, requires the rear cover of the caliper housing to be removed to work on the eccentric shaft, bridge and adjuster assembly; it demands cleanliness, a bench and patience. The boot/seal kit sits between the two: it renews only the sealing elements and, if mechanical wear has not yet started, it is the cheapest and most effective solution of all.
Why is the automatic adjuster mechanism so critical?
On a heavy commercial vehicle, the running clearance (the gap between pad and disc) is typically in the order of tenths of a millimetre. If this gap grows, the brake chamber stroke increases, brake response is delayed and braking becomes unbalanced across the axle. If it shrinks, the pad drags on the disc continuously, the disc and pad overheat, temperatures climb into the 600–700 °C band and the pad crystallises. The automatic adjuster keeps this clearance constant by correcting it a few microns at a time on every brake application. When the mechanism locks up, one of two scenarios follows: either the clearance is never adjusted at all (the brake goes weak), or the mechanism cannot return (the brake binds and the axle overheats).
The floating caliper's one weak point: freedom to slide
The caliper must be able to slide freely on the carrier over the full wear allowance of the outer pad; the moment that freedom is lost, the outer pad can no longer press fully against the disc. The result is a classic: the inner pad wears noticeably faster than the outer one, the disc wears on one face only, and the vehicle pulls slightly under braking. This is the real cause behind a large share of the complaints filed as "poor quality pads". If you can still remove and lubricate the pin by hand, you are not too late; if it will not come out, you now risk damaging the carrier threads through heat and force.
| Caliper type / equivalent class | Common application (heavy commercial) | Key item in the overhaul | Typical warning |
|---|---|---|---|
| Knorr-Bremse SN6/SN7 type (single eccentric, twin tappet) | Tractor unit and truck front/rear axles, trailer axles | Guide pin + boot + tappet cap kit | If long and short pins are mixed up, sliding is ruined |
| Knorr-Bremse SB/SK type | Bus and heavy truck axles | Adjuster shaft plug and mechanism set | Adjuster shaft direction varies from model to model |
| Wabco PAN/Maxx type | Tractor unit, trailer, bus | Sliding bush + boot set | Bush seating depth is critical |
| Meritor ELSA type | Trailer and truck axles | Guide pin set + cap plugs | If the cap plug leaks, the bore takes on water |
| BPW (TSB/ECO Disc) and SAF (SBS/Integral) axle-integrated calipers | Trailer/semi-trailer axles | Boot set + adjuster mechanism | Kit selection is made not by vehicle brand, but by axle brand/type and caliper casting number |
Part number verification is essential: Caliper overhaul kits look very much alike; guide pin diameter, boot lip dimensions and adjuster mechanism thread direction can change even within the same brand depending on the year of production. Before ordering, always verify the casting/label number on the caliper housing, the axle type and the disc diameter. Never select a kit on vehicle model and year alone — the same chassis number can turn up with two different caliper manufacturers. When in doubt, measure the old part alongside the new one and compare.
Failure Symptoms and Diagnosis
Caliper faults rarely appear "out of nowhere one morning". They are usually a story that builds over weeks: first a faint smell, then heat in the wheel rim, then uneven pad wear, and finally a failed axle on the brake test. The table below matches the symptoms most often seen in the field with their likely causes and verification methods.
| Symptom | Possible cause | Check / verification |
|---|---|---|
| Inner pad worn far more than the outer pad | Caliper cannot slide on the carrier; guide pin seized or bush worn | With the pads removed, push the caliper housing back and forth by hand; if it does not slide freely, the guide pin kit must be opened up. Check whether the guide pin boot is torn or packed with debris. |
| Wheel rim/disc overheating after braking, burning smell | Caliper is not releasing; adjuster mechanism locked or guide pin corroded | After a short run, compare disc temperatures across the axles with a non-contact thermometer; a marked difference between the two sides of the same axle means that caliper is binding. |
| Vehicle pulls to one side under braking (especially noticeable on wet roads) | Loss of sliding freedom on one side, or uneven tappet movement | Measure the brake force difference per axle on a roller brake tester; if the difference between the two sides of the same axle exceeds the regulatory limit, look for a mechanical cause. |
| Brake pedal/chamber stroke has increased, brakes bite late | Automatic adjuster is not advancing; running clearance has grown | Remove the adjuster shaft plug and watch the mechanism turn step by step during brake application. If the chamber push rod stroke exceeds the manufacturer's maximum stroke, the adjuster is not working. |
| Tappets cannot be wound back after a pad change | Adjuster mechanism gear damaged, or tappets locked by corrosion | Try to wind the adjuster shaft back without forcing it, using the correct spanner/tool; if the torque rises noticeably, a mechanism set is required. Force it and you will snap the head off the adjuster shaft. |
| Guide pin boot torn, rust/water/mud build-up in the bore | Loss of sealing — the most common trigger for an overhaul | Remove the pin and inspect its surface: it should be bright and smooth. If you see pitting, craters or black corrosion marks, renew it together with the bush — do not just smear on grease and hope. |
| Tappet boot swollen, burst or melted | Overheating; continuous drag or failure of the pad to release from the disc | Look for hardening/cracking in the boot material. If there is a burning smell and a charred boot, replacing the boot alone is not enough — find the source of the heat (adjuster mechanism/guide pin). |
| Faint but continuous scraping noise after the brake is released | Running clearance has become too small; the mechanism is not backing off | Lift the vehicle and turn the wheel by hand; if there is noticeable resistance and a metallic scraping sound, open the caliper up. Look for bluish heat discolouration on the disc. |
Temperature difference: the fastest and most honest diagnosis
The most practical way to hunt down a caliper fault is to scan the disc hubs with a non-contact thermometer immediately after a short road test. The temperatures of the two wheels on the same axle should be similar; a clear and repeatable difference shows that the caliper on that side is either dragging or, conversely, not working at all. A test carried out under load is far more informative than one on an empty vehicle, because the adjuster mechanism works in step with the load.
What does the pad's wear pattern tell you?
When you take the pad out, read its surface. Top-to-bottom taper wear usually indicates that the caliper is rocking — in other words, bush clearance. Inner-to-outer imbalance is a sliding freedom problem. One corner of the pad wearing faster than the rest points to debris in the carrier abutment or a caliper that is not seated properly. A glazed, glass-like pad surface is the classic mark of chronic overheating and almost always means constant drag.
Overhaul or complete caliper? Where the line is drawn
The decision point is clear. If there is a crack in the caliper housing, deformation of the bridge, stripped carrier threads or deep corrosion on the tappet bodies, an overhaul kit is not the right answer; a complete caliper (or a factory-remanufactured unit) should be chosen. Where the housing and bridge are sound, however, and the wear is limited to the guide pins, boots and adjuster mechanism, the overhaul is both the economical and the technically correct choice. When you are unsure, measure — make the decision on measurement, not on "economic" grounds. Brakes are the one system that gives you no second chance.
When damage to the body, bridge or carrier goes beyond what a rebuild can address, the discussion moves to the complete unit; we cover that whole picture in the air disc brake caliper guide.
Standards and further reading
This subject is governed by the equipment rules for air-braked commercial vehicles. In the United States the federal air brake standard, FMVSS 121 (49 CFR 571.121) defines the reservoirs, protection and timing a compliant system must provide, and Europe applies the equivalent limits of UNECE Regulation No. 13. For further detail, see the on-road braking performance requirement in 49 CFR 393.52. Always confirm specific figures against the current regulation and the vehicle manufacturer service data.
Outside the United States the equivalent duties sit in national law. In the United Kingdom, regulation 18 of the Road Vehicles (Construction and Use) Regulations 1986 requires every part of the braking system to be maintained in good working order. In Canada, air brake systems fall under the Motor Vehicle Safety Regulations, which contain CMVSS 121.
Replacement / Installation Steps
Personal protective equipment and safety: The brake system is under pressure and brake dust must not be inhaled. The vehicle must be on level, solid ground, secured with the parking brake and chocks; the air reservoir must be drained in accordance with the rules. Work gloves, safety glasses, a dust mask (for brake dust) and steel-toe boots are mandatory. On axles fitted with spring brake chambers, do not start any removal work until the chamber has been mechanically caged — an uncaged spring chamber can cause fatal injury. The caliper is heavy; do not drop it and never leave it hanging from the brake hose.
- Secure the vehicle and prepare the system: Move the vehicle onto level ground, chock the wheels, raise the axle and set it on stands. Cage the spring chamber mechanically as described in the service manual. Remove the wheel and light the work area properly.
- Carry out a pre-inspection and photograph it: Before you start dismantling, record the pad thickness, the running clearance, the chamber stroke mark and the condition of the guide pin boots. This record is valuable for post-assembly verification and for any warranty assessment.
- Remove the pads and retaining components: Take out the pad retainer spring/clamp and its pins, then remove the pads. Mark which side each pad came from; the wear pattern is the evidence behind your diagnosis.
- Wind the tappets back to a safe position: Remove the adjuster shaft plug and wind the tappets back in a controlled way with the correct tool. If you feel resistance, stop — the mechanism is damaged, and applying force will snap the adjuster shaft.
- Separate the caliper from the carrier: Loosen the guide pin bolts and lift the caliper housing off the carrier. If you do not need to disconnect the brake hose, do not hang the caliper from it; use a suitable hook or support.
- Remove the old components and clean the surfaces: Take out the guide pins, bushes, boots and plugs. Thoroughly clean the pin bores, the carrier abutment faces and the boot seats with a suitable cleaner. Never work the bearing surfaces with an abrasive grinder or wire brush; you will destroy the dimensions.
- Measure the wear and make the decision: Measure the pin diameter with a micrometer and the bush inner diameter with a dial gauge. Look for cracks/deformation in the housing and bridge. If the measurements fall outside the limits in the service manual, a complete caliper — not an overhaul — is on the table.
- Fit the new bushes and pins with the grease supplied in the kit: Caliper grease is not a consumable you have to source separately; in properly designed sets, as with VADEN ORIGINAL overhaul kits, high-temperature grease compatible with rubber boots is supplied inside the kit itself. Apply this grease only in the quantity specified. Excess grease swells the boot and traps air behind the pin, making assembly impossible. Never, under any circumstances, mix up the long and short pins.
- Seat the boots and plugs correctly: Visually verify that both lips of the boot are fully seated in their grooves, that the boot is not twisted and that no air is trapped inside. A badly seated boot takes on water in the first rain and makes the whole overhaul worthless.
- Refit the caliper to the specified torque values: Tighten the guide pin bolts and carrier fixings in the sequence and to the torque specified by the manufacturer, using a torque wrench. Never reuse bolts designated as single-use. Then fit the pads and seat the retaining components.
- Set the running clearance and carry out a functional test: Bring the adjuster mechanism to its initial clearance using the method described in the service manual and fit a new plug. Return the spring chamber to its normal position, pressurise the system, apply the brake several times and verify that the mechanism adjusts itself. The wheel must turn freely with no scraping noise. Always compare disc temperatures after a short road test.
Points to Watch (Common Mistakes)
The most expensive mistake: "getting by with grease". Cleaning up a guide pin with a corroded bore and refitting it with ordinary grease brings the same fault back within a few weeks — and this time with the carrier threads damaged as well. The grease used in calipers is a special formulation compatible with high temperatures and rubber boots. Standard calcium/lithium grease swells and destroys the boot. Use the grease supplied in the kit; failing that, use the equivalent specified by the manufacturer.
Do not force the adjuster mechanism. If the tappets will not turn easily, the mechanism is already damaged. Forcing it with an extension bar, a length of pipe or an impact wrench will snap the adjuster shaft, and from that point on even an overhaul kit is useless — you need a complete caliper. Also, never aim a pressure washer inside the caliper; water washes the lubricant out of the mechanism and starts corrosion.
- Replacing only the torn boot: If the boot has torn, water is already in the bore. Renew the guide pin and bush along with the boot, or you will be taking it apart again within a few months.
- Overhauling one side only: If one caliper on an axle is overhauled and the other is left alone, the brake force imbalance remains. In brake mechanics, symmetry across the axle is fundamental.
- Mixing up long and short pins: The two pins usually have different tolerances; one locates, the other floats. Fitted the wrong way round, the caliper will either seize or rock.
- Not using a torque wrench: Guide pin bolts cause trouble both when under-tightened and when over-tightened. Too loose and the housing vibrates; too tight and you strip the thread or deform the pin.
- Reusing old plugs and O-rings: These come new in the kit for a reason. That small-looking plug is the only barrier stopping water getting into the bore.
- Ignoring the condition of the disc: Fitting new pads and an overhauled caliper to a disc that is overheated, cracked or below its minimum thickness limit simply postpones the problem by a few thousand kilometres.
- Skipping the road test after assembly: You can only confirm that the automatic adjuster is working correctly through several brake applications and a temperature check. A vehicle coming off the bench must not go straight back on the road.
- Blowing brake dust out with compressed air: This is both a health hazard and a way of driving the dust into the bearing clearances. Use proper extraction or a wet cleaning method.
Technical Values and Check Points
The values below are typical/general reference ranges for heavy commercial vehicle disc brake calipers. They vary with the caliper manufacturer, axle type and disc diameter; for exact values, the vehicle and caliper manufacturer's current service manual takes precedence.
| Parameter | Typical reference range | Note / check method |
|---|---|---|
| Brake system working pressure (pneumatic) | approx. 7–8.5 bar (~100–125 psi) | Cut-out pressure and regulator setting per the vehicle manual; measure with a gauge |
| Caliper running clearance (total) | approx. 0.6–1.1 mm band (model dependent) | Per the method in the service manual; with feeler gauge/dial gauge |
| Normal operating disc temperature | approx. 100–350 °C | Non-contact thermometer; both sides of the same axle should be similar |
| Peak disc temperature under heavy deceleration | can exceed 600 °C | Running continuously in this band is a sign of chronic drag |
| Left-right disc temperature difference on the same axle | no marked difference acceptable (no numerical standard threshold) | Repeatability matters more than a numerical threshold; if there is a clear, repeated difference between the two sides of the same axle by eye or thermometer, the caliper must be opened up |
| Minimum pad friction material thickness | usually ~2 mm above the backing plate (manufacturer's limit governs) | Measure through the inspection window; plan ahead rather than running to the limit |
| Minimum disc thickness | the "MIN TH" value stamped on the disc | Measure with a micrometer at several points |
| Disc thickness variation (DTV) | typically in the order of a few hundredths of a mm | Circumferential measurement with a dial gauge; exceeding the limit causes judder |
| Guide pin sliding freedom | must move by hand without resistance | With the pads removed, push the housing back and forth by hand |
| Caliper grease operating temperature | high-temperature type, rubber compatible | Use the grease supplied with the kit; standard grease destroys the boot |
| Fixing | Typical torque order of magnitude | Critical note |
|---|---|---|
| Caliper guide pin / guide bolt | model dependent; no numerical band can be given | Most models use a pre-torque + angular tightening combination — exact value from the service manual only |
| Caliper carrier — axle mounting bolt | approx. 250–400 Nm order of magnitude | Usually single-use; sequence and angle per the manual |
| Adjuster shaft plug / cover | low torque, generally hand-tight + specified value | Over-tightening cracks the plug and lets water in |
| Brake chamber mounting nuts | approx. 180–250 Nm order of magnitude | Do not touch until the spring chamber is caged |
| Wheel nuts | approx. 500–650 Nm order of magnitude | In a crosswise sequence; re-check after the road test |
Torque warning: The torque values above indicate an order of magnitude, not a prescription. Even within the same brand, bolt class, thread length and the need for angular tightening vary from model to model. A torque wrench is mandatory on brake fixings; final tightening is never done with an impact wrench. Reusing a bolt the manufacturer calls "single-use" destroys the security of the joint even at the correct torque. For exact values, the service manual governs.
- Are all guide pin boots intact and fully seated in their grooves?
- Does the caliper housing slide freely on the carrier by hand?
- Does the adjuster mechanism advance during brake application (watch it with the plug removed)?
- Are the two pads close in thickness, and is the wear pattern even?
- Is there heat discolouration, thermal cracking or a pronounced lip on the disc surface?
- Is the brake chamber stroke within the manufacturer's stated limit?
- After the road test, are left and right temperatures similar on the same axle?
- Have the mounting bolts been tightened with a torque wrench and marked?
Maintenance and Service Life
When caliper overhaul kits are seen as parts "you fit once it has failed", you are always too late. The correct approach is to synchronise the overhaul with the pad change. The pad change is the one natural opportunity you have to open the caliper anyway; if the boots are not checked and the guide pins not removed and inspected at that moment, the bore quietly corrodes throughout the period until the next opening — a period that varies with the duty profile and, in most long-haul applications, runs to hundreds of thousands of kilometres. Almost every dead caliper we see in the field is the story of a torn boot that went unnoticed at the second set of pads.
- Inspect guide pins and boots at every pad change: If the boot is torn or the pin turns stiffly, fit the overhaul kit there and then — leaving it to next time means losing the caliper.
- Pre-winter check: Salted road conditions are the worst enemy of guide pin bores. Checking boot integrity before winter sets in prevents the cost of a complete caliper come late spring.
- Make temperature scanning routine: Scanning disc temperatures after a short road test during periodic maintenance costs nothing and gives the earliest warning of all.
- Brake test records: File your roller brake tester results. A brake force difference per axle that grows over time shows a mechanical problem quietly developing.
- Fleet approach — plan by axle: Overhaul both sides of the same axle together and, where possible, use kits from the same production batch. Symmetry is the foundation of brake balance.
- Intervals by duty profile: On construction site, mining, short-haul distribution and hilly-route vehicles, the need for an overhaul arrives markedly earlier than on long-haul tractor units. Build the schedule around the conditions, not the odometer.
- Keep records: Note in the vehicle file which caliper had which kit fitted and when. If a repeat failure is always on the same axle, the problem may not be the caliper but the axle itself or the fitting method.
In short: a caliper overhaul is not a cost-cutting trick, it is part of planned maintenance. An overhaul done in time and with the correct kit doubles the life of the caliper housing, cuts disc and pad costs and, most importantly, preserves brake balance. A delayed overhaul takes the pad first, then the disc, and finally the caliper itself — along with the risk of a breakdown on the road.
VADEN ORIGINAL offers its caliper overhaul product family for heavy commercial vehicle brake systems — guide pin and bush sets, boot and seal kits, tappet and dust boot sets, caliper shaft and rubber plugs and complete mechanism sets — from stock, suitable for Knorr-Bremse, Wabco and Meritor equivalent designs. Once you have verified your vehicle's caliper type and casting number, you can browse the VADEN Caliper Overhaul (guide pin/mechanism/repair kit) product family to select the right kit, and consult our technical team about the axle-by-axle overhaul you have planned. The right part, applied at the right time and by the right method, preserves brake balance, extends caliper life and keeps the vehicle off the hard shoulder.
Related categories: Brake Caliper Pin · Brake Caliper Mechanism · Brake Caliper Shaft · Actuating Lever · Brake Caliper Repair Kits · Dust Boot
Related technical guides: ABS Wheel Speed Sensor & ECU: Faults, Replacement & Care · Air Processing Unit (APU/EAC): Faults, Replacement & Care · Pressure Limiting Valve: Faults, Replacement & Maintenance · Four-Circuit Protection Valve: Faults, Diagnosis & Replacement · ALB Load Sensing Valve: Faults, Replacement & Setting Guide
Application and compatibility: Vehicle compatibility catalogue · Engine compatibility catalogue
Tags
Frequently Asked Questions
- How do I choose between a caliper overhaul kit and a complete caliper?
- The decision is made on measurement. If the caliper housing and bridge are sound and the wear is limited to the guide pins, bushes, boots and adjuster mechanism, the overhaul kit is the correct and economical solution. If there is a crack in the housing, deformation of the bridge, deep corrosion on the tappet bodies or stripped carrier threads, a complete caliper is required. When in doubt, measure; in a brake system there is no such category as "good enough".
- Why does a caliper guide pin seize?
- Almost always the same reason: the guide pin boot tears and water, salt and mud get into the bore. Water starts corrosion, corrosion effectively increases the pin diameter, and sliding freedom is lost. Salted winter conditions and pressure washing accelerate the process. That is why the boot is the cheapest yet most critical part in this system.
- Should a caliper overhaul be done when changing the pads?
- Fitting a kit at every pad change is not compulsory, but inspection is. If the guide pin boot is torn, the pin slides stiffly or the adjuster mechanism is sticking, the overhaul kit should be fitted there and then. An overhaul carried out while the caliper is already open requires far less labour than one done separately.
- Which grease is used in a caliper — will ordinary grease do?
- It will not. Caliper guide pins take a specially formulated grease that withstands high temperatures and is compatible with rubber boots. Standard lithium/calcium greases run at high temperature and swell and destroy the boot material. The rule is simple: use the grease supplied in the overhaul kit, in the specified quantity; more is also harmful, because it traps air and ruins assembly.
- What happens if a caliper binds — can you keep driving?
- No. A binding caliper heats the disc and pad continuously; once temperatures pass 600 °C the pad crystallises, the disc cracks thermally and brake force on that axle drops. The wheel bearing and tyre also suffer from the heat. If you notice excessive heat at the wheel rim, a burning smell or pulling to one side, get safely to the nearest workshop and have it dealt with.
- Does the automatic adjuster mechanism repair itself?
- No. The mechanism works on a one-way gear/clutch principle; once it locks up through corrosion or damage, it cannot be expected to keep working and correct itself. If you see the mechanism failing to advance and do nothing, the running clearance grows, the chamber stroke lengthens and brake response deteriorates measurably. This also shows up directly as a failed axle at the brake inspection.
- Is it enough to overhaul just one caliper on an axle?
- Technically, no. In brake mechanics, symmetry across the axle is fundamental; if one side is renewed and the other left as it was, the brake force difference remains and the vehicle pulls under braking. What is more, the side left alone usually develops the same fault before long. Treating the axle as a whole is both safer and cheaper in the long run.
- What information do I need when choosing an overhaul kit?
- Vehicle brand and model year alone are not enough. You need the caliper manufacturer and type (Knorr-Bremse, Wabco, Meritor-equivalent designs), the casting/label number on the caliper housing, the axle type and brand, and the disc diameter. Because the same chassis number can appear with different caliper manufacturers, verification must always be done on the part, not the vehicle. When you are unsure, measure the old part and compare.
- Why does the inner pad wear so much faster than the outer one?
- Inner-to-outer imbalance is a sliding freedom problem: the caliper housing no longer moves freely on the carrier, so the outer pad never presses fully onto the disc. Check the guide pin and its bush first. Top-to-bottom taper points to bush clearance instead, one corner wearing fast points to debris in the carrier abutment, and a glazed pad face means chronic overheating from constant drag.
- How do I verify the caliper works correctly after fitting the overhaul kit?
- Bring the adjuster to its initial clearance by the method in the service manual and fit a new plug. Return the spring chamber to its normal position, pressurise the system, apply the brake several times and confirm the mechanism adjusts itself. The wheel must turn freely with no scraping noise. Then compare disc temperatures after a short road test; a vehicle coming off the bench does not go straight back on the road.
Related Articles

Brake Caliper Rubber Repair Kit: Failure & Replacement Guide
Brake caliper rubber repair kits explained: dust boots, o-rings, seals, pin bushings, failure signs, step-by-step replacement and the right grease to use.
Caliper Tappet & Dust Boot: Function, Failure, Replacement
Caliper tappet and dust boot on truck air disc brakes: what happens when the boot tears, why tappets seize, and how to inspect, measure and replace them.
Brake Pad Wear Sensor: Function, Faults & Replacement Guide
Truck brake pad wear sensors: how the wire or electronic sensor triggers the warning lamp, common wiring faults, and how to measure and replace one.


