Trailer Control Valve: Faults, Replacement & Maintenance Guide
How the trailer control valve (Anhangersteuerventil) works on heavy trucks, its failure symptoms, gauge diagnosis, replacement steps and OE maintenance tips.
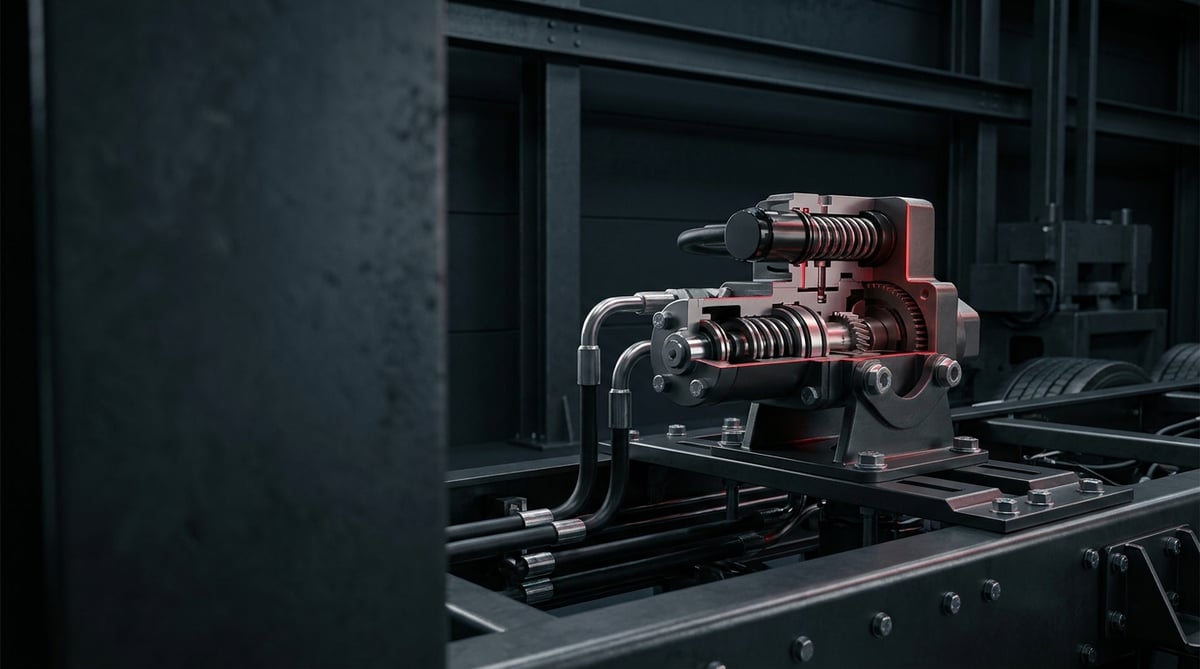
At the heart of the air brake line connecting the tractor and the trailer, a small but critical component does its job: the trailer control valve. In Germany this part is known as the Anhängersteuerventil, and as the name suggests, its task is to relay the tractor's braking command to the trailer accurately and on time. In workshop terms, whenever someone says "the trailer grabs late" or "the trailer locks early," this is one of the first places to look. This guide explains what the trailer control valve does on heavy commercial vehicles, how it fails, and how it is diagnosed and replaced, using examples straight from the field.
This document was prepared by the VADEN technical team, based on field experience with heavy commercial vehicle brake systems and OE component behavior. The values given here are typical reference ranges; for exact torque, pressure and setting values, always refer to the OE service manual of the vehicle and its axle/brake system. Last updated: September 2026.
Heavy commercial vehicle air brake systems are designed within the framework of ECE R13 (UN/EU braking regulation) and ISO 611.What Is a Trailer Control Valve? Function and Operating Principle
The trailer control valve (Anhängersteuerventil) is a pneumatic control valve that monitors the tractor's brake pressure, feeds the trailer brake line proportionally, and provides braking synchronization between the tractor and the trailer.
Its operating principle is based on the logic of "signaling" the tractor's braking command to the trailer. When the driver presses the brake pedal, the control (command) pressure coming from the front and rear axle circuits reaches the signal inputs of the trailer control valve. The valve senses this signal, moves its internal piston and diaphragm assembly, and delivers compressed air taken from the supply reservoir to the trailer via the yellow line (control / command line). The red line, on the other hand, is the trailer's continuously fed supply line. In this way the trailer brakes engage in harmony with the tractor brakes and generally slightly ahead of them (the "trailer leads" principle); this reduces the combination's tendency to jackknife.
On modern EBS (electronic braking system) vehicles, this task is largely handled by the trailer EBS module and the electronic trailer control valve; however, the pneumatic control path is always retained as a backup/redundant line. On classic ABS/pneumatic systems, the valve operates entirely mechanically and pneumatically.
- Body and connection ports: Supply, control signal inputs (1st and 2nd circuit) and trailer output ports.
- Piston / diaphragm assembly: The moving core that proportions the signal pressure to the output pressure.
- Springs and adjustment (predominance) element: The stage that determines how far ahead the trailer leads the tractor.
- Sealing elements: O-rings, diaphragm and valve seating surfaces.
- Ventilation (exhaust) port: The outlet that vents trailer pressure to the atmosphere when the brakes are released.
Why is predominance so important?
Trailer control valves are manufactured with a "predominance" value that makes the trailer brakes engage somewhat earlier and more firmly than the tractor. Typically, at low brake commands the trailer output delivers somewhat more (as a general reference, roughly in the 0.1–1.0 bar range) than the tractor pressure. This difference keeps the combination straight and balanced. If the value is degraded through wear or by fitting the wrong valve, the combination either "pushes" or "pulls."
Dual-circuit safety logic
The valve usually receives its signal from two separate brake circuits. Even if one circuit fails, the other can still actuate the trailer brake. This is the fundamental safety approach of heavy commercial vehicle brake architecture.
Relationship with the parking brake / park signal
Some valve types behave so that when the tractor's parking brake (spring accumulator) is applied, they also engage/cut off the trailer supply line. This keeps the trailer safely held when the combination is parked.
| Type / System | Actuation type | Typical use | Note |
|---|---|---|---|
| Pneumatic trailer control valve | Mechanical-pneumatic signal | Classic ABS tractors | Knorr-Bremse / Wabco (Bendix) equivalent types |
| Electro-pneumatic (EBS) module | Electronic + backup pneumatic | EBS-equipped modern tractor/trailer | Integrated with the trailer EBS module |
| Dual-circuit standard valve | Twin signal input | General heavy commercial | Provides circuit redundancy |
| Predominance-adjusted valve | Adjustable lead | Heavy combination / trailer | Lead value varies by OE |
Part number verification: Although trailer control valves look very similar from the outside, they differ in port count, signal configuration and predominance value. A valve with the wrong predominance value upsets the brake balance and creates a risk of swerving. Before installation, always verify the OE number of the old valve and the vehicle's brake system type (ABS / EBS).
Failure Symptoms and Diagnosis
Trailer control valve failures generally fall into two main groups: "brake imbalance" and "air leakage." The symptoms most often appear on the trailer side, but the root cause may be in the valve on the tractor. The table below is a starting point for field diagnosis.
| Symptom | Possible Cause | Check / Verification |
|---|---|---|
| Trailer brakes engage late (trailer "grabs late") | Signal delay, internal piston sticking, reduced predominance | Compare the yellow line pressure with the tractor command pressure using a gauge |
| Trailer locks early / trailer "pulls" | High predominance, valve setting off, wrong valve fitted | Measure the output/command pressure difference under a graduated brake command |
| Continuous air leak from the valve / blowing from the exhaust port | Torn diaphragm, hardened O-ring, seating surface failure | Soap bubble test; listen with the brakes applied and released |
| Trailer brakes release late when the brake is released | Clogged exhaust port, weak internal spring, piston not returning | Observe the time for the output pressure to drop to atmosphere after release |
| Combination pulls left/right under braking | Brake synchronization disorder, unbalanced output | Check tractor-trailer brake timing and pressure balance |
| Trailer does not brake at all | Broken/clogged signal line, internal valve blockage, no red line supply | Verify the supply and control line pressures separately |
| Warning: trailer discharges slowly/does not fill when the combination stops | Supply line restriction, valve supply port issue | Check the red line charge time and reservoir pressure |
Pressure verification with a gauge
The most reliable diagnosis is to connect a gauge to the yellow (control) and red (supply) lines and monitor the output pressure while applying a brake command. If the output pressure does not proportionally follow the tractor command pressure, an internal valve failure is highly likely. The output is also expected to drop quickly at the moment of release; a delay points to an exhaust/piston problem.
Leak (sealing) test
With the system charged and the engine off, the rate of reservoir pressure drop is observed. Soap bubbles are applied to the valve ports and the exhaust outlet to localize the leak. Continuous blowing from the exhaust port is a classic sign of an internal diaphragm/seating failure.
Reading fault codes on EBS-equipped vehicles
On EBS architectures, the first step of diagnosis is to read the fault code (DTC). The trailer module may report a pressure sensor inconsistency, signal loss or a valve response error. Pneumatic verification complements the electronic diagnosis; the two should be evaluated together.
Standards and further reading
This subject is governed by the equipment rules for air-braked commercial vehicles. In the United States the federal air brake standard, FMVSS 121 (49 CFR 571.121) defines the reservoirs, protection and timing a compliant system must provide, and Europe applies the equivalent limits of UNECE Regulation No. 13. For further detail, see the illustrated reference guide at airbrakecompressor.com. Always confirm specific figures against the current regulation and the vehicle manufacturer service data.
Outside the United States the equivalent duties sit in national law. In the United Kingdom, regulation 18 of the Road Vehicles (Construction and Use) Regulations 1986 requires every part of the braking system to be maintained in good working order. In Canada, air brake systems fall under the Motor Vehicle Safety Regulations, which contain CMVSS 121.
Replacement / Installation Steps
Personal Protective Equipment (PPE) and safety: Use work gloves and safety goggles. Before starting work, secure and chock the vehicle and release all pressure in the brake system. A line or port disconnected under pressure can cause serious injury by ejecting a hose/part. The engine and ignition must be off.
- Release the pressure: Empty all air reservoirs and brake circuits; verify with a gauge that the system is at zero pressure.
- Mark the valve and lines: Before removal, label or photograph every port and line (yellow/red/control); port confusion is the most common mistake.
- Disconnect the air lines: Carefully separate the port connections, fittings or quick connectors; protect the line ends against contamination.
- Disconnect the electrical connector: On EBS valves, remove the connector by pressing its tab without breaking the locking tongue.
- Remove the old valve: Undo the mounting bolts/clamp and take the valve off the chassis/mounting bracket.
- Verify the new valve: Compare the OE number, port layout and predominance value of the new VADEN valve with the old part.
- Clean the surface and ports: Clean the mounting surface and line ends; leave no chips, dirt or old gasket residue.
- Install the new valve: Tighten the bracket bolts progressively to OE torque; seat the valve without forcing it or distorting the body.
- Connect the lines to the correct ports: Following your labels, connect the supply, control and trailer output lines; tighten the fittings to OE torque.
- Charge the system and perform a leak test: Start the engine and fill the system, then check all ports for sealing with soap bubbles.
- Function and brake balance test: Apply a brake command and verify the trailer output pressure with a gauge; check the predominance/timing and the combination's balance on a road test.
Points to Watch (Common Mistakes)
The most critical mistake — wrong predominance value: Fitting a valve that looks identical but has a different lead value upsets the combination's brake balance and creates a risk of swerving/jackknifing. The valve must always be matched to the OE number and system type (ABS/EBS).
Swapping the ports: Interchanging the supply (red) and control (yellow) lines causes the trailer either not to brake at all or to stay permanently locked. Always mark them before removal.
- Dismantling without releasing the pressure: Serious injury risk; always verify zero pressure.
- Skipping the leak test: A small port leak gradually lowers reservoir pressure and degrades brake performance.
- Handing over without a road test: Predominance and brake timing can only be verified under a real brake command.
- Dirty line ends: Chips/dirt entering the system permanently damage the valve seating surface.
- Wrong torque: Over-tightening cracks the body, under-tightening causes leaks; comply with OE torque.
Technical Values and Checkpoints
The values below are typical/general reference ranges for heavy commercial vehicle brake systems. Exact values vary by vehicle, axle and valve type; the OE service manual is always authoritative.
| Parameter | Typical / General Reference | Note |
|---|---|---|
| System operating pressure | ~8–10 bar (approx. 116–145 psi) | Reservoir/circuit pressure; varies by OE |
| Trailer supply (red line) | ~6.5–8.5 bar | Continuous supply line |
| Control (yellow line) maximum output | Proportional to system pressure, ~reservoir level at full braking | Proportional to the brake command |
| Predominance (lead) | ~0.1–1.0 bar more at low command | Specific to valve type; OE value is authoritative |
| Operating temperature range | Approximately -40 °C to +80 °C | Ambient/component temperature |
| Permissible leakage | Very low / negligible per OE limit | Assessed by the reservoir drop rate |
General torque references for the fasteners are below. These are starting values; the OE manual must be used for the final torque.
| Fastener | Typical Torque Range | Note |
|---|---|---|
| Bracket / mounting bolts (M8) | ~20–25 Nm | Tighten progressively and evenly |
| Bracket / mounting bolts (M10) | ~40–50 Nm | Varies by OE |
| Air line fittings | Per manufacturer specification | Over-tightening damages the thread/port |
Always take pressure measurements with a calibrated gauge and with the system fully charged. When assessing the predominance difference, read the tractor command pressure and the trailer output pressure at the same time; a single-point measurement can be misleading.
- Verify the supply (red) and control (yellow) line pressures separately.
- Observe the rapid discharge from the exhaust port when the brake is released.
- Look for leaks with soap bubbles on all ports and body joint surfaces.
- Check the combination's balance at different brake intensities on a road test.
Maintenance and Service Life
Although the trailer control valve is not directly a periodic replacement part, it should be checked regularly within the brake system's overall maintenance cycle. The biggest factor determining its service life is the moisture and dirt entering the system; for this reason, the healthy operation of the air dryer directly affects the valve's service life.
- Air quality: Replace the dryer cartridge on time; moisture hardens and cracks the O-rings and diaphragm inside the valve.
- Reservoir draining: Reduce water and rust ingress into the system by regularly emptying the water drain valves.
- Periodic leak check: During brake maintenance, check the valve ports and the exhaust outlet for leaks.
- Connections and vibration: Inspect that the bracket bolts have not loosened and that the lines are not suffering contact/chafing.
- Monitoring brake balance: Watch the combination's pulling/pushing behavior under braking; the early warning most often comes from the valve.
A quality valve works trouble-free for many years in a system supplied with clean, dry air. By contrast, even the best valve fails early in a damp, dirty system. For this reason, maintaining the system's air preparation chain (compressor, dryer, reservoir) is as important as replacing the valve itself.
A correctly selected trailer control valve, supplied with clean air and installed properly, is a cornerstone of the brake safety of a heavy commercial combination. The VADEN ORIGINAL trailer control valve product family is manufactured with port layouts suited to the ABS and EBS architectures of heavy commercial vehicles and OE-equivalent predominance values; when used together with correct part number matching and the OE service manual, it provides reliable and long-lasting brake synchronization.
Related categories: Trailer Control Valve · Trailer Control Valve · Repair Kit · EBS Trailer Control Valve · EBS Trailer Control Valve · Repair Kit
Related technical guides: ABS Wheel Speed Sensor & ECU: Faults, Replacement & Care · Brake Caliper Overhaul Kit: Guide Pins, Boots & Adjuster · Air Processing Unit (APU/EAC): Faults, Replacement & Care · Pressure Limiting Valve: Faults, Replacement & Maintenance · Four-Circuit Protection Valve: Faults, Diagnosis & Replacement
Application and compatibility: Vehicle compatibility catalogue · Engine compatibility catalogue
Main guide: Truck Air Brake Valves Explained: Types, Functions and Failure Symptoms
Tags
Frequently Asked Questions
- How do I tell a trailer control valve has failed?
- The most common signs are the trailer braking late or early, a continuous air leak from the valve/exhaust port, and the combination pulling left and right under braking. A definitive diagnosis is made by connecting a gauge to the yellow and red lines and monitoring the output pressure under a brake command.
- What is the difference between the yellow line and the red line?
- The red line is the trailer's continuously fed supply line; if the red line is cut, the trailer brakes automatically. The yellow line, on the other hand, is the control (command) line carrying the braking command, and it varies with pedal pressure.
- Why does the trailer brake late?
- It is usually due to piston sticking inside the valve, a reduction in the predominance value, or delay/restriction in the signal line. If a gauge shows the output pressure following the command pressure with a delay, valve replacement comes onto the agenda.
- What is predominance (lead) and why is it important?
- It is the setting that makes the trailer brakes engage somewhat earlier and more firmly than the tractor. This keeps the combination straight under braking. A wrong predominance value increases the combination's jackknife risk; that is why the valve must always be matched to the OE value.
- Can I replace the trailer control valve myself?
- The job requires full release of the pressure, correct connection of the ports, and post-installation pressure/leak/brake balance tests. Since brake safety is critical, if you lack the proper equipment and experience it is recommended to have it done by an authorized heavy commercial vehicle service.
- What happens if I fit the wrong valve?
- A valve with a different port layout or predominance value can cause the trailer not to brake at all, to stay permanently locked, or the combination to sit unbalanced. Always match it to the old part's OE number and the system type (ABS/EBS).
- Do EBS-equipped vehicles still have this valve?
- Yes. Although the trailer EBS module handles most of the control on EBS-equipped vehicles, a pneumatic backup control path is retained for safety. In diagnosis, both reading the fault code and pneumatic pressure verification should be done together.
- What extends the valve's service life?
- Clean and dry air. Regular maintenance of the air dryer, reservoir water draining and periodic leak checks significantly extend the valve's service life. Moisture and dirt harden the internal sealing elements, making up the single biggest cause of failure.
- If one brake circuit fails, does the trailer still brake?
- Yes. The trailer control valve usually receives its signal from two separate brake circuits, so even if one circuit fails the other can still actuate the trailer brake. That is why the valve body carries separate control signal inputs for the first and second circuit. This dual-circuit layout is the fundamental safety approach of heavy commercial vehicle brake architecture, but the failed circuit must still be repaired promptly.
- Is a road test really necessary after replacing the valve?
- Yes. Predominance and brake timing can only be verified under a real brake command; a workshop pressure and leak test will not show them. On the road test you check the combination's balance at different brake intensities and watch for pulling or pushing. Handing the vehicle over without a road test is one of the most common mistakes in this job.
Related Articles
ALB Load Sensing Valve: Faults, Replacement & Setting Guide
Rear axles locking when the truck runs empty, or longer stopping distances when loaded, point to the ALB load-sensing valve: diagnosis and setting.

ABS Brake System: How It Works, Warning Light and Faults
Learn how the ABS brake system works on heavy trucks, why the warning light comes on, how to diagnose sensor faults, and the correct replacement steps.
Brake Chamber, Diaphragm & Hose: Faults, Replacement, Care
Learn how to spot a leaking brake chamber, measure push rod stroke, cage the power spring safely and replace the unit and hose without risk on heavy trucks.


