Hydraulic Clutch Pedal Unit: Fault Diagnosis, Replacement, Maintenance
How to diagnose a faulty hydraulic clutch pedal unit on trucks, replace and properly bleed it, and maintain it to prevent a spongy clutch pedal.

When a heavy commercial vehicle feels like the clutch never fully disengages, the pedal goes spongy underfoot, or it doesn't spring back after being pressed, drivers often blame the pressure plate or the clutch kit. Yet field experience frequently points somewhere else: the fault sits higher up, inside the hydraulic unit right behind the pedal itself. In modern trucks and buses the clutch is no longer actuated by individual linkage rods and cables but hydraulically, through a master cylinder integrated into the pedal assembly. This guide explains, from a foreman's and service technician's perspective, what the hydraulic clutch pedal unit does, how it fails, the correct diagnostic sequence, removal and installation with a focus on bleeding discipline, and the maintenance habits that extend its service life.
What Is a Hydraulic Clutch Pedal Unit? Function and Working Principle
A hydraulic clutch pedal unit is the actuation assembly that converts the mechanical force applied by the driver's foot into hydraulic pressure via a master cylinder integrated into the pedal arm, and transmits that pressure through the clutch line to the slave cylinder — and, where fitted, through a servo/booster — to the clutch fork. Fluid drawn from the reservoir is compressed by the pedal pushrod to disengage the clutch.
The same unit goes by several names in the field and in catalogs: clutch master cylinder, clutch actuation unit, pedal master cylinder assembly, clutch pump, and, when supplied as one piece with the pedal arm, complete pedal unit. All belong to the same hydraulic actuation family; regardless of the name used, the selection criterion is the same: chassis/engine code and OE reference number.
The working principle combines leverage with hydraulic pressure. When the driver presses the pedal, the pedal arm rotates about a pivot pin and pushes the pushrod forward. The pushrod drives the piston inside the master cylinder along the bore. In the first instant of piston movement, it closes off the reservoir feed port (the compensation port); from that point the fluid inside the cylinder is compressed and pressure builds. This pressure travels through the outlet fitting and the clutch hose to the slave cylinder (release cylinder). The slave cylinder piston extends and, either directly or with the help of a servo/booster, pushes the clutch fork, releasing the pressure plate — the clutch disengages and the gear can be changed.
When the pedal is released, the piston returns, the compensation port reopens, and the excess fluid in the circuit flows back to the reservoir. This return flow compensates for thermal expansion and for the volume change caused by pad wear. This compensation mechanism is exactly why hydraulic actuation self-adjusts compared to cable-operated systems, and why it depends so heavily on precise seals. Once a seal starts leaking, pressure escapes and the reservoir level quietly drops.
Which OE systems is it found on?
The geometry and actuation character of the hydraulic clutch pedal unit depend less on the vehicle brand and more on the clutch actuation architecture and chassis/engine code it is built into. In heavy-duty service, this unit is most commonly encountered on the Mercedes-Benz Actros and Axor, MAN TGA / TGS / TGX, DAF CF and XF, Volvo FH and FM, Scania, and Iveco Stralis families; on the booster side, Wabco- and Knorr-sourced OE units are common. These names are given only as application examples; within each family there are different unit variants depending on trim level and pedal group. The correct part is determined by engine/chassis code and OE number, not by brand name; the relevant OE service procedure governs hydraulic line and fitting dimensions.
Synchronized and non-synchronized variants
The hydraulic clutch pedal unit is manufactured in two basic variants depending on the gearbox control it is used with. The synchronized unit is used on gearboxes where gear changes are smoothed by synchromesh, with actuation characteristics and stroke values set accordingly. The non-synchronized unit is intended for applications without synchromesh or with a different actuation logic. Although the two look similar from the outside, piston stroke, output characteristics, and connection dimensions can differ; fitting the wrong variant spoils pedal feel and gear engagement. VADEN's category tree reflects this distinction clearly: Synchronized and Non-Synchronized units are listed separately.
Components and supporting elements
- Pedal arm and bearing: the lever that transfers foot force through a leverage ratio to the pushrod, rotating on a pivot pin.
- Integrated master cylinder: the body housing the piston that converts mechanical force into hydraulic pressure.
- Pushrod: the rod connecting the pedal arm to the piston, carrying the free-travel adjustment.
- Reservoir feed port: the connection that feeds hydraulic fluid into the cylinder and provides the compensation function.
- Sealing elements (repair kit seals): the seals and O-rings in front of and behind the piston — the root component in most leaks.
- Outlet fitting and clutch hose (546): the line carrying pressure from the master cylinder to the slave cylinder.
- Return spring: the spring and pedal stop that return the pedal to its upper position.
| System / Application | Actuation type | Characteristic feature | Service note |
|---|---|---|---|
| Servo-assisted hydraulic actuation (heavy tractor) | Master cylinder + line + booster-assisted slave cylinder | Pedal effort reduced by the booster | Booster and master cylinder fail independently; diagnose separately |
| Direct hydraulic actuation (mid-range) | Master cylinder + line + slave cylinder | No booster, higher pedal effort | Bleeding and seal maintenance are decisive |
| Synchronized unit (325) | Synchromesh gearbox actuation | Stroke/output characteristic matched to synchronized shifting | Variant must not be mixed up; confirm against OE |
| Non-synchronized unit (326) | Non-synchromesh / different actuation | Different piston stroke and connection dimensions | Wrong variant spoils gear engagement |
| Complete pedal unit (939) | Pedal arm + integrated master cylinder together | Arm, bearing, and cylinder as a single set | Complete unit is required when a repair kit is not enough |
How is a hydraulic clutch pedal unit fault recognized?
Most hydraulic clutch pedal unit faults fall under two headings: loss of hydraulic pressure (leakage or air) and mechanical failure (pedal arm, bearing, pushrod, spring). The first typically shows up as the clutch not disengaging and a spongy pedal feel; the second as the pedal not returning or as a creaking noise. The table below matches field symptoms with likely causes and verification methods.
| Symptom | Likely Cause | Check / Verification |
|---|---|---|
| Pedal feels soft/spongy; firms up after a few presses | Air in the system, internal leak at the master cylinder seal, or low reservoir level | Check reservoir level; observe feel change after bleeding; hold the pedal down and watch for slow creep |
| Gear engages hard, clutch doesn't fully disengage, chatter on shift | Insufficient stroke: master cylinder not building pressure, internal seal leaking, or air present | Measure pedal stroke; observe slave cylinder travel; check lines and fittings for leaks |
| Reservoir fluid level keeps dropping with no visible outside leak | Internal leak from the master cylinder's rear seal into the pedal box | Check for moisture/wetness behind the pedal and around the pushrod area; indicates internal leak requiring seal repair kit |
| Pedal stays at the bottom, doesn't return on its own | Return spring broken/loose, piston seal sticking, or pedal bearing jammed | With the engine off, pull the pedal by hand and test free movement; visually inspect spring and bearing |
| Pedal is very stiff, requires strong effort | Servo/booster inactive, blocked line, or dry/corroded pedal bearing | Check servo supply (air/hydraulic); lubricate pedal pivot; check line clearance |
| Fluid drop or wet trace around the pedal area | Outlet fitting, hose connection, or master cylinder front seal leaking | Clean the area, press the pedal, and trace the direction the leak spreads from |
| Creaking, clicking, or vibration when pressing/releasing the pedal | Dry pedal pivot pin, worn bearing, or play at the pushrod mount | Move the pedal by hand to check for play; inspect pin and bearing for lubrication/wear |
| Clutch feels tight on first use in the morning, improves once warm | A small amount of air in the system, or a seal that stiffens in cold weather | Observe repeatedly through cold-warm cycles; evaluate bleeding and seal condition |
Leak, air, or mechanical?
Separating these is half the diagnosis. If the pedal on a hydraulic clutch pedal unit feels spongy and firms up after a few pumps, air is the first suspect. If the reservoir level is dropping with no outside trace, the problem is an internal leak from the master cylinder's rear seal into the pedal box; a repair kit or a complete unit then becomes necessary. If the pedal doesn't return, or feels stiff or creaks, the problem is not hydraulic but mechanical — the spring, bearing, pin, or pushrod. Replacing parts without separating these three possibilities is the most common and most expensive mistake.
Pedal stroke and free-travel check
Diagnosis of a hydraulic clutch pedal unit centers on pedal free travel and total stroke. The first few millimeters of pedal movement (free travel) is the clearance until the piston closes the compensation port; if this clearance is too large, the remaining stroke is not enough to build pressure and the clutch fails to disengage. If it is too small, the piston can never open the port, fluid cannot return to the reservoir, and the clutch stays partially engaged, burning the friction lining. Free travel and total stroke values are vehicle-specific; the exact figure must be confirmed against the OE service manual.
Internal leak test
If the master cylinder's internal seal is leaking, the pedal slowly sinks to the floor when held down. With the engine off, press the pedal with moderate force and hold it steady: if you feel a slow "melting" sensation under your foot, there is an internal leak, and the fluid is usually going into the pedal box rather than outside. This test is the fastest way to explain a dropping fluid level with no external trace.
This test only covers the pedal end of the line; for the full symptom picture at both ends, see our guide on clutch master and slave cylinder failure symptoms.
Further reading
For a plain-language technical overview of this subject, see the reference article on Wikipedia. Always confirm specific figures and procedures against the vehicle manufacturer service data.
How is a hydraulic clutch pedal unit replaced? Step by step
- Secure the vehicle: Stop the engine, apply the parking brake, chock the wheels, and disconnect the battery switch/negative terminal. On servo/booster-equipped systems, release air pressure according to procedure if applicable.
- Drain the system: Drain the hydraulic fluid from the slave cylinder bleed nipple into a clean container. Draw off the reservoir with a suction tool. Drained fluid must not be reused. Wipe up any spills immediately — they will stain painted surfaces.
- Record the pushrod setting: Before fitting the new unit, measure and record the current pushrod length and pedal free travel. This value is your reference for setting free travel correctly during installation; skipping it means the clutch either won't disengage or will stay permanently half-engaged.
- Remove the pedal linkage: Remove the pivot pin/clip connecting the pedal arm to the pushrod. Do not force a seized pin — apply penetrating fluid and wait. Photograph the position of the return spring.
- Disconnect the hydraulic line: Undo the outlet fitting/hose with the correct size wrench, holding the counter body steady. Immediately plug the open line end and the unit outlet with clean caps — even a single particle entering the hydraulic system will score a seal.
- Disconnect the reservoir feed: Remove the hose/clip at the reservoir feed port, keeping fluid drip under control. Cap the openings.
- Remove the unit: Undo the bolts securing the master cylinder/complete pedal unit to the chassis/cab body and take the unit out. Note bolt length and sequence.
- Prepare the new unit or repair kit: For a complete replacement, compare the new unit with the old one (mounting hole pattern, outlet direction, pedal arm geometry, synchronized/non-synchronized variant). For a repair-kit rebuild, clean the housing and inspect the cylinder bore; if there is scoring or corrosion, a repair kit is not enough and a complete unit is required. Lightly wet the new seals with the correct fluid before fitting.
- Fit the unit: Seat the unit without forcing it, start the bolts by hand, and tighten in the correct sequence and to OE torque. Connect the reservoir feed and hydraulic line; tighten the fitting to the correct torque without over-tightening and crushing the tapered sealing face.
- Set the pushrod and free travel: Set the pushrod length to your recorded value and bring pedal free travel into the OE range. Do not forget the locknut. If free travel is wrong, the system will never work correctly.
- Fill with the correct fluid and BLEED: Fill the reservoir with the correct type of fluid for the vehicle (mineral oil vs. DOT4 — mixing them swells or dissolves seals). Bleed the system through the slave cylinder nipple, either with two people ("press–release") or with a pressure/vacuum bleeding tool, until all air is expelled. This step is critical; incomplete bleeding is the number-one cause of "spongy pedal" and "clutch won't disengage" complaints. Do not let the reservoir run dry during the process, which would draw air back in.
- Test sealing and function: Mark the reservoir level, press the pedal several times and confirm a firm feel develops. Check all connections with a dry cloth. Start the engine and try shifting gears; confirm the clutch fully disengages and the pedal returns. After a short test drive, recheck cold — some leaks only appear after a thermal cycle.
Common Mistakes to Avoid
- Incomplete bleeding: Even a single remaining air bubble makes the pedal spongy and prevents full clutch disengagement; bleeding is not finished until no trace of air remains.
- Skipping the pushrod adjustment: If free travel is wrong, the clutch won't disengage properly even with a sound unit, or it stays half-engaged and burns the lining.
- Dirty assembly: Dust or grit entering the hydraulic system scores the seal; the area around fittings and ports must be cleaned before disassembly.
- Fitting the wrong variant: Installing a non-synchronized unit in place of a synchronized one (or vice versa) spoils stroke and output character, worsening gear engagement.
- Letting the reservoir run dry while bleeding: Once the level bottoms out, air re-enters the system and the job has to start over.
- Not lubricating the pedal pivot: A dry pin and bearing create creaking, stiffness, and play over time; apply the correct grease at every service.
- Over-tightening the fitting: Crushing the tapered sealing face makes the leak permanent; use a torque wrench.
- Neglecting the return spring/clip: A missing or fatigued spring won't return the pedal; check it at every disassembly.
- Reusing drained fluid: Used hydraulic fluid carries moisture and particles; always refill with fresh fluid.
Technical Values and Checkpoints
The values below are general reference ranges commonly encountered in heavy commercial vehicle hydraulic clutch actuation systems. Vehicle family, synchronized/non-synchronized variant, trim level, and model year change these ranges; always check the vehicle manufacturer's current service manual for exact data.
| Parameter | Typical range / condition (general reference) | Note |
|---|---|---|
| Hydraulic fluid type | Mineral oil OR DOT4, depending on vehicle | Never mix; determined by OE label/manual |
| Pedal free travel (clearance) | On the order of a few millimeters | Exact value is vehicle-specific; set via the pushrod |
| Total pedal stroke | Application-specific | Insufficient stroke prevents full disengagement |
| Reservoir fluid level | Between Min–Max marks | Continuous drop indicates internal/external leak |
| Unit/pedal mounting bolt torque | General range — follow OE value | Sequence and torque taken from the manual |
| Outlet fitting / hose torque | General range — narrow tolerance | Over-tightening crushes the sealing face |
| Internal leak test (pedal sink) | No sink should occur when held down | Slow sinking = master cylinder seal leak |
- Is the reservoir level between Min and Max; has it dropped since the last service?
- Is pedal free travel within the OE range; is the pushrod locknut tight?
- Does the pedal sink when held down (internal leak) — check with the engine off?
- Are the outlet fitting, hose, and reservoir connection dry — checked both hot and cold?
- Is the pedal pivot pin/bearing free of play and properly lubricated; any creaking?
- Is the return spring intact, does the pedal fully return when released?
- On servo-equipped systems, is the booster supply (air/hydraulic) normal; is the pedal excessively stiff?
Maintenance and Service Life
The hydraulic clutch pedal unit has no fixed "replacement interval" of its own; its lifespan is determined by hydraulic fluid quality, seal condition, pedal pivot lubrication, and correct installation. A unit running the correct fluid type, with periodic level checks and a lubricated pivot, is one of the vehicle's longer-lasting components. By contrast, a unit running on moisture-contaminated old fluid, with a dry pivot, or that has been exposed even once to the wrong fluid type, starts leaking before the year is out.
- Fluid discipline: Hydraulic fluid — especially in DOT-type systems — absorbs moisture; it should be changed per the manufacturer's interval and the level checked regularly. Contaminated fluid shortens seal life.
- Loyalty to the correct type: Always use the system's defined fluid type when topping up or replacing; never mix mineral and DOT fluid.
- Pedal pivot lubrication: The pin, bearing, and pushrod mount should be greased periodically with the correct grease; this is the cheapest prevention for creaking and stiffness.
- Free-travel monitoring: As the friction lining wears and mechanical parts settle in, free travel can drift; check and adjust it at each service.
- Periodic visual inspection: At every service, review reservoir level, fitting/hose connections, and any fluid trace inside the pedal box.
- Post-intervention monitoring: After any work on the hydraulic system, recheck sealing and pedal feel within the first few hundred kilometers.
- Acting early: Address the pedal at the first sign of sponginess or dropping level; a delayed internal leak lets fluid fill the pedal box and cause further damage.
For fleet operators, the most efficient approach is to treat the unit as part of a system rather than in isolation. Evaluating the master cylinder's seal condition, outlet fitting, and hose during the same service as a clutch kit or slave cylinder job is far more economical than bringing the vehicle back down a few months later. VADEN's hydraulic clutch pedal unit and connection product family is built exactly on this logic: complete pedal units, repair kits, clutch hoses, and synchronized/non-synchronized variants can be matched to the engine/chassis code alongside the master and slave cylinders, so a vehicle going in for clutch work leaves with a complete actuation set in a single visit. A ten-minute sealing and pedal-feel check before sending the vehicle back out is the cheapest insurance against being stranded on the road.
Related categories: Hydraulic Clutch Pedal Unit
Related technical guides: Clutch Central Unit (Lower/Upper Servo): Faults & Replacement · Clutch Fork: Fault, Replacement and Maintenance Guide · Clutch Hose Failure, Replacement and Maintenance Guide · Clutch Release Bearing: Fault, Replacement and Care Guide
Application and compatibility: Vehicle compatibility catalogue · Engine compatibility catalogue
Tags
Frequently Asked Questions
- Why does the clutch pedal feel spongy?
- The most common cause is air remaining in the system; if it firms up after a few pumps and then softens again, this is the typical pattern. The second cause is the master cylinder's internal seal leaking: the pedal slowly sinks when held down. The third is a low reservoir level. The correct response is to check the level and bleed the system first, then consider a seal/repair kit if the problem persists.
- The clutch pedal doesn't return after being pressed — why?
- A pedal not returning is usually a mechanical problem: a broken or loose return spring, a jammed pedal bearing/pivot pin, or a sticking piston seal. With the engine off, pull the pedal by hand; if it returns freely, look at the spring/bearing, and if not, look for a sticking point on the hydraulic side. A dry pivot is the most common and cheapest cause to fix.
- Clutch hydraulic fluid keeps dropping with no floor trace — why?
- If the level drops with no outside trace, the leak is most likely internal: the master cylinder's rear seal is letting fluid into the pedal box. Moisture or dampness behind the pedal and around the pushrod area is the giveaway. In this case a repair kit's seals or a complete unit is needed; continuing to top up fluid does not fix the fault.
- What fluid goes into a hydraulic clutch system — DOT4 or mineral oil?
- This depends entirely on the vehicle; some heavy commercial systems use mineral-based hydraulic oil, others use DOT4-type fluid. The two must never be mixed — the wrong fluid swells or dissolves the seals and ruins the system. The correct type should be confirmed from the reservoir cap label or the OE service manual. If unsure, drain the system and refill with the correct type.
- Is a clutch master cylinder rebuilt with a repair kit or replaced complete?
- The decision depends on the condition of the cylinder bore. If the bore is clean, free of scoring and corrosion, a repair kit (seals, O-rings) is an economical rebuild option. If the inner surface has scoring, pitting, or corrosion, new seals will leak again shortly, and a complete unit is required. If the pedal arm, bearing, or pushrod is also worn, a complete pedal unit is the correct choice.
- What is the difference between synchronized and non-synchronized clutch pedal units?
- The difference lies in the stroke and output characteristic, set according to the gearbox actuation the unit is used with. The synchronized unit is for gearboxes with synchromesh shifting; the non-synchronized unit is for applications without synchromesh or with different actuation logic. Although they look similar from the outside, piston stroke and connection dimensions can differ; the wrong variant spoils pedal feel and gear engagement. Selection is made by OE number.
- What should I do if the clutch still doesn't fully disengage after bleeding?
- First confirm that bleeding was genuinely thorough; this is the most common cause and must be continued until no air remains. If bleeding is confirmed complete, check the pushrod/pedal free-travel setting next — insufficient stroke prevents full disengagement. If both are correct, investigate a master cylinder internal leak or the slave cylinder/servo side. Working through this order avoids unnecessary parts replacement.
- The clutch pedal is very stiff and takes a lot of effort — why?
- On servo/booster-equipped systems, the most likely cause is the booster being inactive or its supply (air/hydraulic) being insufficient. On non-servo systems, a dry pedal pivot, bearing corrosion, or a blocked line stiffens the pedal. Check the pedal pivot and free travel first, then the booster supply.
- Can a vehicle be driven with a faulty clutch pedal unit?
- It should not be. When the clutch fails to fully disengage, gear changes strain the synchromesh and gearbox; if the pedal doesn't return, the clutch stays partially engaged and burns the pressure plate and release bearing. A hydraulic fluid leak drains the actuation system and can also cause environmental damage. Once a symptom is noticed, the vehicle should be stopped safely and taken in for service.
- How do I select the correct hydraulic clutch pedal unit?
- Vehicle model alone is not enough for selection. Engine/chassis code, model year, trim level, synchronized/non-synchronized variant, and, where possible, the OE number on the old unit must all be used together. VADEN's catalog search can be done exactly on this data: you can look up the application list by engine/chassis code, or search directly by the OE reference number on the old unit to find the matching VADEN part number (complete unit, repair kit, or hose). Comparing the new unit side by side with the old one for mounting, outlet direction, and pedal arm geometry before installation is the safest final step.
Related Articles
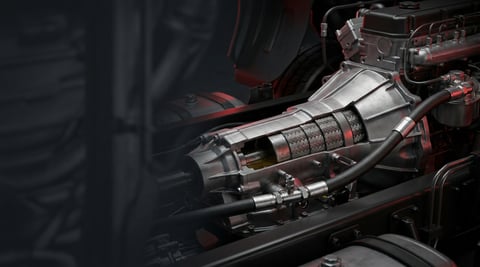
Clutch Hose Failure, Replacement and Maintenance Guide | VADEN
Clutch hose symptoms, swelling test, step-by-step replacement, torque values and maintenance tips for heavy commercial vehicles — VADEN technical guide.
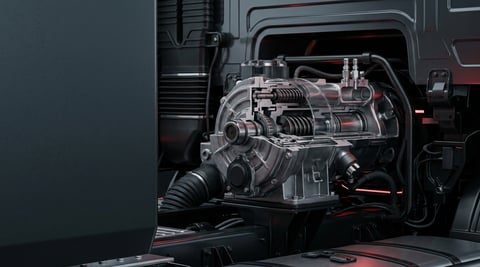
Clutch Central Unit (Lower/Upper Servo): Faults & Replacement
Diagnose, replace and maintain the heavy commercial vehicle clutch central unit (clutch booster & master cylinder): symptoms, torque values and field tips.
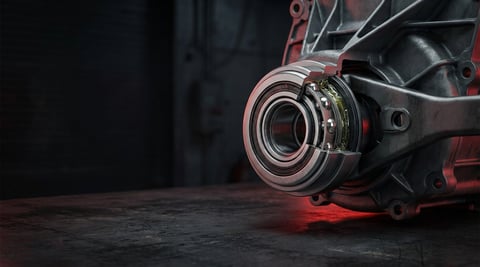
Clutch Release Bearing: Fault, Replacement and Care Guide
How a truck clutch release bearing works, how to spot noise and pedal symptoms, measure release travel, replace it correctly and extend its life.


