Belt Tensioner: Failure, Replacement & Maintenance Guide
Diagnose belt tensioner failure on heavy commercial vehicles: symptoms, water-spray test, step-by-step replacement, torque values and maintenance intervals.
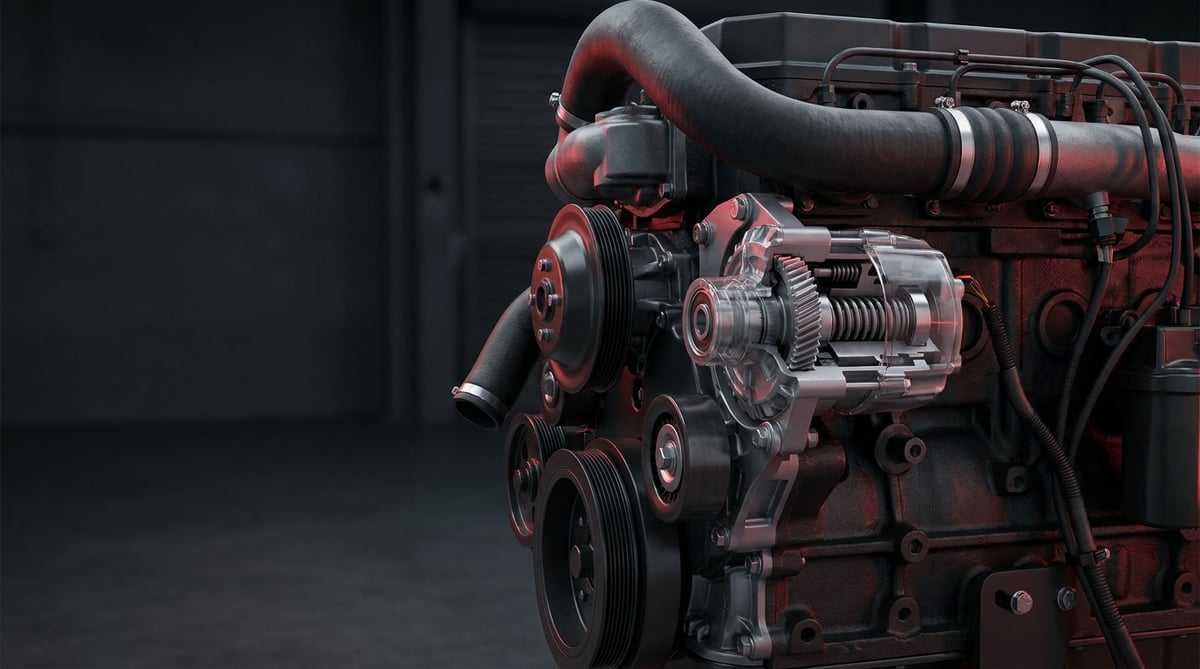
On a heavy commercial vehicle, the belt tensioner is a component that is often forgotten until it fails, yet when it drops out of service it can bring the engine to a standstill within minutes. The sentence we hear most often in the field is this: "There's a ratcheting noise coming from the engine bay, and then the belt flew off." In this guide we explain what the belt tensioner does, how to diagnose its failure symptoms, the removal and installation steps, and the maintenance intervals; all through real-world situations encountered on the engines of trucks, tractor units, buses and construction machinery.
What Is a Belt Tensioner? Function and Working Principle
The belt tensioner is a spring-loaded or hydraulically damped mechanism that applies constant and correct tension to the engine's accessory drive belt (V-ribbed/serpentine belt), allowing the belt to run over the pulleys without slipping, vibrating or flying off.
The working principle is simple but critical: while the engine is running, accessories such as the alternator, water pump, air-conditioning compressor and steering pump are driven from the crankshaft pulley by a single belt. As temperature, load and speed change, the belt length expands and contracts at the micron level; over time the belt also stretches. Thanks to a powerful coil spring (or a hydraulic piston) inside it, the tensioner mechanism continuously presses the tensioner pulley against the belt and automatically compensates for these variations. In this way the belt tension stays close to the ideal band across the engine's entire operating range.
On heavy commercial diesel engines the tensioner assembly is usually of the automatic (spring-loaded) type. The damper mechanism absorbs sudden load shocks and vibrations on the belt, extending the life of both the belt and the pulley bearing. When the damper wears out, the tensioner begins to "bounce" and the characteristic noise appears.
Main Components
- Tensioner arm: A cast or steel body that rotates around a pivot and carries the pulley.
- Coil spring: The main element that generates the tension force; when fatigued, the tension drops.
- Tensioner pulley (idler/tensioner pulley): The pulley that contacts the belt and houses a bearing inside.
- Bearing: Allows the pulley to spin quietly; when it dries out it makes a droning/grinding noise.
- Damper/friction pad: The internal element that dampens oscillation.
- Pivot bushing and main bolt: The connection that fixes the assembly to the block.
The Difference Between an Automatic Tensioner and a Fixed Idler
In a drive system, the "tensioner pulley" and the "idler pulley" are often confused. The tensioner pulley is at the end of the spring-loaded arm and is movable; the idler pulley, on the other hand, is a fixed pulley that changes the direction of the belt. Both can suffer bearing failure, but spring/damper wear only occurs in the tensioner assembly. This distinction is important in diagnosis.
One of those accessories is the alternator that feeds the charging circuit; to tell charging faults apart from belt slip caused by the tensioner, see the charging alternator guide.
Mechanical and Hydraulic Damped Types
Most Euro 5/Euro 6 diesel engines use an automatic tensioner with a mechanical friction damper. In some high-load applications there are hydraulically damped tensioners (a gas/oil-filled piston); these provide softer damping but must be replaced completely when they leak.
| Application / Engine family (typical) | System | Tensioner type (general) | Watch out for |
|---|---|---|---|
| Heavy tractor unit — large diesel (12–13 L class) | Serpentine accessory belt | Spring-loaded automatic, mechanical damper | High alternator + fan load |
| City/passenger bus | Multiple belts / separate A/C belt | Automatic tensioner + idler pulleys | Idle vibration fatigues the damper |
| Medium-duty truck / distribution | Single serpentine belt | Compact spring-loaded tensioner | Limited space, mounting angle is critical |
| Construction machinery / stationary engine | Accessory + fan drive | Heavy-duty automatic tensioner | Dust/dirt reduces bearing life |
Failure Symptoms and Diagnosis
Belt tensioner failures generally come from two families: spring/damper weakening (loss of tension) and pulley bearing deterioration (noise/seizing). Both lead to belt slip, overheating and ultimately the belt flying off. The table below is the symptom-cause-check matching that we refer to most often in field diagnosis.
| Symptom | Possible Cause | Check / Verification |
|---|---|---|
| Squealing/chirping noise on cold start | Belt slip, low tension, fatigued spring | Listen to the area with the engine at idle; isolate the source of the noise with a water-spray test |
| Continuous drone/grinding (increasing with speed) | Tensioner or idler pulley bearing worn | With the engine off, remove the belt and turn the pulley by hand; look for play/roughness/noise |
| Visible shaking/bouncing of the tensioner arm | Damper worn, damping exhausted | Watch the tensioner arm by eye at idle; if the oscillation amplitude is excessive, replace the assembly |
| Belt slipping off/flying out of the groove | Insufficient tension, wrong arm angle, pulley misalignment | Check pulley alignment with a straightedge/laser; observe the tensioner travel range |
| Low alternator charging / battery warning | Belt is slipping, alternator not turning fully | Measure charging voltage (under load); check belt and tensioner tension |
| Glazing, cracking, oil contamination on the belt back | Slip heat, ageing, leak contamination | Remove the belt; inspect the groove base and side surfaces, renew if necessary |
| Tensioner resting at end of travel (outside stop mark) | Belt overly stretched or wrong-length belt | Look at the min/max mark on the tensioner; verify the belt length and PN |
Listening and the Water Test
To isolate the source of the squealing noise, keep the engine at idle and spray a fine mist of water onto the tensioner area. If the noise disappears momentarily and then returns, it is a belt slip (tension/alignment) problem. If the noise does not change, it is most likely bearing-related. This simple distinction prevents unnecessary part replacement.
Hand Pulley and Play Check
After the engine has come to a complete stop, loosen and remove the belt. Turn the tensioner and idler pulleys one by one by hand: rotation should be smooth and quiet, with no radial play felt. If there is a clicking, friction or run-out, the bearing/pulley is finished. At the same time, push the tensioner arm and release it; the return should be smooth and springy, and should not feel "empty" or jammed.
Alignment and Wear-Mark Reading
One side face of the belt wearing more than the other indicates pulley misalignment. A shiny/glassy surface on the belt back is a sign of chronic slip; cracks in the groove base are a sign of ageing. When replacing the tensioner, if you do not read these marks and eliminate the root cause (alignment, oil leak, wrong belt), the new part will also fail in a short time.
Further reading
For a plain-language technical overview of this subject, see the reference article on Wikipedia. Always confirm specific figures and procedures against the vehicle manufacturer service data.
Replacement / Installation Steps
- Preparation and belt-routing record: Photograph the belt routing or note the diagram on the hood. Incorrect routing is the most commonly made installation error.
- Open up access: Remove the fan shroud, lower guard or, if necessary, parts that block access such as the fan/viscous coupling. Space is tight on heavy commercial vehicles, so be patient.
- Release the tensioner: Fit a suitable socket/bar into the square hole (or onto the bolt) of the tensioner arm and slowly turn the arm away from the belt against the spring force. Use a long-handled, sturdy tool.
- Remove the belt: With the tensioner released, slip the belt off the topmost pulley and remove it, then release the tensioner in a controlled manner. If you are going to replace the belt, discard it; if not, assess its condition.
- Remove the old tensioner: Loosen the main pivot bolt and take the tensioner assembly off the block. Note the bolt orientation/length and any pin/spigot seating.
- Clean the surface: Clean the mounting surface and pin hole; leave no burrs, old gasket residue or dirt. If the surface does not seat properly, the tensioner angle is thrown off.
- Fit the new tensioner: Seat the VADEN tensioner assembly in place, passing it over the locating pin if present. Make sure the arm's free-movement angle faces the correct direction.
- Torque it: Tighten the main bolt to the value specified by the manufacturer, with a torque wrench and, if required, the specified angle step. Do not tighten "by feel."
- Route the new belt: Seat the belt on all pulleys except the tensioner along the correct route. Visually verify that the ribs are fully seated.
- Bring the tensioner onto the belt last: Turn the arm again, fit the last (usually the tensioner) pulley and slowly release the arm. Check again that the belt is fully seated in the groove on every pulley.
- Test run and final check: Connect the battery, run the engine briefly; watch the noise, tensioner oscillation and belt seating. Stop again after a few minutes and perform a visual check.
Points to Watch For (Common Mistakes)
- Removing without photographing the belt routing — incorrect routing leads to slip and early failure.
- Tightening the main bolt without a torque wrench — overtightening damages the pivot, undertightening brings vibration and loosening.
- Replacing only the tensioner without correcting pulley misalignment (oil leak, tilted pulley, faulty bracket).
- Skipping the idler pulley bearing — even when the tensioner is new, an old idler can be a source of noise/failure.
- Applying oil/belt spray to the belt grooves — it masks the persistent slip noise but increases slip and wear.
- Tightening the bolt without seating the locating pin — the tensioner angle seats incorrectly and the arm works wrong.
Technical Values and Check Points
The values below are typical/general references for heavy commercial diesel applications; for the exact values of your engine, the service manual is authoritative. Use the figures as an "expected range," not a "target."
| Parameter | Typical / General Reference Range | Note |
|---|---|---|
| Belt type | Multi-ribbed (PK) serpentine or V-groove | Rib count varies by PN |
| Free belt deflection (span midpoint) | ~5–12 mm (at specified load) | On an automatic tensioner, the tensioner mark is authoritative instead of deflection |
| Tensioner position mark | Must stay within the min–max range | If outside the mark, belt length/PN is wrong |
| Pulley bearing operating temperature | Ambient + ~40–70 °C above is normal | Suspect if too hot to touch |
| Acceptable radial play (pulley) | No perceptible play | Play = bearing finished |
| Belt alignment tolerance | Generally ≤ 0.5–1° / on the order of mm over a short distance | Take the manual value as authoritative |
Torque values are at the heart of installation safety. The table below only gives an order-of-magnitude idea; the exact value is always taken from the manual.
| Connection | Typical Torque Range (general reference) | Method |
|---|---|---|
| Tensioner main pivot bolt (medium class) | ~40–70 Nm | Torque wrench |
| Tensioner main pivot bolt (heavy class) | ~70–120 Nm | Torque + angle step if required |
| Idler pulley bolt | ~40–90 Nm | Torque wrench |
Quick field checklist:
- Is the belt back clean, are there cracks/glazing?
- Is the tensioner position mark between min–max?
- Do the pulleys turn quietly and without play?
- Are the pulleys in the same plane (aligned)?
- Has the main bolt torque been verified, are there signs of loosening?
- Is there an oil/coolant leak in the immediate vicinity?
Maintenance and Service Life
The belt tensioner is not a "fit-and-forget" part; it is inspected periodically together with the belt system. Its life is directly related to engine load, operating temperature, dust/dirt exposure and the condition of the belt. The general approach is to assess the tensioner together with belt changes and to renew it in any doubtful situation.
- During periodic maintenance, inspect the belt and tensioner together; if the belt is being changed, also assess the tensioner and idler pulleys.
- At every service, turn the tensioner pulley by hand and check for noise/play.
- Check the free movement of the tensioner arm and the springiness of its return; if there is jamming/slack, replace it.
- Fix any oil or coolant leak immediately; a contaminated belt and tensioner deteriorate rapidly.
- Review pulley alignment and bracket integrity.
- In heavy dust/mud conditions (construction site, mine), increase the frequency of inspection.
In short: think of the belt tensioner not as independent, but as a part of the drive system. A timely tensioner/belt renewal prevents breakdowns on the road, cascading alternator/water-pump failures and expensive tow costs. Postponing a small squealing noise with "we'll look at it later" is often the most expensive decision.
The VADEN ORIGINAL belt tensioner product family covers OE-equivalent belt tensioner assemblies and tension rollers for the fan belt drive of heavy commercial vehicles; for correct tension, quiet operation and long life they are delivered from stock with catalog matching. To verify the part number suitable for your engine and confirm the torque/installation values, you can contact the VADEN technical team.
Related categories: Belt Tensioner · Tension Roller
Related technical guides: Truck Radiator & Expansion Tank: Faults, Replacement & Care · Engine Coolant Thermostat: Faults, Replacement & Care · Viscous Fan Clutch: Fault, Replacement & Maintenance Guide
Application and compatibility: Vehicle compatibility catalogue · Engine compatibility catalogue
Main guide: What Is a Fuel Injector? How to Recognize Injector Failure Symptoms
Tags
Frequently Asked Questions
- Can the vehicle break down on the road when the belt tensioner fails?
- Yes, it can. If the tensioner spring or pulley fails completely, the belt slips, goes slack or flies off. In that case the alternator does not charge, the water pump does not turn and the engine overheats in a short time. When squealing/droning starts, having it checked at the nearest service is the safest course.
- When should the belt tensioner be replaced?
- Instead of a clear "mileage," the situation is what matters: it is replaced if the pulley makes noise/has play, if the tensioner arm shakes/jams, if the tension mark has moved out of range, or if the belt is slipping continuously. The general practice is to renew the tensioner together with a belt change.
- Is it enough if I replace only the pulley (bearing)?
- On some tensioners the pulley can be supplied separately; however, if the spring and damper are also fatigued, replacing only the pulley solves the problem temporarily. The economical and safe choice is to replace the complete tensioner assembly if the spring/damper is weak. In the VADEN catalog there are complete-assembly or pulley options depending on your application.
- Does the squealing noise from the engine always come from the tensioner?
- No. Squealing can also come from belt slip, low tension, pulley misalignment or from an accessory (alternator/water pump) bearing. Isolating the source with the water-spray and hand-pulley tests prevents unnecessary part replacement.
- I fitted a new belt but the noise didn't go away, why?
- The most common causes are: a fatigued tensioner spring not tensioning the new belt enough, continuing pulley misalignment, or oil/dirt entering the grooves. Along with the new belt, also check the tensioner and the alignment; if the root cause is not eliminated, the noise will come back.
- Does spraying oil or spray onto the belt tensioner stop the noise?
- It may suppress the noise temporarily but is absolutely not recommended. Oil/spray increases slip, ruins the belt and hides the real failure. The correct solution is to fix the tension and the condition of the parts.
- How much should I tighten the tensioner bolt?
- The exact value varies by engine and is taken from the service manual. On heavy commercial vehicles the typical range is wide; that is why you should tighten not "by feel" but with a torque wrench and, if required, the specified angle step. If you do not know the correct value, get confirmation from the VADEN technical team with the engine code.
- How do I choose the correct tensioner assembly?
- Base it on the OE number on the removed part and the engine/chassis information. The number of ribs (PK), the pulley diameter and the arm geometry must absolutely match. Place the order by verifying the number against the VADEN cross-reference table; if in doubt, consult the technical team.
- What is the difference between a tensioner pulley and an idler pulley?
- The tensioner pulley sits at the end of the spring-loaded arm and is movable, constantly compensating for changes in belt length. The idler pulley is a fixed pulley that only changes the direction of the belt. Both can suffer bearing failure, but spring and damper wear occurs only in the tensioner assembly. The distinction matters in diagnosis: even with a new tensioner, an old idler can still cause noise or failure.
- What safety preparations should I make before removing the tensioner?
- Stop the engine, remove the key, disconnect the battery switch or negative terminal, and do not start work until the engine and exhaust have cooled. Park on level ground with the parking brake engaged and the wheels chocked, and wear gloves, safety glasses and steel-toe shoes. Photograph the belt routing first. The most dangerous mistake is leaving your hand in the belt path while releasing the spring, because the arm snaps back suddenly.
Related Articles

Brake Caliper Mechanism: Camshaft, Bearings, and Return Spring
Inside the truck air disc brake caliper: how the camshaft, thrust bearings, return spring and automatic adjuster turn push-rod force into pad pressure.
Tachograph Explained: Driver Cards, Symbols, Rest Times
How tachographs work in trucks and buses: analogue, digital and smart types, driver and company cards, symbols, download rules and roadside checks.
ADR Guide: Vehicle & Driver Rules for Dangerous Goods Transport
Learn what ADR means for heavy trucks: hazard classes, required vehicle equipment, driver certification, orange plate labeling, and inspection documents.


