Air Dryer Cartridge and Moisture Management: Selection, Service Life and Winter Conditions
How the desiccant cartridge in a heavy-duty air dryer works, what shortens its service life, replacement steps, tank-drain diagnosis and winter preparation.
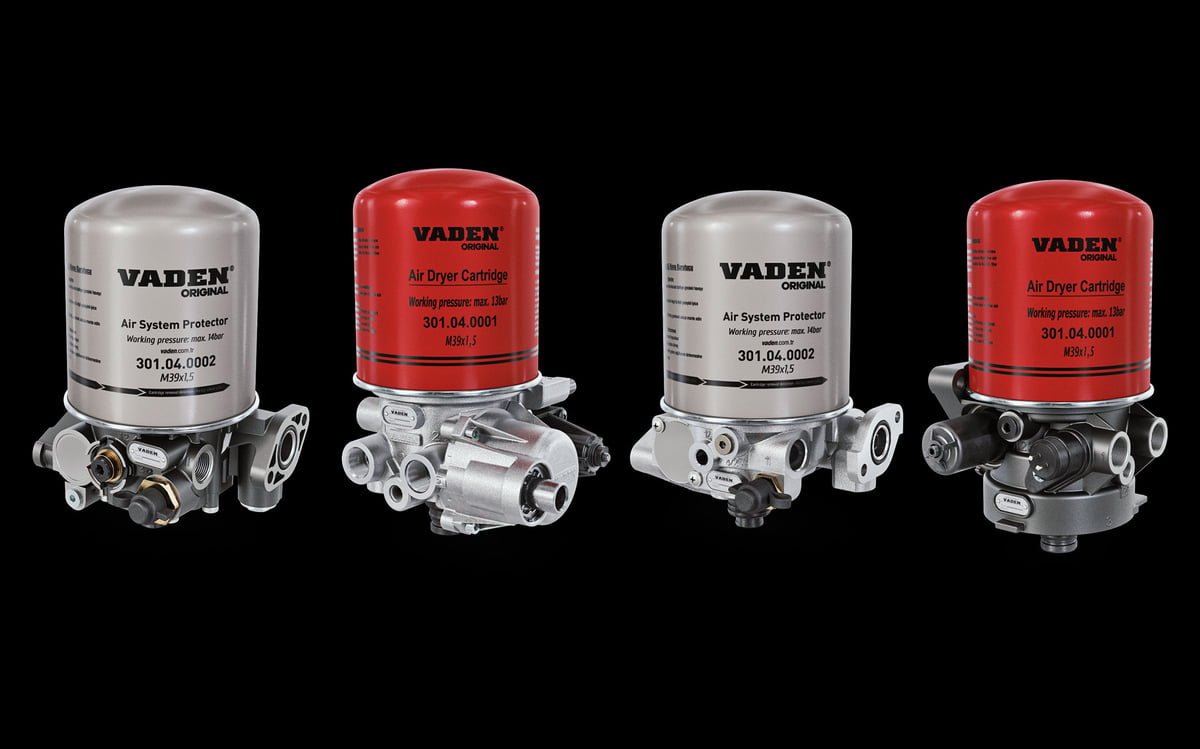
A tractor unit that spent a December night in the yard shows full pressure gauges and a smooth-running engine, yet the trailer brakes will not release: a few drops of water trapped inside a control-line valve have frozen solid and locked the piston in place. Drain the same truck's air tank and a cloudy, grey, soapy liquid comes out of the petcock. The driver blames the cold; in reality what froze was never the air itself but the water that had been quietly building up in the system for months, unnoticed. This guide treats the air dryer not as a single part but as the moisture-management function that runs from the compressor to the reservoirs, and it focuses on the consumable at the heart of that function: the desiccant cartridge.
Where does the water in compressed air come from?
Water does not leak into the air system from outside; the system manufactures it itself. The atmospheric air the compressor draws in always carries some water vapour, and how much it can carry depends on temperature. Once the compressor squeezes that air into a much smaller volume, the same water vapour has to fit into a fraction of the space; as the air cools along the delivery line its capacity to hold moisture in vapour form drops, and the surplus condenses into liquid. In other words, the compressor does not just deliver air — it manufactures a certain amount of water on every cycle.
The amount is not fixed. Relative humidity, ambient temperature, the vehicle's daily air consumption and the compressor's duty cycle all decide how much. A delivery truck working a warm, humid coastal route produces many times more water than a long-haul tractor running a dry, cool corridor. A vehicle whose doors, suspension and body equipment are constantly drawing on the air supply keeps the compressor pumping for longer, and every cubic metre it delivers carries its share of moisture along with it.
There is a second source that is often overlooked: the compressor's own oil. A tiny fraction of the oil lubricating the cylinder wall is carried over into the discharge side as an aerosol in the hot air. In a healthy compressor this amount is negligible; in one with worn piston rings or running too hot it becomes significant. When water and oil meet in the same line, they combine into something worse than either on its own: emulsion.
This is where the cartridge's job begins. The air dryer does not generate air, build pressure or actuate valves; its sole task is to capture the water vapour and oil aerosol in the air heading to the reservoirs before they reach the rest of the system, and to purge them outside. It is one of the cheapest components in the whole system, yet when it fails to do its job it sets loose the most expensive chain of failures.
What exactly does moisture break once it gets into the air system?
Water does not cause a single kind of damage in the air system. Depending on where it sits and the season, it works through different mechanisms: it freezes and mechanically locks parts in winter, it oxidises and causes sticking in summer, and when mixed with oil it narrows passages and degrades elastomers.
The most visible consequence is freezing. Water collecting at the low points of the lines, in the dead volumes of valve bodies and at drain outlets turns to ice once the temperature drops below zero and locks a moving part in place. A brake releases late, trailer brakes will not release, the parking brake will not come off. In this picture the part itself is not faulty; once the temperature rises everything goes back to normal and the fault is written off as having "fixed itself", only to repeat identically at the next cold snap.
The second mechanism is corrosion. Water that sits permanently at the bottom of a reservoir produces rust on the inner surface and, over time, releases flakes of debris into the system; when these lodge in a valve seat they create a permanent leak. The third is oil emulsion: the grey, milky sludge that forms when water and compressor oil mix builds up on the inside of hoses, narrows the passage, fouls the fine channels of solenoid valves and attacks the surface of rubber sealing elements.
| Affected area | Mechanism | Field symptom |
|---|---|---|
| Control and brake valves | Water trapped in dead volume freezes or oxidises | Brake releases late, valve sticks, response is delayed |
| Trailer control line and couplings | Water collects at the low point, ice forms at the coupling head | Trailer brakes will not release, the line will not hold pressure |
| Parking brake spring chamber | Frozen water blocks the control pressure from reaching it | Parking brake will not release, the vehicle cannot move |
| Air reservoirs | Permanent layer of water at the bottom, internal corrosion | Rust-coloured liquid on drain, sediment at the bottom |
| ABS and EBS modulators | Fine solenoid passages foul or freeze | ABS warning light, erratic wheel control |
| Air suspension and level control | Water and emulsion inside the solenoid and levelling valve | Vehicle leans to one side, cannot hold ride height |
| Seals and elastomer surfaces | Oxide and emulsion settle on the sealing surface | Persistent small leaks, compressor cycles more often |
| Compressor and air dryer | Leaks raise the duty cycle, temperature climbs | Cartridge saturates early, oil carryover accelerates |
The last row in the table shows where the loop closes: moisture creates leaks, leaks force the compressor to run longer, a compressor that runs longer delivers hotter, oilier air, and that air finishes the cartridge off sooner than it should. Once this cycle is established, replacing the cartridge alone will not break it. Telling which valve is producing which symptom also means looking at what each valve is for; the truck air brake valves guide is a good starting point for matching a symptom to a part.
How does the desiccant cartridge work? The desiccant bed and adsorption
Inside the cartridge sits a packing that, at first glance, looks like fine gravel. That packing is made of desiccant granules — porous material with an enormous internal surface area. The granules do not soak up water the way a sponge does; they hold water vapour molecules on their surface. This process is called adsorption, and two of its properties govern the entire logic of the cartridge: it is physical, not a chemical reaction, and it is reversible — water held under the right conditions can be released again.
Hot, humid air from the compressor enters the cartridge from the bottom, first passing through a pre-filter layer that catches oil and coarse particles, then travels upward through the desiccant bed. As it rises it deposits its moisture on the granule surfaces and arrives dry at the top, continuing on its way to the reservoirs. The bed saturates from the bottom up, and the saturated zone grows taller over time. This is exactly what happens when the cartridge reaches the end of its life: the saturated zone reaches the top of the bed and air starts passing through without being dried.
Two points are critical to this mechanism. The first is temperature: adsorption works efficiently in cool air and poorly in hot air, so the very hot air leaving the compressor is expected to cool as it travels along the discharge line. That is why the line's length, routing and exposure to airflow are part of the design — if that line is shortened or insulated during a repair, the air reaching the cartridge stays too hot and drying efficiency drops. The second is oil: once a granule's surface is coated in an oil film, its ability to hold water is lost, and lost for good.
The cartridge's second, less well-known job is filtration. Air coming from the compressor carries not only moisture but carbon particles, wear debris and oil aerosol. The cartridge traps this contamination and protects the rest of the system; running on past a saturated cartridge lets through not just water but contamination as well.
Regeneration: the cycle that renews the cartridge at every stop
The cartridge does not have unlimited capacity; the reason it can serve for months is that it is regenerated on every cycle. When system pressure reaches the cut-out point and the governor unloads the compressor, the dryer's purge valve opens and a quantity of previously dried air flows backward through the bed. That dry air picks up the moisture sitting on the granule surfaces, sweeps along the oil and contamination collected in the pre-filter layer, and vents it all to atmosphere through the purge port.
Where this return-flow air comes from depends on the design: some systems use a dedicated regeneration reservoir mounted on or near the dryer, others set aside a portion of the first air tank for the purpose. The short, sharp hiss of release the driver hears right after the system fills up is exactly the sound of this cycle, and it is not a fault — it is a health report.
The cost of regeneration is that a certain amount of compressed air is vented on every cycle — that is the price of keeping the system dry. But there is a condition attached, and it is the single most important point in the field: regeneration can only happen while the compressor is unloaded. If the system has a continuous leak, or the vehicle is constantly drawing air, the governor can never unload the compressor, the purge cycle never fires, and the cartridge keeps saturating without ever being regenerated. This is the main reason a cartridge in a leaking system dies fast.
Cartridge types: standard, oil-separating, single tower and twin tower
Cartridges that look alike from the outside differ in their internal construction. What determines the right choice is not price, but the vehicle's air-consumption profile and how much oil its compressor tends to carry over.
| Type | Internal construction and operating logic | Typical application | Service note |
|---|---|---|---|
| Standard desiccant cartridge | Simple pre-filter and desiccant bed | Vehicles with low oil carryover and moderate air consumption | Saturates fast once oil arrives; depends on compressor health |
| Oil-separating (coalescing) combination cartridge | A coalescing layer ahead of the desiccant bed that merges and separates oil aerosol | High-duty-cycle tractor units, buses, construction equipment, vehicles with an ageing compressor | Fitting into the housing is not enough on its own — OE approval for the vehicle is required |
| External oil separator system | Oil separation happens in a separate unit; the cartridge only dries | Heavy-duty applications with high oil-carryover risk | Two service points; the separator's own drain also belongs in the maintenance schedule |
| Single-tower dryer | Dries during the charge cycle, regenerates during the purge cycle | Common truck and tractor unit application | Regeneration requires that the compressor can be unloaded |
| Twin-tower dryer | Two beds alternate; one dries while the other regenerates | Vehicles and specialised equipment with continuous, high air consumption | Provides uninterrupted drying; cartridges are assessed together |
| Heated housing option | The purge valve area is heated by an electric element and thermostat | Regions with harsh winters and vehicles that stand idle in low temperatures | This is a housing feature, not the cartridge's; check the circuit before winter |
| Housing with integrated governor | The pressure governor sits on top of the dryer housing | Modern vehicles with compact packaging | A governor fault can look identical to a dryer fault |
The most common mistake sits in the second row. An oil-separating cartridge is not a cure for a compressor that is leaking oil — it is a buffer that buys time. As long as the compressor keeps carrying oil over, the coalescing layer fills up too, and the cartridge runs out early all the same.
What determines how long the cartridge lasts
Cartridge life is not set by mileage but by the total volume of water and oil that pass through it. Two identical cartridges fitted to different vehicles can deliver wildly different service lives. Four of the five factors that decide that life have nothing to do with the cartridge itself and everything to do with how the vehicle is operated.
The compressor's duty cycle comes first: the longer it spends pressurising air, the more humid air passes through the cartridge. The most common cause of a raised duty cycle is not a faulty compressor but small, continuous leaks in the system. Ambient humidity and temperature come second — in a warm, humid climate the same volume of air carries far more water. The compressor carrying over oil is the third factor, and the most destructive one; it coats the desiccant surface and permanently kills its capacity.
The vehicle's air-consumption profile is fourth: doors, suspension, tipper bodies and similar equipment all draw more from the compressor. Fifth is the duty pattern — a short-haul, stop-and-go, long-idling profile both generates more condensation and leaves fewer opportunities for a full regeneration. The cartridge's own fill capacity obviously matters, but it comes last on this list: if even two of the factors above are working against it, life will be shortened no matter which cartridge goes in. That is why a cartridge that keeps failing early is not a maintenance line item — it is a symptom that needs investigating.
Standards and further reading
This subject is governed by the equipment rules for air-braked commercial vehicles. In the United States the federal air brake standard, FMVSS 121 (49 CFR 571.121) defines the reservoirs, protection and timing a compliant system must provide, and Europe applies the equivalent limits of UNECE Regulation No. 13. For further detail, see the illustrated reference guide at airbrakecompressor.com. Always confirm specific figures against the current regulation and the vehicle manufacturer service data.
Readers outside the United States should work from their own national framework: in the United Kingdom the braking system must be maintained under regulation 18 of the Road Vehicles (Construction and Use) Regulations 1986, and in India the governing rules are published by the Ministry of Road Transport and Highways.
What determines the replacement interval
There is no single universal interval for the cartridge. The vehicle manufacturer gives a starting interval, usually applied on a whichever-comes-first basis between a time period and a distance or hours figure. The reason for the time condition is straightforward: a low-mileage vehicle produces moisture too, often more of it, precisely because of its short-trip profile. That is why writing off a low-mileage cartridge as "too soon to fail" is a common and expensive mistake. The OE interval is a ceiling; operating conditions decide the floor.
| Operating profile | Load on the cartridge | Interval approach | Early-replacement sign |
|---|---|---|---|
| Long-haul, moderate air consumption, healthy compressor | Low | OE's stated time and distance interval | Water seen on tank drain |
| Urban distribution, frequent stop-start | High | OE interval shortened | Compressor cycling noticeably more often |
| Tipper, crane or PTO-equipped bodywork | Very high | Interval significantly shortened; consider an oil-separating type | Trace of oil at the cartridge outlet or purge port |
| Bus; door, kneeling and suspension draw constant air | Very high | Shortened interval; on twin-tower systems the beds are assessed together | Regeneration sound becoming rarer or disappearing |
| Short-haul, heavy idling, low daily mileage | High (few regeneration opportunities) | Time-based interval brought forward | Emulsion on tank drain |
| Humid, warm climate, high relative humidity | High | Time-based interval shortened | Water found in the tank at the pre-winter check |
| Ageing compressor carrying over oil | Critical | Setting an interval is meaningless until the compressor is assessed | New cartridge oils up within a short time |
The most reliable way to manage the interval is to back the calendar up with a measurement. When tank drains are carried out periodically and the results are logged, exactly when a cartridge starts to fail becomes visible without any guesswork, and within a few months this record produces a realistic interval specific to that fleet.
Cartridge replacement step by step
Cartridge replacement is technically simple, but it is a procedure that has to be taken seriously from a safety standpoint. The risk comes from two places: pressure left in the system, and dirt getting into it during the work. The sequence below is a general framework and does not replace the OE manual.
- Secure the vehicle on level ground, chock the wheels and stop the engine; make sure the vehicle cannot move once system pressure is released.
- Drain all air reservoirs to depressurise the system and confirm on the gauges that pressure has dropped. Because a check valve may sit between the dryer and the tank, verify whether pressure remains on the dryer side using the method the manufacturer describes.
- Clean around the dryer housing with compressed air and a clean cloth; dirt that falls onto the sealing face during removal goes straight under the new gasket.
- Disconnect any heater, pressure switch and governor connectors, and note the cable routing beforehand.
- Remove the cartridge with the correct strap wrench or the specified special tool. If it resists, stop and find out why — it could be remaining pressure, a frozen housing or an over-tightened gasket.
- Inspect the removed cartridge: oil at its opening, a mark under the gasket and emulsion in the housing are diagnostic evidence that will guide the next steps.
- Clean the sealing face and make sure no fragment of the old gasket is left stuck to it; even one leftover trace will produce a leak.
- Lubricate the new cartridge's gasket with the lubricant the manufacturer specifies, in a thin film; a dry gasket deforms from friction while being tightened.
- Turn the cartridge in by hand until the gasket contacts the sealing face, then tighten by the additional turn the OE specifies. Cartridges are usually tightened by turn amount rather than torque value; over-tightening crushes the gasket.
- Reconnect the connectors you disconnected, and confirm the cable routing stays clear of rubbing points and hot surfaces.
- Start the engine and let the system fill, wait until the governor reaches cut-out pressure, and confirm the purge sound occurs at the moment of cut-out.
- Check the sealing face and housing connections with a soapy solution, drain the reservoirs, and log the job with date, mileage and cartridge type in the maintenance record.
After replacement: the cartridge is fitted, the job is not done
The most common mistake in the field is fitting the cartridge, sending the vehicle back out and only learning the outcome at the next service — when in fact the success of the job is visible on the very first cycle. The first check is fill behaviour: the system should fill in the expected time without interruption, and there should be no whistling leak from around the cartridge. The second is the cut-out moment: when the governor unloads the compressor, a short, single, clear purge sound should follow. The third, after a few fill-and-discharge cycles, is to drain the reservoirs; with a new cartridge, dry air is what should come out.
One point needs underlining: a new cartridge does not clean out the water that has already accumulated in the system. Water already sitting in the reservoirs, lines and valves stays exactly where it is and keeps producing faults. That is why draining all the reservoirs from the bottom is an inseparable part of a cartridge replacement — skip it and you get the "we replaced the cartridge and the trailer still froze" picture, with the new part taking the blame.
If the symptom persists after replacement, the problem sits in the housing, not the cartridge. The purge valve, the check valve, the governor and the control line each need to be assessed on their own; for housing faults and the decision to replace the whole unit, the air dryer faults, replacement and maintenance guide sets out a detailed framework.
Continuous discharge and no discharge at all: reading two opposite symptoms
Continuous air coming from the purge port is the most misread symptom in the field. The driver usually says "the dryer is leaking" and asks for the cartridge to be replaced, but the cartridge is innocent in most of these cases. The most common cause is dirt on the purge valve seat or a fatigued elastomer. The second is a leak in the line that pilots the valve, or the governor holding the valve open continuously — in that case the fault is not in the dryer but in the pressure regulation. The third is specific to winter: water frozen in the purge area locks the valve open.
The practical way to tell them apart is to look at when the discharge happens. If a short discharge occurs only at the exact moment the governor cuts out, the system is normal. If it carries on after cut-out and pressure keeps falling, check the purge valve or the control side. If discharge happens even while the compressor is still charging the system, air is being lost while it is being produced.
Silence is the more insidious version, because there is no visible loss. The vehicle runs normally and the driver notices nothing, but because regeneration never happens, the cartridge saturates a little more on every cycle, and the symptom only shows up weeks later — at a tank drain, or in a frozen valve on the first cold day. The causes here run the other way: the purge valve stuck closed, the control line blocked or pinched, the governor not producing an unload signal, or the purge port sealed shut by ice. In heated housings, a heater circuit that has stopped working is the most common winter cause of this picture.
Another possibility is that the compressor is never unloaded at all. Continuous air demand or a sizeable leak means the governor can never reach cut-out pressure, and without cut-out there is no regeneration either. The dryer and the cartridge are perfectly sound but never get the chance to do their job; replacing the cartridge on such a vehicle only postpones the problem by a few weeks — it does not solve it.
What does the liquid from the reservoir drain tell you?
The reservoir drain cock is the cheapest and most honest diagnostic point in the whole system; what comes out of it is a report card on the job the dryer has done up to that day. In a fleet with a drain-checking habit, cartridge failures are never a surprise, because the symptom reaches the petcock weeks before the failure does.
| What comes out of the drain | What it means | First thing to check |
|---|---|---|
| Only dry air, no liquid | The dryer and the regeneration cycle are doing their job | Keep the schedule, log the result |
| Clear, odourless water | The desiccant is saturated, or air is bypassing the dryer | Cartridge age, purge sound, purge valve |
| Cloudy, grey, milky emulsion | Water has mixed with compressor oil | Compressor oil carryover and cartridge type |
| Dark, black, sooty oily liquid | Excessive heat and carbonisation on the discharge side | Compressor duty cycle, system leaks, discharge line |
| Rust-coloured liquid with sediment | Corrosion has progressed on the reservoir's inner surface | Reservoir condition and how long the water sat there |
| Foamy, soapy liquid | Emulsion; a foreign liquid may have been added to the system | Past use of antifreeze or an additive |
| A little water at every drain | The cartridge is approaching the end of its life | Shortening the interval, reviewing the type, checking the compressor |
| Ice fragments or a frozen petcock | Free water has accumulated in the tank and frozen | Full review of the dryer cycle and winter preparation |
One distinction is worth keeping while reading this table: water is the dryer's result, oil is the compressor's result. If only water comes out at the drain, it is the drying capacity that is in question. If oil or emulsion comes out, replacing the cartridge alone will not be enough — a new one will meet the same oil and reach the same state in short order.
How does compressor oil carryover kill the cartridge?
Desiccant granules hold water on their surfaces, and that surface has to stay clean and open. When an oil aerosol settles on the granules as a thin film, the pores close up and the granule loses its ability to hold water. The damage is irreversible: the regeneration cycle can vent water back out, but it cannot vent oil. Once a cartridge has been oiled, it is finished, even if it has completed only a small fraction of its calendar life.
The main causes of a compressor carrying over oil are worn piston rings and cylinder bores, heat from a high duty cycle, carbon buildup on the discharge side, a blocked oil return line, and an overfilled engine oil level. Most of these begin well before the compressor gets judged "faulty" — while the vehicle keeps running normally, cartridge life is quietly being cut short. A fleet that sees back-to-back early cartridge failures has good enough reason to look at the compressor; for symptoms, replacement and the maintenance sequence, the air brake compressor guide lays out the diagnostic order in detail.
The second effect of oil carryover reaches beyond the cartridge. Oil that the cartridge fails to catch reaches the reservoirs and valves, where it mixes with water to produce emulsion, swells rubber components, and narrows the fine channels inside solenoid valves. So oil carryover is not only a consumable-part problem — it is a contamination problem for the whole pneumatic system.
Winter moisture management: freezing, heaters and drain discipline
Winter does not create a new fault in the air system; it makes visible the water that has been building up all year. Water sitting in a tank through the summer only produces corrosion; once the temperature drops below zero the same water locks valves and leaves the vehicle stranded on the road. That is why winter preparation is a job done in autumn, not in December.
The order of the pre-winter check matters. First, all reservoirs are drained from the bottom and the liquid that comes out is logged; if water or emulsion appears, the preparation starts with a cartridge replacement. Next, the regeneration sound is confirmed. Then, on heated housings, the heater circuit's continuity, fuse and connector are checked; when this circuit does not work, the purge valve freezes and the dryer stops doing its job altogether. Finally, the system is scanned for leaks, because a leak keeps the compressor running continuously and removes any chance of regeneration.
Drain frequency increases during winter months. Draining reservoirs while the system is still warm, rather than at the end of the day, is more effective; a reservoir that has already started to freeze gives up neither water nor ice when drained. For vehicles that will be parked for a long stretch, leaving the reservoirs drained empty is the simplest way to avoid leaving water inside to freeze.
Fleet moisture management programme and general reference values
The cartridge is not the sole party responsible for moisture management — it is the link in the middle of the chain: the compressor produces the water and oil, the cartridge catches and expels it, the reservoirs collect what is left, and the drain cocks release it outside. That is why moisture management is achieved not by replacing one part but by consistently applying a handful of small habits.
- Scheduled reservoir draining: All reservoirs are drained from the bottom periodically, more often in winter, and the nature of the liquid that comes out is logged.
- Regeneration sound check: The purge sound at the moment of cut-out is listened for at every service; its absence or its persistence is noted.
- Leak scanning: The small leaks that raise the compressor's duty cycle are scanned for periodically; cutting a leak directly extends cartridge life.
- Compressor monitoring: Cartridges that fail early or arrive oiled trigger a compressor assessment.
- Cartridge type review: The type is chosen to match the air-consumption profile and compressor condition, according to OE approval.
- Pre-winter preparation: In autumn, cartridge age, the heater circuit, the purge valve and reservoir condition are reviewed together.
- Discharge line inspection: The line's routing, length and exposure to airflow are preserved; repairs should not insulate or shorten it.
- Record discipline: Replacement date, mileage, cartridge type and drain observations are logged in the vehicle file; only this record produces a fleet's real interval.
The table below gathers the figures most often needed in the field, given as an order of magnitude; these values are not for making a decision but for judging whether a measured result looks reasonable.
| Quantity or criterion | General reference | Interpretation |
|---|---|---|
| System operating pressure window | Roughly in the 8-12.5 bar range on heavy commercial vehicles | Cut-in and cut-out values are vehicle-specific; read from the OE manual |
| Cartridge tightening method | The additional turn the OE specifies, after the gasket makes contact | Usually given as a turn amount rather than a torque value; over-tightening crushes the gasket |
| Cartridge replacement interval | Whichever comes first between the time period and the distance or hours figure | Shortened for a heavy-duty profile, a humid climate or oil carryover |
| Regeneration (purge) sound | A short, single, clear release when the governor cuts out | If it is absent or continuous, check the dryer side |
| Reservoir drain result | Dry air is expected | Water, emulsion or oil coming out is the dryer's report card |
| Temperature of the air entering the dryer | Expected to cool along the discharge line | A shortened or insulated line reduces drying efficiency |
| Heater circuit | Checked for continuity, fuse and connector before winter | Thermostat-controlled; the first suspect for a frozen purge valve |
| Compressor duty cycle | Expected to spend only a limited share of the time charging | Continuous charging is a leak signal and shortens cartridge life |
| Antifreeze alcohol and additives | Not used in a desiccant system | Permanently damages the bed and the elastomers |
The air dryer cartridge is one of the cheapest consumable parts on a heavy commercial vehicle, and one of the widest-reaching in its effect. As long as it is doing its job, nobody notices it exists; the moment it stops, the failure shows up far away from the part itself — in a frozen trailer valve, or in an ABS warning light. That is why the cartridge should be treated not as a calendar item but as a measurement point: a fleet that knows what comes out of the tank drain and what the regeneration sound should be also knows exactly when to replace it. In every case, the vehicle's current OE service documentation for its engine and chassis code, together with the manufacturer's compatibility list, remains authoritative.
Shop this part: Air Dryer Valve
The suspension side fed by the same air line has its own control elements; for their role and failure symptoms, see our article on ECAS solenoid valves.
Main guide: Air Dryer: Faults, Replacement & Maintenance Guide
Tags
Frequently Asked Questions
- What does a truck air dryer actually do?
- The air dryer captures the water vapour and oil aerosol in the air the compressor pushes toward the reservoirs, and expels them during its purge cycle before they reach the rest of the system. This prevents valves from freezing, corrosion from building up in the reservoirs and blockages caused by emulsion. It does not generate air or build pressure; its only job is keeping the system dry and clean.
- When should the air dryer cartridge be replaced?
- It is replaced whichever comes first between the manufacturer's stated time period and the distance or hours figure. Low-mileage vehicles produce moisture too, so the time condition should never be skipped. Water starting to appear at the tank drain is the clearest sign that the cartridge has reached the end of its life before the calendar interval is up.
- What shortens a dryer cartridge's service life the most?
- The most destructive factor is the compressor carrying over oil; it coats the desiccant granules and permanently kills their ability to hold water. Next come a high compressor duty cycle, small leaks in the system, a humid climate and a short-haul duty pattern. Under these conditions, service life will be cut short no matter which cartridge is fitted.
- What does it mean if water or an oily liquid comes out of the air tank drain?
- Clear water means the cartridge has saturated or that air is bypassing the dryer entirely. A grey, milky or soapy liquid means water has mixed with compressor oil to form an emulsion, and the compressor side should be checked first. A rust-coloured, sediment-laden liquid points to corrosion already progressing inside the reservoir.
- If the dryer keeps venting air continuously, where is the fault?
- The most common cause of continuous venting is dirt on the purge valve seat or a fatigued elastomer there. A leak in the line that pilots the valve, or a governor holding the valve open, produces the same picture — in that case the fault is in pressure regulation, not the dryer. In winter, water frozen in the purge area can lock the valve open in the same way.
- What should be checked if no purge sound is heard from the dryer at all?
- Silence means the regeneration cycle is not firing, so the cartridge saturates a little more on every cycle without ever being refreshed. Likely causes include a purge valve stuck closed, a blocked or pinched control line, a governor not producing an unload signal, or a purge port sealed by ice in winter. If the system has a large leak, the compressor may never unload at all, which stops regeneration the same way.
- Should a standard cartridge or an oil-separating cartridge be fitted?
- A standard desiccant cartridge is enough for vehicles with low oil carryover and moderate air consumption. High-duty-cycle tractor units, buses and vehicles with heavy body-equipment air draw benefit from an oil-separating coalescing cartridge. That type is a buffer, not a cure, for a compressor that is leaking oil, and the choice should always follow the vehicle's OE approval.
- What needs the most care during a cartridge replacement?
- The vehicle is chocked first and all reservoirs are drained to confirm the system is fully depressurised before anything is disturbed, because removing a cartridge under pressure is dangerous. The sealing face is cleaned, no trace of the old gasket is left behind, and the new gasket is lubricated with a thin film before fitting. The cartridge is tightened by the additional turn the OE specifies rather than by a torque value, and the reservoirs are drained again once the job is finished.
- Can antifreeze alcohol be added to a heavy vehicle's air system?
- No liquid such as antifreeze alcohol, grease or oil should ever be added to a system with a desiccant cartridge. This practice dates back to before air dryers existed, and it permanently damages the desiccant granules, swells rubber components and causes valves to stick. The real solution to freezing is preventing water from entering the system at all, through a sound cartridge, a working regeneration cycle and regular reservoir draining.
- How is a heavy vehicle's air brake system prepared for winter to prevent freezing?
- Preparation is done in autumn: every reservoir is drained from the bottom, the liquid is logged, and a cartridge is replaced if water or emulsion appears. The regeneration sound is confirmed, the heater circuit's continuity, fuse and connector are checked on heated housings, and the system is scanned for leaks. Through the winter months, reservoirs are drained more often and while the system is still warm.
Related Articles
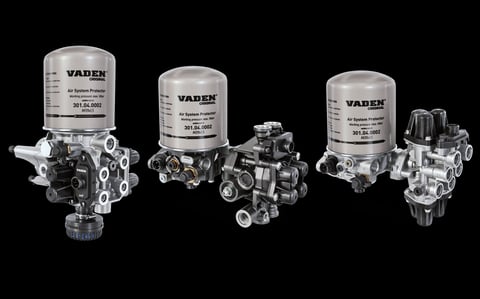
What Is an Air Processing Unit? Role, Faults & Care
What is an air processing unit and how does it work on a truck? Drying, pressure regulation, fault diagnosis, and maintenance explained.
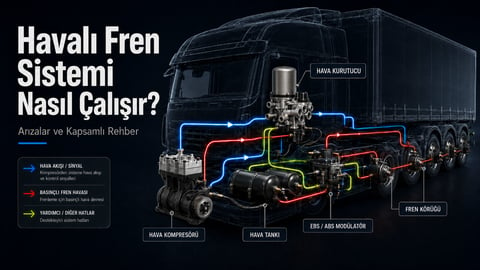
AIR BRAKE SYSTEMS IN HEAVY COMMERCIAL VEHICLES: WORKING PRINCIPLE, COMPONENT GLOSSARY AND COMPREHENSIVE FAULT-FINDING GUIDE
Air brakes on heavy commercial vehicles stage by stage: compression, drying, four-circuit storage and wheel actuation, plus a component glossary and fault guide.
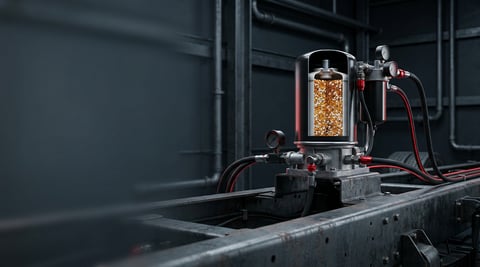
Air Dryer: Faults, Replacement & Maintenance Guide
How a truck air dryer's charge and purge cycle keeps moisture and oil out of the brake system, and what a hissing purge valve or water in the tanks means.


