Brake Caliper Repair Kits: Bringing Heavy Vehicle Brake Systems Back to Life
Which brake caliper repair kit level fits a given fault, when repair is banned, and how a heavy truck workshop proves it afterward.
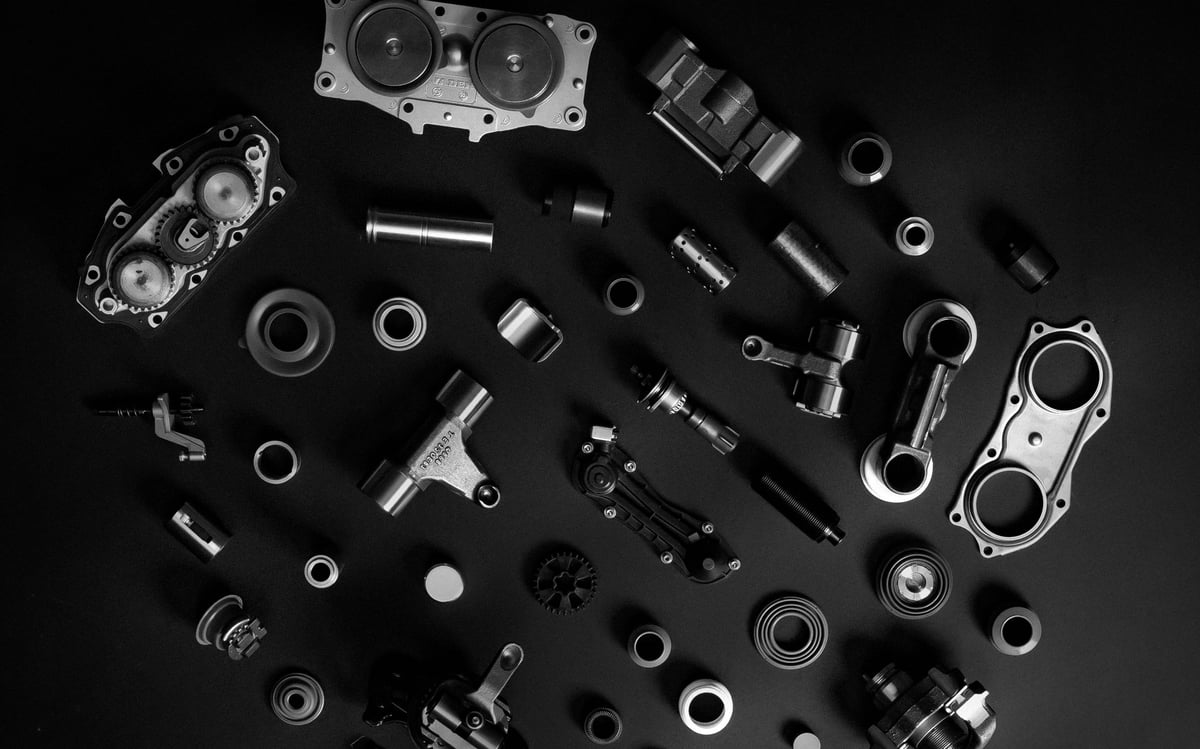
When a caliper comes off the axle, a short but expensive uncertainty starts in the workshop: does this body get repaired, or does it get replaced? Most of the time the decision is driven not by the part's actual condition but by what happens to be on the shelf that day. Whichever repair kit is in stock gets fitted; if the truck has to be back on the road by evening, the measurements get skipped. Made correctly, this decision closes in a few hours. Made incorrectly, it brings the same vehicle back with the same fault three weeks later — and by the second visit, the repair option is often already gone.
This article owns a single question: which level of repair kit is sufficient for a given caliper fault, when repair is off the table, how a workshop builds a workflow that makes the repair reliable, and how the repair is proven afterward. In other words, the subject here is the decision and the process. On a heavy commercial vehicle, repairing a caliper is technically possible; the real issue is whether it is the right choice every single time, and how the job is run when it is.
This is not the article that lists "what's inside the kit" or "which order to remove the bolts in." The individual parts inside a repair kit, the tappet and dust boot side, the guide pin and bushing side, and the full overhaul procedure are the subject of companion articles, linked wherever relevant. What stays here is the decision: which level, when, and with what evidence.
The first decision on a caliper fault: repair or replace?
A caliper is the mechanism in an air disc brake that transmits clamping force to the pad and automatically takes up the running clearance as the pad wears. The first of these two jobs is a matter of raw mechanical force; the second depends on a precise internal mechanism. Deciding whether to repair a caliper really means answering one question: has the failure hit the rough side, the precision side, or the body itself?
The rough side consists of the protective elements and the sliding assembly: a torn boot, a worn guide bushing, a seized pin. These are faults that a defined repair kit closes, with a result you can measure. The precision side is the adjuster mechanism and the tappet assembly; repair is possible here too, but the outcome depends directly on cleanliness and assembly discipline. The third layer is the body: if the caliper body and its carrier bracket have taken damage, no kit reverses that.
In practice, three questions drive the first decision. First: are the body and carrier sound? Second: is the fault confined to a single sub-assembly, or has it spread? Third: does this vehicle's current downtime budget even allow for a repair? The first question is a hard technical gate, and if the answer is no, the other two are never asked. The second question sets the level of repair kit needed. The third is not the workshop's question at all — it belongs to the fleet, and the right answer changes from vehicle to vehicle.
Getting this wrong is costly in either direction. Replacing a caliper that could have been repaired means throwing away a sound body and, usually, a returnable core. Repairing a caliper that should not have been repaired is more expensive still: the job gets opened a second time, the vehicle stops a second time, and the new parts fitted the first time around go with it. That is why the order of the decision matters: reject criteria first, then level, then schedule. A workshop that works in the reverse order is the workshop that sees the same vehicle come back most often.
From fault symptom to repair kit level: a decision table
Repair kits are not a single box; they form a family with steadily widening scope. The useful way to think about them on the shop floor is not by box name but by level — level describes how deep into the caliper the fault has reached, and it maps directly onto a decision.
Level 0 covers only the outer protective elements: boots, dust seals and their retaining rings. A tear caught early closes at this level, and it is the cheapest intervention possible on the caliper side. For the failure patterns of the protective elements themselves, how they seat, and replacement detail, Caliper Tappet & Dust Boot: Function, Failure, Replacement is a dedicated resource.
Level 1 is the sliding assembly: guide pins, bushings, their boots and the fasteners that hold them. On a sliding caliper, if this assembly binds, the caliper cannot center itself against the disc; one pad wears out fast while the other barely wears at all. For the failure symptoms and replacement detail of this assembly, Caliper Guide Pin, Bushing & Bolt: Faults, Repair, Care is a dedicated resource.
Level 2 is a rubber-based seal and boot set where the sealing and protective elements are renewed together. Level 3 reaches down into the adjuster mechanism and the tappet assembly. Level 4 is a full overhaul: the mechanism, the sliding assembly and the protective elements are all renewed together, and the caliper is effectively rebuilt. For the procedure behind this widest level, the tooling it needs, and the sub-tasks it involves, Brake Caliper Overhaul Kit: Guide Pins, Boots & Adjuster is the primary reference. Level 5 is not a repair level at all; it is the point where repair is refused and the caliper is replaced.
The table below maps the symptom seen in the field, the area to inspect once the unit is stripped down, and the level that is likely to be enough. This is a starting point, not a diagnosis guarantee; the final decision is made only after the reject criteria and the measurement gates below have both been cleared.
| Symptom observed in the field | Area to inspect once stripped | Level likely to be sufficient | Decision note |
|---|---|---|---|
| Torn boot, moisture and salt trace inside, surfaces still clean | Boot seating groove, retaining ring, condition of the surface beneath it | Level 0: protective elements | Caught early, this is the cheapest repair there is; left alone, the same fault escalates to level 3-4 |
| Caliper will not slide by hand on the carrier, one pad worn out while the other is untouched | Guide pins and bushings, their boots, seating surfaces | Level 1: sliding assembly | One-sided pad wear is almost always lost sliding freedom |
| Pad clearance has grown, pedal takes up late, adjuster is not keeping up | Adjuster mechanism, drive lever, tappet rotation | Level 2-3: sealing and mechanism | If the adjuster side itself is damaged, the rubber-based set alone is not enough; the level moves up |
| Tappet does not retract, pad is dragging, disc and wheel are hotter than expected | Tappet assembly, mechanism, depth of corrosion reached | Level 3-4: mechanism or full overhaul | Dragging may also have left thermal damage; disc and pad are assessed separately |
| Water and salt have entered the caliper, mechanism is seized, no movement at all | Corrosion state of the mechanism, integrity of the bores | Level 4 or reject | If corrosion is still surface-level, overhaul; if it has become section loss, there is no repair |
| Crack in the body, deep corrosion pitting, discoloration from overheating | Body, carrier bracket, bolt bores | Level 5: no repair, caliper replacement | These findings are reject criteria; covered separately in the next section |
| Skewed seating after an impact or accident, deformation on the carrier | Carrier mounting face, bolt holes, disc runout, opposite side of the axle | Level 5: no repair | No kit restores geometry once it is distorted; the opposite side is also inspected |
The real value of this table is in reading it right to left. Whatever level of kit you have on hand defines exactly which symptoms it can close. Using a level 1 kit to try to close a fault that originates in the adjuster mechanism does not fix the fault — it schedules that same vehicle's second visit.
Do not commit to a level before the unit is stripped down, but do not start work without writing the level down either. The line "this level of kit, for this reason" belongs in the work order, and if a problem shows up after the repair, that line is the one concrete record anyone will go back to.
Standards and further reading
This subject is governed by the equipment rules for air-braked commercial vehicles. In the United States the federal air brake standard, FMVSS 121 (49 CFR 571.121) defines the reservoirs, protection and timing a compliant system must provide, and Europe applies the equivalent limits of UNECE Regulation No. 13. For further detail, see the on-road braking performance requirement in 49 CFR 393.52. Always confirm specific figures against the current regulation and the vehicle manufacturer service data.
Outside the United States the equivalent duties sit in national law. In the United Kingdom, regulation 18 of the Road Vehicles (Construction and Use) Regulations 1986 requires every part of the braking system to be maintained in good working order. In Canada, air brake systems fall under the Motor Vehicle Safety Regulations, which contain CMVSS 121.
When repair is off the table: reject criteria
Not every caliper gets repaired. Setting that as a firm rule is the single most effective protection a workshop has, because when the repair decision is made under time pressure, this is exactly the threshold that gets skipped first. Reject criteria are not a "we'd have been better off not repairing this" list; they are a "if this is repaired, braking safety cannot be proven" list.
The underlying logic is simple: a repair kit renews parts that wear or age. The one thing it cannot renew is the carrier structure itself. The body, the carrier bracket, the bore geometry and thread integrity all sit outside the kit's scope; if any of these carries permanent damage, the result is not trustworthy even if every single part in the box is brand new.
| Finding | Why it cannot be repaired | Correct decision |
|---|---|---|
| Crack in the body or carrier bracket, including hairline crack traces | A crack propagates under load; a repair kit does not repair the carrier structure | Caliper replacement; the area where the crack started is logged |
| Corrosion has become section loss, deep pitting, a layer lifting off the surface | The carrier's cross-section has been reduced and its real strength can no longer be measured | Caliper replacement; the source of corrosion on that vehicle is also investigated |
| Overheating trace: discoloration, a tempered look on the surface | The material's thermal history is unknown; spring and mechanism behaviour may have changed | Caliper replacement; the cause of the dragging is found separately |
| Ovalling, offset, or a clear wear step in the tappet bore | New parts will not seat evenly in a damaged bore; leakage and binding come back quickly | Caliper replacement |
| Unrepairable thread damage in the pin or fastener bores | The correct torque value cannot be held; the fastener cannot maintain its preload | Caliper replacement; a makeshift thread-repair fix is not a solution on a brake connection |
| Damage to the mechanism's bearing and bore surfaces on the body side | The damage falls outside the kit's scope; adjuster behaviour becomes unpredictable | Caliper replacement |
| Water and salt ingress has fused with the mechanism through corrosion | The bore is damaged during disassembly; even cleaned, the surface geometry does not come back | Caliper replacement |
| A history of being "rescued" by welding, heating, force or impact | The material's thermal and mechanical history is compromised and cannot be documented | Caliper replacement |
| A caliper type or area the manufacturer has declared closed to repair | The service documentation defines the scope of repair; going outside it voids the approval | Follow the path the manufacturer defines |
| Collision damage, skewed seating, carrier deformation | A geometry fault cannot be corrected with a repair kit | Caliper replacement and inspection of the opposite side of the axle |
Every intervention on a brake system directly affects the vehicle's stopping performance. The criteria in this section are a general engineering approach; what counts as repairable on a specific caliper, which area falls outside scope, and which values are valid are set by the current service documentation of the vehicle and caliper manufacturer. Where the documentation and workshop habit disagree, the documentation wins.
What makes applying reject criteria hard is not technical — it is timing. Making the reject call after teardown is complete feels like writing off all the labor spent up to that point; in reality, pushing ahead with the repair anyway guarantees that same labor gets spent a second time, under worse conditions. That is why reject criteria have to be applied immediately after teardown, before cleaning and before the parts box is opened.
What gets measured before repair begins?
The measurement gate is the section that justifies the repair decision. Every line produces a "pass" or "fail"; if all of them pass, the repair proceeds, and if any one fails, the job reverts to the reject criteria. The order is not arbitrary: gates concerning the structure come first, then the ones that set the level.
| Measurement gate | What is checked | How it affects the decision |
|---|---|---|
| Body and carrier integrity | Crack, pitting, deformation, thermal discoloration; inspected on a clean, dry surface | A fail here ends the repair; the caliper is replaced |
| Sliding freedom | Whether the caliper moves by hand on the carrier without binding or sticking | A fail means at least level 1; if the stiffness comes from corrosion, the level rises further |
| Tappet freedom and return | Free movement, rotation behaviour, binding and tight points | A fail means level 3 or above; a damaged bore means reject |
| Adjuster mechanism operation | Clearance take-up working only in the expected direction, without slipping | A fail means level 3-4; damage on the body side of the mechanism means reject |
| Integrity of the protective elements | Tears, hardening, seating faults, whether the rings are in place | On its own, a fail means level 0; if dirt has already got inside, the level rises |
| Degree of corrosion | Whether it has stayed on the surface or reached the section; whether the coating has lifted | Surface-level: repair; section loss: reject |
| Disc and pad condition | Thickness, runout, cracking and wear pattern; limit values come from the manufacturer's documentation | Even if the caliper is repaired, a disc or pad beyond limit is addressed separately |
| Mounting faces and bolt threads | Flatness, cleanliness, thread integrity, marks from previous tightening | Unrepairable thread damage means reject; a dirty surface is cleaned before repair |
| Record and history | Whether this caliper has been repaired before, and at what level | If the same fault has come back a second time, the root cause is sought, not the level |
None of these gates produces a hard number by itself; minimum disc thickness, allowed runout, clearance range and torque values come only from the manufacturer's current service documentation. What the gates enforce is not a number but a sequence: you do not move to the mechanism before checking the structure, and you do not move to the level decision before checking the mechanism.
The sliding-freedom gate deserves special attention, because it is the most commonly misread one. If a caliper is hard to move by hand, there are three separate possible causes: mechanical wear in the guide assembly, a torn protective element that let dirt in, or corrosion narrowing the bore. All three produce the same symptom, but they lead to three different levels; the first two are repaired, and the third one very often runs straight into a reject criterion.
Do not run the measurement gates on a dirty part, but do look at it once dry, before washing. The trace a leak leaves behind, a salt ring, the direction a grease leak has travelled, and which side dirt has built up on — all of that disappears the moment you wash it, and it never comes back. The right order: photograph it in place, remove it, read it dry, then clean it, then measure.
The workflow that makes a workshop repair reliable
What decides the outcome of a caliper repair is less the kit used than the way the job is run. The same kit gives two different lifespans in two different workshops. Three things make the difference: cleanliness, sequence, and control gates. The workflow below is not a teardown-and-refit instruction; it is a work order describing which step comes before which, and where to stop.
- Intake and identification. Vehicle, axle, position, mileage and complaint go into a single record line. The caliper is photographed in place before removal; orientation, connections and contact with neighboring parts are not something you remember once it is off.
- Verify the complaint yourself. The driver's description is a starting point, not a diagnosis. Sliding freedom, pad clearance, dragging and any temperature difference across the axle need to be seen before teardown; some of it disappears once the parts come apart.
- Inspect the opposite side at the same time. The other caliper on the axle set is what determines whether the fault comes back. Leaving this step for later is the most common way a job ends up split in two.
- Dry inspection. Read the traces before washing: moisture and salt marks, the direction of a grease leak, corrosion color, coating scuffs. This evidence can only be gathered once.
- Measurement gates. Work through the gates from the previous section in order. If any one of them fails, the job stops there. Applying the gates partially is more misleading than not applying them at all.
- Write down the level decision. Which level of kit, for what reason, and which gates were passed goes into the work order. The box is opened only once this line is written; a box opened early closes off the return option.
- Cleaning. The method has to suit the surface; anything that lifts a coating, distorts bore geometry or leaves a sharp edge is avoided. Blind passages and seating surfaces are dried once cleaned; a bore left damp will not survive its first winter after the repair.
- Parts preparation. The kit is opened and its contents are counted before work starts; if anything is missing or wrong, the job does not begin. The lubricant has to be the specific type the manufacturer specifies for that caliper; grease chosen because "it's what we had" swells the elastomer and brings the repair back within a few months.
- Assembly environment. A clean bench, a separate tray for removed parts, an area away from dust. A caliper left half-finished collects dirt; the job is planned to finish in one sitting.
- Interim control gate. As soon as assembly is done, and before the caliper goes back on the vehicle, free movement and adjuster behaviour are checked on the bench. A caliper that fails on the bench does not get fitted; no fault corrects itself once it is on the vehicle.
- Torque and tightening sequence. Values and sequence come from the manufacturer's current documentation, never from a guess, and the value actually applied is recorded. Fasteners defined as single-use are not reused.
- Record and tag. The level performed, the kit used, the measurement results and the date go into the caliper's record. Skip this step and the next visit starts the decision from zero.
The most expensive contamination in a caliper repair does not happen during teardown — it happens during assembly. An open caliper sitting on the bench collects the dust and grinding debris floating in the workshop air straight into its bores. That is why well-run workshops keep it simple: once a caliper is open, the job gets finished; if the job cannot be finished, the caliper does not get opened.
Verification after repair: how do you prove it?
A repair is not finished when the caliper goes back on the vehicle — it is finished when verification is complete. The goal is not to say "it works," but to show that it works in a way that can be recorded; that distinction is what decides every conversation that happens later if the repair is disputed under warranty.
- Bench check: free movement, adjuster behaviour and seating of the protective elements are confirmed before the caliper goes back on the vehicle.
- Mechanical check on the vehicle: sliding freedom, pad clearance and the absence of dragging at any point are checked.
- Torque record: the values applied and the sequence used are written down with reference to the manufacturer's documentation.
- Static brake check: with circuit pressure in the normal operating range, the brake is applied and released, and full return is confirmed.
- Axle check on a brake tester: the braking force on the right and left side of the same axle is compared.
- Test drive and temperature comparison: after a short drive, the temperatures on both sides of the axle are compared; a noticeable difference points to dragging.
- First-service follow-up: after the vehicle has run for a few days, the fasteners, protective elements and clearance are checked once more.
| Verification | How it is done | Acceptance criterion | What gets recorded |
|---|---|---|---|
| Sliding freedom | Caliper moved by hand on the carrier | Full movement, no binding or stiffness | Pass / fail |
| Adjuster behaviour | Clearance take-up runs correctly in the expected direction | No slipping, no reverse movement | Pass / fail |
| Seating of the protective elements | Visual and manual: rings in place, lips seated in the groove | No curling, no offset seating, no gap | Pass / fail |
| Pad clearance | Checked using the manufacturer's specified method | Within the manufacturer's documented range | Measured value |
| Torque values | Calibrated torque tool, manufacturer's sequence | Value and sequence per documentation | Value applied and date |
| Axle balance | Right/left comparison on a brake tester | Within the limit set by regulation and the manufacturer | Test output |
| Temperature comparison | Measured on the axle after a short test drive | No noticeable difference between the two sides | Observation note |
| First-service follow-up | Visual and mechanical check a few days later | No loosening, no leak, no new marks | Date and result |
The last column of this table is empty in most workshops, and that is exactly where the real loss sits. The verification may well have been done; until it is written down, it counts as not done. If a repair is ever disputed afterward, the measurement and observation lines from that day are the only thing that can be produced.
Values such as the imbalance limit on a brake tester, tightening torques and the pad clearance range vary by vehicle, axle and caliper type; no figures are given deliberately in this article. The valid values must come from the applicable regulation and the vehicle manufacturer's current service documentation. A brake that has not been verified after repair does not count as repaired.
Axle-set discipline: why isn't one side repaired alone?
A brake works on the axle, not on a single wheel. The difference in braking force between the two sides of one axle directly determines how the vehicle behaves under braking, and it is one of the first things measured at a roadworthiness inspection. That is why work on the caliper side is, as a rule, thought through at the axle-set level.
Working on one side alone carries three concrete risks. The first is balance: if one side has been renewed while the other has a sliding assembly that is starting to bind, the two sides produce different force under the same pressure. The second is wear rate; the side working freely does most of the work, its pad wears out fast, and a new imbalance appears within a short time. The third is diagnostic confusion: if nobody knows which side was repaired when and at what level, the root cause cannot be traced the next time round.
Axle-set discipline does not mean "both calipers get repaired every single time." What it means is: the decision is made at the axle level. If one side is going to be repaired, the other side goes through the same measurement gates and the result is recorded. If the opposite side is sound, that record has value the next time around; if it is not sound, there is already a job that belongs in the same work order.
The same discipline applies to the pad and disc side as well, though they have their own limit values and that is outside the scope of this article. The rule to keep here is simple: an intervention on the caliper side is not considered finished until the other side of the axle has been looked at too.
Fleet economics: downtime, core management and warranty
For the workshop, repair is a technical decision; for the fleet, that same decision is a downtime decision. The choice cannot be reduced to comparing part prices; the calculation carries at least five line items: the part, labor, how long the vehicle is off the road, the work missed in that time, and the likelihood the repair comes back.
The numbers behind these line items differ from fleet to fleet. The framework below shows which way the decision leans; each fleet fills in the numbers from its own records.
| Scenario | Favors repair | Favors replacement |
|---|---|---|
| Vehicle must leave the same day, no suitable kit on the shelf | None | A ready caliper cuts downtime, if one is available |
| Body is clean, fault is limited to the protective elements | Lowest cost, fastest-closing scenario | Only if the kit itself is delayed |
| Fleet keeps a pool (exchange) caliper | The removed body can be repaired later at a calmer time | Vehicle leaves immediately; repair is left to the workshop's own schedule |
| Same caliper comes back a second time with the same fault | None; the root cause is investigated first | Replacement is safer until the root cause is found |
| Vehicle is leaving the fleet soon | The smallest level that covers the remaining time | Only if a reject criterion applies |
| Roadside failure, service point far away | Only if the measurement gates can actually be applied there | Preferred when the gates cannot be applied |
| Finding falls under one of the reject criteria | None | Only option |
Core management is the line item most often skipped in this calculation. A body that comes out during a replacement carries a returnable value in most supply arrangements, and that value only materializes if the body comes back in acceptable condition. Leaving the core lying around in the open, stacking other parts on top of it, or mixing it in unlabeled quietly zeroes out that value. In a well-run setup, the body that comes out gets tagged the same day and collected in a closed container.
The warranty side comes down to records too. For a repair to be considered under warranty, three things generally have to be demonstrable: that the correct level of kit was used, that assembly was carried out under the conditions the manufacturer specifies, and that verification was actually applied. Keeping records, in other words, is not extra work — it is the warranty entitlement itself.
On the fleet side, the fastest gain does not come from speeding up the repair — it comes from moving the decision earlier. Early signs (a torn protective element, a caliper that won't slide, one-sided pad wear) can be caught during scheduled maintenance. A job that closes at level 0-1 at that stage comes back as level 4 or a full caliper replacement once it has been left to run on the road.
Traceability and record-keeping for a repaired caliper
A repaired caliper is a part with a history. If that history is not written down, the part goes back to being "unknown" the next time it comes in, and the same decisions get made from zero all over again. Traceability doesn't just improve the outcome for one caliper — it raises the decision quality across the whole fleet.
The fields a record needs are simple and fit on a single line:
- Identity: vehicle, axle, position (left/right), date and mileage.
- Complaint: what the driver described and what the workshop confirmed.
- Measurement gates: which one passed, which one failed.
- Decision: the level chosen and the reasoning; if rejected, which criterion triggered it.
- Kit used: level and batch information.
- Verification: bench check, axle balance and test-drive results.
- Tightening: values applied, with reference to the documentation.
- Opposite side: what was found on the other caliper on the axle.
The value of these lines shows up not one at a time but as they accumulate. Three records already form a pattern: a repeated tear in the protective elements across vehicles on the same route points to road conditions; stiffness clustering in a particular season points to washing and corrosion; recurring early failures traced to the same crew point to assembly discipline.
Do not stamp or punch a mark into the caliper body for traceability. A mark made by impact creates a stress concentration point, and that is very often exactly where a fatigue crack starts. Keep the record on the work order and the tag — not on the part itself.
Summary: repair is a chain of decisions, not a part
What makes a caliper repair succeed is not what's inside the box — it's the moment someone decides to open it. The chain always runs in the same order: reject criteria first, then the measurement gates, then the level decision, then a clean and uninterrupted workflow, and verification and record-keeping at the very end. Skip any one link in that chain and the repair does not simply fail outright — something worse happens: it looks partly successful, and the fault comes back a few months later.
No single hard figure was given deliberately in this article, because the values that matter in a caliper repair vary by type and vehicle, and the only valid source is the manufacturer's current service documentation. What can be given is the decision itself: which finding stops the job, which finding lets it continue, and how what was done gets proven.
VADEN manufactures air brake system components and repair kits for heavy commercial vehicles; the decision criteria and verification points in this article are the same ones we work with alongside feedback from the field. For the wider job where every sub-assembly is renewed together, Brake Caliper Overhaul Kit: Guide Pins, Boots & Adjuster is the natural next step from this article.
Shop this part: Brake Caliper Repair Kits
What wears the rubber parts inside these sets, and what to watch during fitting, is covered in detail in the brake caliper rubber repair kit guide.
Main guide: Air Disc Brake Caliper: Faults, Replacement & Maintenance Guide
Tags
Frequently Asked Questions
- How is the decision made between repairing and replacing a brake caliper?
- The decision comes down to three questions. First, are the body and carrier bracket sound? If the answer is no, the other two questions never get asked, because a repair kit cannot renew the carrier structure itself. Second, is the fault confined to a single sub-assembly, or has it spread from the protective elements all the way to the mechanism? This question sets the level of repair kit needed. Third, what is the vehicle's downtime budget today — and that question belongs to the fleet, not the workshop. The order matters: reject criteria first, then level, and schedule comes last.
- Which repair kit level is enough for which fault?
- It helps to think of repair kits by level rather than box name. If the fault is limited to the protective elements and the surfaces underneath are still clean, the narrowest level is enough. If the caliper will not slide by hand on the carrier and one pad has worn out while the other has not, the fault has reached the sliding assembly. If pad clearance has grown and the adjuster is not keeping up, the sealing-and-mechanism level is needed. If the tappet does not retract and the pad is dragging, the job approaches a full overhaul. If the body shows a crack, deep corrosion or discoloration from overheating, no repair level applies — the caliper is replaced.
- In which cases can a caliper definitely not be repaired?
- The one thing a repair kit cannot renew is the carrier structure itself. That is why a crack in the body or carrier bracket, corrosion that has become section loss, discoloration from overheating, ovalling in the tappet bore, unrepairable thread damage, damage to the mechanism's bores on the body side, a mechanism fused by corrosion, a history of being welded or forced back into shape, and collision-related deformation are all reject criteria. Any caliper type or area the manufacturer has declared closed to repair also belongs on this list — the service documentation defines the scope.
- What needs to be measured before repair begins?
- The measurement gates are applied in order: body and carrier integrity, the caliper's sliding freedom, tappet freedom and return, whether the adjuster mechanism moves only in the expected direction, integrity of the protective elements, whether corrosion has stayed on the surface or reached the section, disc and pad condition, mounting faces and bolt threads, and the caliper's repair history. Each gate produces a pass or a fail. The numerical limits are not inside these gates themselves — they come from the vehicle and caliper manufacturer's current service documentation.
- Why does the workflow matter more than the kit itself in a caliper repair?
- The same repair kit gives two different lifespans in two different workshops; cleanliness, sequence and control gates make the difference. If the caliper is removed without being photographed in place first, orientation and contact information get lost. If traces are not read before washing, they never come back. If the measurement gates are applied only partially, a reject case slips through. The most expensive contamination happens during assembly: a caliper left open on the bench collects the dust in the workshop air. The rule is simple — once a caliper is opened, the job gets finished; if it can't be finished, it doesn't get opened.
- How is a correct repair proven afterward?
- A repair is not finished when the caliper goes back on the vehicle — it is finished when verification is complete. The sequence is: free movement and adjuster behaviour on the bench, sliding freedom and pad clearance and dragging on the vehicle, a torque record against the manufacturer's values, a static brake check, a right/left comparison on a brake tester for the same axle, a temperature comparison after a short test drive, and a first-service follow-up a few days later. All of these steps have to be recorded; verification that is not written down counts as not done.
- Can the caliper on just one side of an axle be repaired on its own?
- A brake works on the axle, not on a single wheel, which is why the decision is made at the axle-set level. If one side has been renewed while the other side's sliding assembly is starting to bind, the two sides produce different force under the same pressure; the side working freely does most of the work and its pad wears out fast. And if nobody knows which side was repaired when and at what level, the root cause cannot be traced on the next visit. The rule is not that both calipers get repaired every time — it is that the opposite side goes through the same measurement gates and the result gets recorded.
- Is repair or a pool caliper swap the more sensible choice for a fleet?
- The calculation cannot be reduced to part price; it includes the part, labor, how long the vehicle is off the road, the work missed in that time, and the likelihood the repair comes back. If the vehicle has to leave the same day and no suitable kit is on the shelf, a ready pool caliper cuts downtime, and the removed body can be repaired later at a calmer time. If the body is clean and the fault is limited to the protective elements, repair is the fastest-closing option. If the same caliper comes back a second time with the same fault, the fix is finding the root cause, not simply raising the repair level.
- Why does core management matter?
- A body that comes out during a replacement carries a returnable core value in most supply arrangements, and that value only materializes if the body comes back in acceptable condition. Leaving the core lying in a corner of the workshop, stacking other parts on top of it, or mixing it in unlabeled quietly zeroes out that value. In a well-run setup, the body that comes out gets tagged the same day, marked with which vehicle it came from, and collected in a closed container. This is the line item most often skipped in the repair-versus-replacement calculation.
- What should be recorded for a repaired caliper?
- The record fits on a single line: vehicle, axle and position information, date and mileage; the driver's complaint and what the workshop confirmed; which measurement gate passed and which failed; the level chosen and its reasoning, or the criterion the reject decision was based on; the level and batch of the kit used; the verification results; the torque values applied; and what was found on the opposite side of the axle. Do not stamp or punch the part itself for traceability — a mark made by impact concentrates stress, and a fatigue crack very often starts from exactly that kind of mark.
Related Articles
Air Brake Caliper: Air Disc Brake Systems Explained
Fixed and floating air disc brake calipers on trucks and trailers: how each turns air pressure into clamping force, core parts and why fade resistance matters.
Air Brake Compressor Duty Cycle & Efficiency Guide
Heavy-duty compressor efficiency and duty cycle: how much time it runs loaded, how to measure build-up time, what drives high duty cycle, and fleet logging.
Air Disc Brake Caliper: Faults, Replacement & Maintenance Guide
On truck and trailer axles a seized caliper, uneven pad wear or pulling to one side traces to the guide pins or cam mechanism: diagnosis, repair or replacement.


