Truck Water Pump Repair: Housing, Gasket and Water Pipe
Learn how a heavy truck water pump fails, how to diagnose leaks and bearing noise, and how to replace the housing, gasket and water pipe correctly.
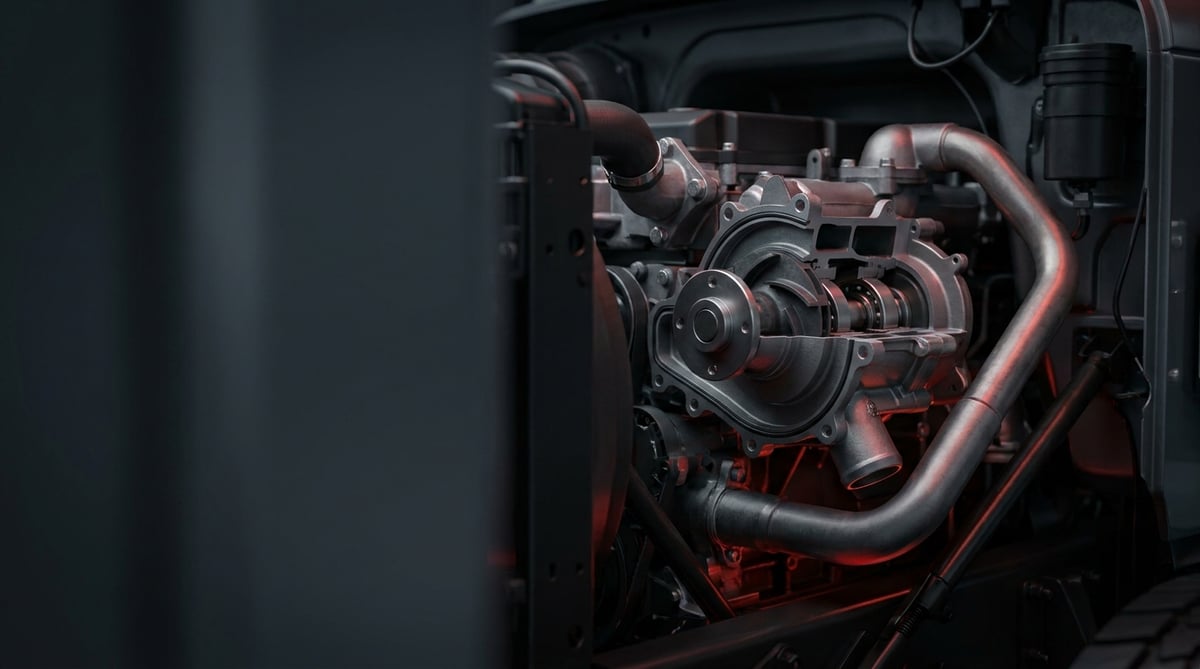
When the temperature needle on a heavy commercial vehicle starts to climb, the first suspects are usually the radiator or the thermostat. Yet that small green-orange stain found in the morning on the cardboard laid under the service bay more often comes from the weep hole of the coolant circulation pump. A water pump rarely bursts all at once; first it seeps at the seal, then the bearing starts to make noise, and finally it throws the belt and strands the vehicle on the road. This guide handles the pump's housing-gasket-water pipe trio through the eyes of a workshop foreman: what it does, how it fails, in which order it is diagnosed, how it is removed and refitted, and how its service life is extended.
What Is Water Pump Repair: Housing/Gasket/Water Pipe? Function and Working Principle
Water Pump Repair: Housing/Gasket/Water Pipe is the repair group covering the joint renewal of the coolant circulation pump housing, the sealing gasket and shaft seal, and the water pipes connected to the pump in a heavy commercial vehicle engine. Driven by belt or gear, the pump typically produces a coolant flow of 200-600 L/min at full load and must remain leak-tight under a closed-circuit pressure of 0.9-1.4 bar.
In the field and in catalogues the same group goes by several names: circulation pump, water pump, coolant pump, pump housing, volute, pump gasket and the water pipe / water neck that joins the pump to the block, the thermostat housing or the radiator. Whatever name is used in the search, the selection criterion is single: engine code and OE reference number.
The working principle is simple but the tolerances are tight. Motion from the crankshaft pulley is transferred to the pump shaft through a belt or gear; the impeller at the end of the shaft rotates and throws the coolant from the centre outwards. The volute form of the housing converts this velocity into pressure, and the coolant travels into the galleries inside the block, from there to the cylinder head and, once the thermostat opens, to the radiator. The system is a closed circuit; the expansion tank cap pressurises the system to around 0.9-1.4 bar, so the boiling point of the coolant is raised and the risk of cavitation at the pump inlet is reduced.
Sealing is provided by two separate lines. The first is static sealing: the gasket or O-ring between the housing and the block. The second is dynamic sealing: the mechanical seal on the rotating shaft (a carbon-ceramic face pair). Between these two lines there is a small weep/drain hole on the housing; when the seal begins to seep, the coolant is expelled here so that it does not reach the bearing. In other words, the coolant dripping from that hole is not a defect but a designed warning signal.
Why are the housing, gasket and water pipe considered together?
The pump housing, the gasket face and the water pipe form a single sealing chain. The difference in thermal expansion between the aluminium housing and the cast iron block imposes micro-movement on the gasket face with every heating-cooling cycle; over the years this movement leaves a witness mark on the gasket face and a corrosion pit in the aluminium. The O-ring at the end of the water pipe follows the same ageing curve. That is why renewing only the pump and reusing the old gasket and the old pipe O-ring is one of the most common causes of repeat failure in the field.
In which OE applications do we encounter it?
In heavy commercial vehicles the housing form and mounting geometry of the water pump depend far more on the engine family and emission generation than on the make of the vehicle. Belt-driven compact pumps are widespread in the Mercedes-Benz OM 457 / OM 470 / OM 471, MAN D20 and D26 and Iveco Cursor families; gear-driven and generally longer-lived pumps are frequently seen in Volvo D11 / D13, DAF MX-11 / MX-13 and Scania DC13 applications. These names are given only as application examples; even within the same engine family the fan drive type and the Euro 5 / Euro 6 equipment level can change the housing geometry. The correct part is determined not by the make name but by the engine code and OE number.
Components and auxiliary elements
- Pump housing (volute): aluminium or cast iron, the main casing that directs the flow.
- Impeller: pressed steel, grey cast iron or composite; the blade form determines the flow rate.
- Shaft and bearing set: generally a double-row, lifetime-lubricated and non-serviceable unit.
- Mechanical seal: a carbon-ceramic face pair; provides dynamic sealing.
- Housing gasket / O-ring: static sealing at the block, thermostat housing and pipe connections.
- Water pipes and necks: metal or composite lines between pump and block, pump and radiator, pump and oil cooler.
- Pulley or drive gear: the element that transfers motion to the shaft.
- Weep/drain hole: the observation point that keeps seal leakage away from the bearing.
| Drive / construction type | Typical application example | Characteristic feature | Service note |
|---|---|---|---|
| Belt-driven pump with external housing | Mercedes-Benz OM 4xx, MAN D20/D26, Iveco Cursor | Easy access, sensitive to belt tension | Assessed together with belt and tensioner |
| Gear-driven pump seated on the block | Volvo D11/D13, DAF MX-11/MX-13, Scania DC13 | Higher torque capacity, independent of the belt | Gear backlash and O-ring seating are critical |
| Pump with composite impeller | New generation Euro 6 heavy commercial applications | Low inertia, corrosion-resistant impeller | Sensitive to the wrong coolant chemistry |
| Classic pump with metal impeller | Older generation Euro 3/Euro 5 engines and construction machinery | Durable, open to cavitation wear | Impeller blade thickness must be checked |
| Installation with a separate water pipe / neck group | Tractor units and bus chassis with long cooling lines | Numerous O-ring and flange connections | Pipe gaskets are renewed together with the pump |
How can a Water Pump Repair: Housing/Gasket/Water Pipe fault be identified?
Water Pump Repair: Housing/Gasket/Water Pipe faults fall under three main headings: external coolant loss, reduced flow and mechanical noise. The first is read by eye, the second from the temperature behaviour, and the third by ear. The table below matches field symptoms with probable causes and the verification method.
| Symptom | Probable cause | Check / verification |
|---|---|---|
| Dripping from the weep/drain hole, residue trace once dry | Mechanical seal fatigued, face pair worn | Clean around the hole and observe for 24 hours; pressure test the system at 1.0-1.5 bar |
| Seepage at the joint between pump housing and block | Housing gasket aged or corrosion pitting on the seating face | Dry the flange line on a cold engine and re-inspect during the pressure test |
| Intermittent leakage from the end of the water pipe | Pipe O-ring hardened, pitting corrosion at the pipe end | Inspect under pressure with directed light without removing the pipe end; O-ring elasticity test |
| Metallic hum or rustling from the front of the engine, rising with engine speed | Play developed in the pump bearing | Turn the pulley by hand with the belt removed; feel for radial play and roughness |
| Misalignment on the belt run, dust and wear on the belt edge | Shaft bending or loss of pulley offset | Pulley alignment with a straight edge/laser; pulley run-out check |
| Temperature rises on gradients, returns to normal on the flat | Impeller blades thinned by cavitation, low flow | Measure the inlet-outlet temperature difference with a sound thermostat; remove the pump and inspect the impeller |
| Continuous level drop in the expansion tank with no external wetness | Internal leakage or coolant escaping by evaporation under pressure | Pressure test plus check for coolant traces in the exhaust; trace with leak dye |
| Rust-coloured cloudiness or brown sludge in the coolant | Wrong/mixed coolant, corrosion inhibitor depleted | Refractometer and pH measurement; inhibitor level with a test strip |
Leak-tightness diagnosis by pressure test
The most reliable verification of a water pump leak is a system pressure test carried out on a cold engine. The test pump is connected and the system is pressurised, without exceeding the manufacturer's limit, typically to the order of 1.0-1.5 bar; if the pressure drops visibly within 10-15 minutes there is a leak. Meanwhile the pump flange, the weep hole, the water pipe ends and the thermostat housing are scanned with directed light. The pressure cap itself is also tested separately; a weak cap is the classic red herring that gets the pump blamed.
Diagnosing mechanical noise and play
On belt-driven installations the belt is removed and the pulley is turned by hand. A sound pump turns smoothly and gives no rattle or gritty feel; if a noticeable radial play is present when the pulley is pulled and pushed at the 12 o'clock and 3 o'clock positions, the bearing is finished. On gear-driven pumps this check cannot be made directly, and listening through the housing with a stethoscope is more meaningful. When bearing noise is identified the pump is not repaired but renewed complete.
Performance diagnosis by flow and temperature difference
If the pump is not leaking but the vehicle overheats, the impeller efficiency must be questioned. With the thermostat in the open position, the temperature difference between the radiator inlet and outlet hoses is measured with a non-contact thermometer; in a sound system this difference is typically in the 5-12 °C range under load. If the difference is very low, circulation is weak: the impeller blades may be worn, the impeller may have slipped on the shaft, or the inside of the water pipe may be narrowed by scale. On pumps with a composite impeller, the impeller spinning on the shaft is the most insidious form of failure because it causes overheating without giving any sign of leakage.
Further reading
For a plain-language technical overview of this subject, see the reference article on Wikipedia. Always confirm specific figures and procedures against the vehicle manufacturer service data.
How is a Water Pump Repair: Housing/Gasket/Water Pipe carried out? Step by step
Water Pump Repair: Housing/Gasket/Water Pipe replacement is a routine job when done in the right order; when the order is broken the gasket face and the belt alignment are upset, and the job has to be opened up a second time.
- Prepare the vehicle and let the system cool: Secure the vehicle on level ground, switch off the battery isolator and wait until the engine temperature drops to a level that can be touched by hand. If you have to tilt the cab, verify that the tilt lock has engaged.
- Drain the coolant properly: Open the expansion tank cap in two stages and drain the coolant into a clean closed container using the radiator bottom plug and, where fitted, the block drain plug. Note the colour of the coolant and whether it contains particles; this information points to the root of the fault.
- Open up access and remove the belt after marking it: Remove the fan cage, the guard plate and the necessary hoses. Mark the running direction of the belt, release the tensioner in the correct direction and take the belt off; if there is cracking, oil contamination or edge wear, add the belt to the list of items to be renewed.
- Remove the pulley and the connections: Loosen the pulley bolts in an opposing sequence. Detach the water pipes, necks and, if fitted, the cab heater line connected to the pump; label every pipe. Do not set the removed O-rings aside for refitting, put them straight into the waste bin.
- Remove the pump housing: Loosen the housing bolts from outside to inside, in a crosswise sequence and in stages. If the housing has stuck, free it by tapping with a plastic mallet; do not insert a screwdriver or chisel into the gasket face. Record the difference in bolt lengths, as a long bolt going into the wrong hole can pierce the water jacket.
- Clean and inspect the seating faces: Remove the old gasket residue with a plastic scraper and a suitable cleaner; do not use a steel brush on the aluminium surface. Check by eye and with a straight edge for corrosion pitting, scoring or distortion; if there is deep pitting, the housing side must also be renewed.
- Assess the water pipes and hoses: If there is pitting corrosion, scale build-up or ovality at the pipe ends, renew the pipe. Squeeze the hoses by hand; a hose that has hardened, gone spongy or cracked at the edge is not left in place.
- Fit the new pump after comparison: Lay the new pump alongside the removed one and compare the pulley offset, the inlet-outlet angle, the bolt holes and the number of impeller blades. Place the new gasket or O-ring on a dry, clean surface. Unless the manufacturer states otherwise, do not add liquid sealant to the gasket face; excess sealant breaks up and blocks the radiator.
- Tighten the bolts to the specified torque: Seat the bolts by hand, then bring them to the manufacturer's specified torque from inside to outside in a crosswise sequence and in at least two stages. Do not go to full torque in a single pass; on an aluminium housing this causes distortion and leakage. Always renew bolts specified as single-use.
- Fit the belt and verify the alignment: Fit the belt in the marked direction and verify that the tensioner is within its indicator range. Check the pulley alignment with a straight edge or a laser alignment tool. A misaligned belt destroys the bearing of the new pump within a few thousand kilometres.
- Fill, bleed and test: Fill the system slowly with coolant of the specification approved by the manufacturer, using the bleed plugs. Let the engine idle until the thermostat opens, top up the level, then carry out a pressure test and observe the weep hole and all flanges. After a short road test, check the level again once it has cooled.
What are the most common mistakes in Water Pump Repair: Housing/Gasket/Water Pipe replacement?
Water Pump Repair: Housing/Gasket/Water Pipe jobs see most repeat failures arise not from the quality of the part but from a lack of assembly discipline. The mistakes most frequently met in the field are gathered below.
- Replacing only the pump: The housing gasket, the pipe O-rings, the hoses and the clamps are all in the same age group; when one is renewed and the others are left, the job comes back within a short time.
- Scraping the gasket face with a metal tool: Every scratch opened on an aluminium surface is a leakage channel. Use a plastic scraper and a chemical cleaner.
- Applying excessive liquid sealant: Surplus material flows into the water jacket and blocks the radiator and oil cooler cores. If the manufacturer does not require it, do not use it at all.
- Tightening the bolts in a single stage and in a random sequence: The aluminium housing distorts and the flange opens up at individual points.
- Setting the belt tension "by pressing with the thumb" and not checking the alignment: Excessive tension shortens the bearing life, while a misalignment of a few millimetres produces dust on the belt edge and early bearing damage.
- Not bleeding the system completely: An air lock creates cavitation at the pump inlet and local overheating; it erodes the impeller blade.
- Filling with pure water or with neat antifreeze: Pure water contains no corrosion inhibitor, while neat antifreeze reduces heat transfer.
- Closing off the weep/drain hole: A hole blocked with silicone or a plug directs the leakage into the bearing and destroys the pump rapidly.
- Skipping the thermostat and the cap: An aged thermostat and a weak pressure cap upset the operating conditions of the new pump.
Water Pump Repair: Housing/Gasket/Water Pipe technical values and check points
Water Pump Repair: Housing/Gasket/Water Pipe jobs use values that vary by engine family; the tables below give the general ranges frequently met in heavy commercial vehicle service practice. On the coolant chemistry side, heavy commercial applications are typically defined by the ASTM D6210 (heavy duty engine coolant) and ASTM D3306 families, hoses by the SAE J20 classification, and rotary shaft sealing elements by the ISO 6194 / DIN 3760 families and, for mechanical seals, by EN 12756. These standards give only a framework; the equivalent of the part and its full specification must be verified from the relevant OE catalogue.
| Parameter | Typical range (general reference) | Unit | Description / check note |
|---|---|---|---|
| System operating pressure (cap setting) | 0.9-1.4 | bar (approximately 13-20 psi) | If the cap is weak the boiling point drops and cavitation starts at the pump inlet |
| Leak test pressure | 1.0-1.5 | bar | The manufacturer's upper limit is not exceeded; there should be no drop within 10-15 minutes |
| Thermostat opening temperature | 79-88 | °C | Varies by engine family; the marking is on the thermostat body |
| Normal operating coolant temperature | 82-95 | °C | Continuous running at the upper limit is a sign of flow loss |
| Radiator inlet-outlet temperature difference (under load) | 5-12 | °C | A very low difference indicates weak circulation |
| Pump flow rate (at nominal speed) | 200-600 | L/min | Varies by engine displacement and application |
| Antifreeze-water mixture ratio | 40-60 | % by volume | A mixture of approximately 50% typically gives freeze protection of -35 to -40 °C |
| Coolant pH value | 7.5-11.0 | pH | In heavy duty products, approaching the lower limit means inhibitor depletion |
| Perceived shaft axial/radial play | No perceptible play | — | Roughness, rattle or run-out when turned by hand is not acceptable |
| Pulley alignment deviation | Within manufacturer tolerance, typically ≤1 | mm | Measured with a straight edge or a laser alignment tool |
| Connection | Common bolt size | Typical torque range | Note |
|---|---|---|---|
| Pump housing to block | M8 | 20-30 Nm | Crosswise sequence, in at least two stages |
| Pump housing to block (large housing) | M10 | 40-55 Nm | The upper limit is not forced on an aluminium housing |
| Pulley to pump shaft | M8 | 20-30 Nm | The pulley seating face must be clean and dry |
| Water pipe flange | M8 | 18-28 Nm | Flange parallelism is verified before the O-ring is compressed |
| Thermostat housing | M8 | 20-30 Nm | The gasket is single-use |
| Drain plug | M14-M18 | 25-40 Nm | The washer or O-ring is renewed |
Post-assembly field checklist:
- Is the weep/drain hole dry; was it re-inspected after the first 200-500 km?
- Do the housing flange, the water pipe ends and the thermostat housing stay dry under pressure?
- Is the expansion tank level between MIN and MAX on a cold engine, and stable on two consecutive days?
- Is the belt tension within the indicator range and the pulley alignment within tolerance?
- Does the coolant temperature stay within its normal band under load, without climbing on gradients?
- Have the freeze protection and inhibitor level of the coolant been measured?
- Is there any abnormal hum from the front of the engine at idle and at mid speed?
How is Water Pump Repair: Housing/Gasket/Water Pipe maintained and its service life extended?
Water Pump Repair: Housing/Gasket/Water Pipe group life depends far more on the chemistry of the fluid passing through it and on the trueness of the drive line than on the part itself. In heavy commercial use, a sound pump is typically expected to last in the order of 250,000-500,000 km, or 6,000-10,000 operating hours in intensive site use; however, the wrong coolant or a misaligned belt easily halves this figure. The most frequent cause of early failure in the field is not a mechanical defect but coolant whose service has been delayed and whose inhibitor is depleted.
- Manage the coolant by measurement, not by calendar: Measure the freeze protection with a refractometer and the inhibitor and pH level with a test strip at regular intervals. The change interval given by the manufacturer (typically 2-5 years or the stated mileage) is an upper limit; measurement may call for earlier intervention.
- Stay with a single specification: A different product added during roadside assistance upsets the chemistry of the system. Keep top-up fluid of the correct specification on the vehicle.
- Do not use pure water: Hard tap water leaves deposits on the impeller and the inner surface of the housing and abrades the seal face. Only the water quality and mixture ratio permitted by the manufacturer are used.
- Consider the belt and tensioner together with the pump: If the tensioner bearing has developed play, the new pump will also run under vibration. Assess the belt, the tensioner and the idler pulley at the same service.
- Monitor the weep hole regularly: This hole should be inspected visually at every oil service, and any dry residue trace noted. Seal seepage caught early prevents a breakdown on the road.
- Do not neglect the hoses, clamps and radiator: A hardened hose imposes additional load on the pump flange; a blocked radiator causes the pump to run at a higher temperature and fatigues the seal early.
- Do not add cold water to a hot engine: This creates the risk of thermal shock and distortion in an aluminium housing.
- Put the system through a periodic pressure test: A 10-minute pressure test at the annual inspection reveals invisible seepage early.
In short, this group is not one that is "replaced when it fails" but one whose "condition is monitored". Regular observation of the weep hole, management of the coolant by measurement and keeping the belt line in alignment are the three basic habits that extend pump life.
Related categories: Housing · Gasket · Water Pipe
The life of the pump group is directly tied to the chemistry of the fluid passing through it; choosing a type and setting renewal intervals are covered in the antifreeze types and change interval guide.
Main guide: Water Pump: Faults, Replacement & Maintenance Guide
Tags
Frequently Asked Questions
- What is the first sign of a water pump failure?
- The first sign of a water pump failure is usually a slight dripping from the weep/drain hole on the housing, or a coloured residue trace left once it dries. This is followed by a hum from the front of the engine that rises with engine speed, and then by a continuous drop in the coolant level. A rising temperature gauge is generally the final stage.
- Is dripping from the water pump weep hole normal?
- Dripping from the water pump weep hole is not normal, but it is an expected form of warning. The hole is designed to prevent mechanical seal leakage from reaching the bearing. If continuous dripping has started, the seal has reached the end of its life and the pump should be renewed in a planned manner. The hole must never be blocked.
- Can the water pump gasket be replaced on its own?
- The water pump gasket can be replaced on its own if the pump housing and shaft assembly are sound. However, if the pump has already been removed, most of the labour cost has been spent; for this reason the common practice in heavy commercial service is to renew the pump together with the gasket, or at the very least to inspect the bearing play and impeller condition in detail.
- At what mileage is a water pump replaced?
- There is no fixed replacement mileage for a water pump; in heavy commercial use a life in the order of 250,000-500,000 km or 6,000-10,000 operating hours is typically expected. Coolant quality, belt alignment and operating temperature determine this range. For the exact interval, the vehicle's OE maintenance table must be taken as the basis.
- Should the thermostat and belt also be replaced when the water pump is changed?
- When the water pump is changed, it is recommended that the condition of the thermostat, the belt, the tensioner bearing and the expansion tank cap be assessed. These parts share the same thermal cycle and access has already been opened up. An aged thermostat or a weak pressure cap can upset the operating conditions of the new pump and lead to early failure.
- Can a water pipe O-ring be reused?
- A water pipe O-ring should not be reused. The elastomer undergoes permanent deformation under thermal cycling and cannot regain its original sealing pressure once removed and refitted. Every O-ring and gasket removed is replaced with a new one; if there is pitting corrosion at the pipe end, the pipe is renewed as well.
- Can antifreezes of different colours be mixed?
- Coolant products of different technologies should not be mixed. Colour alone does not indicate the technology; what is decisive is the specification given by the manufacturer. Mixing organic acid technology products with conventionally inhibited ones leads to gelling, inhibitor precipitation and deposits on the seal face. Where mixing is suspected, the system is flushed and refilled with a single specification.
- Can a vehicle be driven with a faulty water pump?
- A vehicle should not be driven with a faulty water pump. Loss of flow or a seized bearing leads to overheating within a short time, and from there to cylinder head distortion and gasket damage. On belt-driven installations a seized pump snaps the belt, and charging and steering assistance may also be lost. When symptoms are seen, the vehicle should be taken to the nearest service centre under low load.
- Does a water pump cause overheating, or does it only leak?
- A water pump can be a source of both leakage and overheating. Impeller blades thinned by cavitation, or a composite impeller slipping on the shaft, reduce the flow without any sign of external leakage and cause overheating especially on gradients. In this case, measuring the radiator inlet-outlet temperature difference is decisive in the diagnosis.
- What information is needed when selecting a water pump?
- When selecting a water pump, the vehicle's engine code, year of manufacture, emission generation and, if possible, the OE number on the old pump are needed. Make and model information alone is not enough; within the same model the pulley offset, the inlet-outlet angle and the bolt hole pattern can differ. Verification is always made through the OE reference number.
Related Articles
What is a Water Pump in Commercial Vehicles? Tasks, Failures and Maintenance Recommendations
What is a water pump in a heavy truck? How it drives coolant flow, drive types, early failure signs, and a fleet cooling system checklist.

ABS Brake System: How It Works, Warning Light and Faults
Learn how the ABS brake system works on heavy trucks, why the warning light comes on, how to diagnose sensor faults, and the correct replacement steps.
Engine Overheating in Heavy-Duty Trucks: Causes & Fixes
Learn why heavy-duty truck engines overheat, how to read the gauge, step-by-step diagnosis, and how coolant, water pump, thermostat, and fan clutch fail.


