Quick Release Valve (QRV): Faults, Replacement & Care
How a quick release valve (QRV) works on truck air brakes: fault symptoms, diagnosis, step-by-step replacement, torque values and maintenance tips.
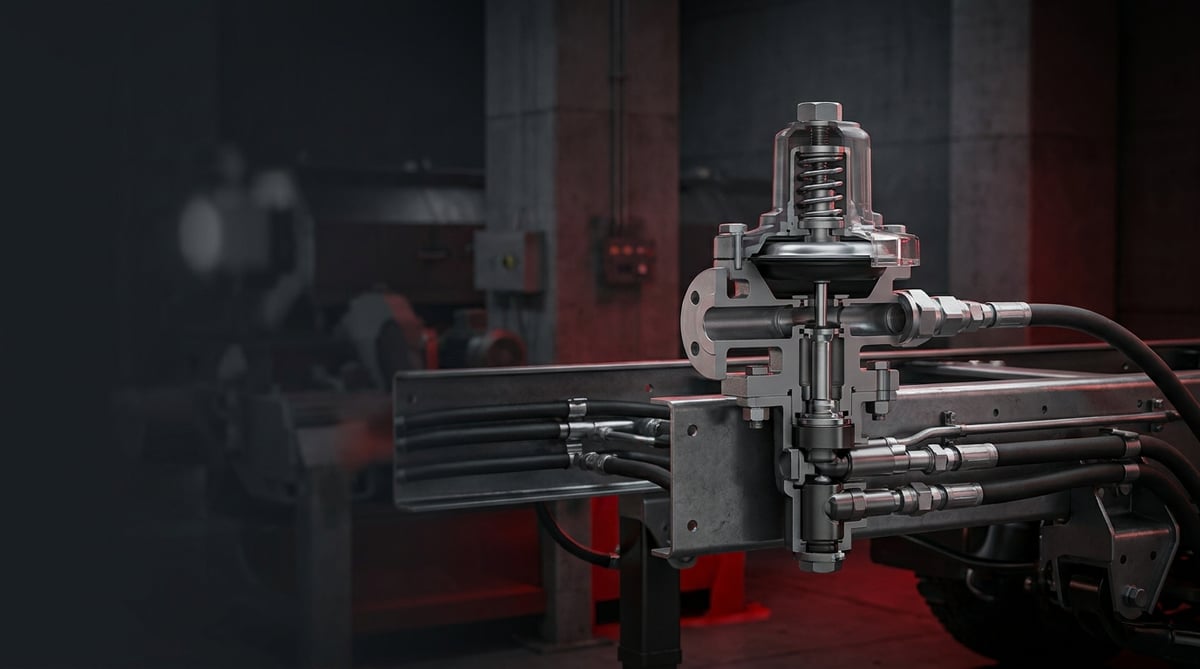
Every technician who works on heavy commercial vehicle brake systems will, at some point, run into a truck whose brakes "release late." The driver lifts off the brake, but the chamber or brake piston bleeds off the air slowly; the vehicle drags along braked for a moment longer, the linings heat up, the trailer scuffs at the rear. Behind most of these complaints lies not an expensive main valve but a part no bigger than the palm of your hand: the quick release valve. This guide explains how to recognize this valve in the field, how to isolate its fault, and how to replace it correctly.
What Is a Quick Release Valve (QRV)? Function and Operating Principle
A quick release valve (QRV) is a pneumatic valve that, when the brake is released, shortens the release time by exhausting the compressed air in the brake chamber or piston directly to the atmosphere through an exhaust port right next to the chamber, instead of sending it all the way back to the main valve along the control line.
The operating principle is simple but effective. Inside the valve there is a flexible diaphragm (membrane) and an exhaust port. When the driver presses the brake pedal, the compressed air from the main brake valve enters through the inlet port (port 1), pushes the diaphragm down to close the exhaust port, and lets the air pass to the delivery ports (port 2) — that is, to the brake chambers. When the driver lifts off the pedal, the pressure in the inlet line drops; the air on the chamber side lifts the diaphragm up and is expelled directly through the exhaust port. This way the air does not have to travel back through metres of hose to the main valve; the brakes release far faster.
Why Is Its Location in the System Critical?
On long-wheelbase tractors and buses, the line between the main brake valve and the rear axle chambers is quite long. The delay that occurs as the air travels back along this line can cause the brake to release late and the wheel to lock. By positioning the QRV as close to the chamber as possible, this exhaust path is reduced to a few centimetres. The same logic applies to the synchronous release of the front axle chambers and the rapid exhaust of trailer/semi-trailer lines.
Main Components
- Body: Usually aluminium alloy or technopolymer; houses the inlet, delivery and exhaust ports.
- Diaphragm (membrane): A flexible element based on nitrile (NBR); it is the heart of the valve and the part most prone to fatigue and hardening.
- Exhaust cover / muffler: A cap that prevents dust and water from entering the exhaust port while also reducing the exhaust noise.
- Port connections: Threaded ports such as M22, M16, or push-in connectors.
Typical Applications and Matching
Quick release valves are mainly used on vehicles equipped with Knorr-Bremse and Wabco (today ZF) type systems. The table below is a rough guide based on the valve's typical position in the system and its flow capacity; for an exact application, the vehicle catalogue is decisive.
| Position / Application | Typical Vehicle Class | Key Feature |
|---|---|---|
| Front axle chamber line | Tractor, truck, bus | Synchronous release, medium flow |
| Rear axle chamber line | Long-wheelbase tractor | High flow, mounted close to the chamber |
| Trailer / semi-trailer supply | Semi-trailer, trailer | Rapid exhaust, muffled exhaust |
| Auxiliary / chamber balancing | Bus, special bodywork | Low-to-medium flow, compact body |
Fault Symptoms and Diagnosis
QRV faults often look like a "brake system failure" but are in fact localized. The table below matches the symptoms most frequently seen in the field with their likely causes and verification methods.
| Symptom | Likely Cause | Check / Verification |
|---|---|---|
| Brake releases late, vehicle drags | Diaphragm cannot open the exhaust port (stuck/hardened) | Listen for air discharge from the exhaust when the brake is released; if there is none, the valve is blocked |
| Continuous air leak from the exhaust port | Diaphragm torn or seating surface damaged | Apply soapy foam to the exhaust with the brake applied; continuous bubbling = leak |
| Brake releases late on one side / vehicle pulls | QRV on one axle side is blocked, flow imbalance | Compare the exhaust times of the left and right chambers |
| Brake applies slowly, engages with a delay | Inlet port or muffler blocked, air restricted | Measure the inlet pressure with a gauge; check the port by removing it |
| Water/mud spraying from the exhaust, freezing | Muffler/exhaust cover damaged, has taken in water | Remove the exhaust cover and look for moisture/rust on the inner surface |
| Continuous air consumption, compressor runs excessively | Diaphragm does not fully close, inlet air leaks through the exhaust | Engine off, tank full; listen for a leak from the exhaust with the brake applied |
| Spongy feel at the brake pedal | Partial air trapping inside the QRV or diaphragm deformation | Isolate the line and bypass the valve to compare pedal feel |
Looking for the Leak in the Right Place
A leak from the exhaust port may not always come from the valve itself. Slight air coming from the exhaust while the brake is not applied usually indicates a diaphragm leak; air coming while the brake is applied indicates that the seating surface on the inlet side has deteriorated. Distinguishing the two prevents you from replacing the valve unnecessarily.
Exhaust Time Test
A sound QRV exhausts the pressure in the chamber almost instantly (usually in under a second) when the brake is released. In case of a dragging complaint, observe the pressure drop time with a gauge fitted to the chamber outlet; if there is a visible delay, the diaphragm inside the valve has hardened or the exhaust path is restricted.
System-Related Confusions
Dragging is not always the QRV. Misadjustment, fatigue of the chamber return spring, a seized slack adjuster, or a drum/disc caliper failing to retract can produce the same symptom. Before blaming the QRV, confirm with the exhaust test that the valve is actually exhausting.
Replacement / Installation Steps
- Secure the system: Park the vehicle on level ground, chock it, stop the engine and drain the pressure in all air tanks down to zero through the drain valve.
- Locate the valve: Identify the faulty QRV; it is usually the small three-port (inlet, delivery, exhaust) valve closest to the chamber. Photograph its position.
- Mark the lines: Before removing the inlet and delivery hoses, label or mark them; a reversed connection will render the valve inoperative.
- Disconnect the connections: Loosen the fitting nuts with a suitable wrench. A slight release of air at the moment of removal, due to residual pressure, is normal.
- Remove the old valve: Detach the valve from the mounting bracket. Check the condition of the bracket and bolts for corrosion.
- Clean the ports and hoses: If there is dirt, rust or old seal residue on the hose ends and fittings, clean it; it can cause leaks in the system.
- Prepare the new valve: Verify that the port diameter, connection type and exhaust orientation of the new VADEN QRV are the same as the old one. Make sure the exhaust port faces down/outward so that water does not collect.
- Apply thread sealing: On threaded connections, use the type of thread tape or liquid sealant recommended by the manufacturer; do not let it get inside the exhaust port.
- Install the valve: Secure the new valve to the bracket and connect the inlet and delivery lines to the correct ports according to your marks. Tighten the fittings to the manufacturer's torque value; overtightening will crack the body.
- Restore pressure and test: Start the engine and fill the system to nominal pressure. Apply soapy foam to all connections to check for leaks.
- Function test: Apply and release the brake several times; at each release a clear, short air discharge should be heard from the exhaust, and the brakes should release quickly and evenly. Confirm with a short road test that the dragging has stopped.
Points to Watch (Common Mistakes)
- Do not remove the muffler/exhaust cover and leave it off; dust and water damage the diaphragm in a short time.
- Do not overtighten the fittings; technopolymer and aluminium bodies crack and cause micro-leaks.
- Check not just one valve but also the matching valves on the same axle; if only one side is renewed, the release imbalance may persist.
- Do not use an equivalent with the wrong flow capacity; "it fits but doesn't match" is the most common mistake.
- Before cutting out and discarding the old diaphragm, note the fault type (torn or hardened); it may be a sign of a systemic problem.
Technical Values and Checkpoints
The values below are typical/general references for heavy commercial vehicle pneumatic brake systems. Exact values vary according to the service manual of the vehicle, axle and valve manufacturer; in practice, the service manual is decisive.
| Parameter | Typical Range (general reference) | Note |
|---|---|---|
| System operating pressure | ~8–12.5 bar (116–181 psi) | Depends on the regulator cut-out pressure |
| Opening pressure differential (exhaust) | ~0.1–0.5 bar | The differential at which the diaphragm opens the exhaust |
| Exhaust time (chamber) | < ~1 second | No visible delay on a sound valve |
| Operating temperature | ~ -40 °C to +80 °C | Depends on the diaphragm material |
| Port diameter (typical) | M16 / M22 threaded or push-in | Varies by application |
| Permissible leakage | Practically "zero" (no bubbles) | In both the brake-applied and released states |
Connection torques also vary according to the body material. The values below are for guidance only:
| Connection | Typical Torque (general reference) |
|---|---|
| Mounting bolt (M8) | ~18–25 Nm |
| Port fitting (M16) | ~25–35 Nm |
| Port fitting (M22) | ~35–45 Nm |
- No air should come from the exhaust while the brake is released (bubble test).
- The exhaust port should close while the brake is applied, with no leak from it.
- A clear, short discharge sound should be heard when the brake is released.
- The release times of the left and right chambers should be close to each other.
- The exhaust cover/muffler should be in place and intact, facing down.
Maintenance and Service Life
Although the quick release valve looks like a "fit-and-forget" part, it is in fact a quiet part of regular brake system maintenance. The main factor determining its life is the quality of the air passing through it: moisture and oil harden the diaphragm over time; road salt and dust block the exhaust port.
- During periodic brake maintenance, visually inspect the exhaust port and muffler, and clean off any blockage and water traces.
- Make sure the air dryer and its cartridge are working properly; dry air is the single biggest factor in extending QRV life.
- During major work such as a brake overhaul or chamber replacement, review the valve as well; renew an aged diaphragm on the spot so you do not have to dismantle it again later.
- As winter approaches, verify that the exhaust port faces down and is clean against the risk of freezing.
- Do not delay on early symptoms such as dragging or slight release delay; a small valve affects the life of the linings and drum.
A correctly mounted QRV fed with clean air will usually run for many years without trouble. However, it should not be forgotten that the diaphragm is a flexible wear element; replacing it at the first hesitation is the most economical choice for both driving safety and the rest of the brake equipment.
The VADEN ORIGINAL quick release valve (QRV) product family is produced in OE-equivalent dimensions and performance, with different port and flow options for the front axle, rear axle and trailer lines of heavy commercial vehicles. A VADEN QRV matched to the correct part number ensures that the brakes release quickly and evenly, protecting the life of the linings, drum and chambers; it keeps your vehicle safe and efficient.
Related categories: Unloader Valves · Unloader Valves · Repair Kit · Quick Release Valve · Quick Release Valve
Related technical guides: ABS Wheel Speed Sensor & ECU: Faults, Replacement & Care · Brake Caliper Overhaul Kit: Guide Pins, Boots & Adjuster · Air Processing Unit (APU/EAC): Faults, Replacement & Care · Pressure Limiting Valve: Faults, Replacement & Maintenance · Four-Circuit Protection Valve: Faults, Diagnosis & Replacement
Application and compatibility: Vehicle compatibility catalogue · Engine compatibility catalogue
Tags
Frequently Asked Questions
- What does a quick release valve do?
- When the brake is released, it exhausts the compressed air in the chamber directly to the atmosphere through the exhaust port next to the chamber, instead of sending it back to the main valve along the long control line. This way the brakes release much faster and more evenly, and dragging is prevented.
- What happens if the quick release valve fails?
- The most typical result is that the brakes release late and the vehicle drags. This leads to overheating of the linings, drum/disc wear and increased fuel consumption. If the diaphragm tears, a continuous air leak from the exhaust and excessive running of the compressor are seen.
- There is a continuous air leak from the exhaust — should I replace the valve?
- Most likely yes, but first check when it leaks. A leak while the brake is released points to a diaphragm leak; a leak while the brake is applied points to the seating surface on the inlet side. In either case the valve should be renewed; the diaphragm cannot be reliably repaired in the field.
- Is a quick release valve the same as a relay valve?
- No. A relay valve applies the brake faster by feeding air quickly from a nearby tank and is usually four-ported. A QRV only speeds up the exhaust and is three-ported. The two are complementary but have different functions and internal designs; one cannot be fitted in place of the other.
- Can I replace the QRV myself?
- For an experienced technician it is a simple task, but because the work is on a compressed air system, the tank must be drained and the safety steps followed. If port orientation and torque values are not observed, the new valve may leak too. When in doubt, leave it to an authorized service.
- What happens if I fit the wrong quick release valve?
- Even if the port size fits, a valve with the wrong flow capacity causes uneven brake release and pulling to one side. That is why you must verify the OE part number of the valve you removed and match the equivalent exactly.
- Why must the exhaust port face down?
- Because the exhaust is open to the atmosphere, an upward-facing port takes in rain and wash water. The accumulated water damages the diaphragm and freezes in winter to lock the valve. Having the port face down or to the side lets the water drain naturally.
- How long does a quick release valve last?
- There is no specific mileage guarantee; life depends largely on air quality. A valve fed with dry, clean air lasts for many years. If there is moisture, oil and dust, the diaphragm hardens earlier. It is best to replace it at the first signs of dragging or leakage.
Related Articles
Chassis Mounting Bracket: Failure, Replacement & Care Guide
Chassis mounting bracket guide for trucks and trailers: fatigue cracks, diagnosis, step-by-step replacement, bolt torque values and maintenance tips.
Oil Spray Jet: Faults, Replacement and Maintenance Guide
Engine oil spray jet guide for trucks: how piston cooling nozzles work, clogging and low oil pressure symptoms, diagnosis, replacement steps and torque values.
Turbo Intake & Exhaust Inlet Pipe: Faults and Replacement
Turbo intake and exhaust inlet pipe faults on trucks: leak symptoms, diagnosis, step-by-step replacement, torque values and maintenance tips from VADEN.


